Crafts
I love to craft! I always seem to have something on the go, taking over the house with my bits and pieces. Having two children has been great for making them presents or things they need. My sewing machine has become my best friend (and worst enemy when it breaks).
The projects you can see here are things that I have made for friends and family, usually gifts to commemorate special occasions. This is what I call enjoyment for enjoyment's sake.
The projects you can see here are things that I have made for friends and family, usually gifts to commemorate special occasions. This is what I call enjoyment for enjoyment's sake.
Christmas Crafting with the Kids
|
|
|
|
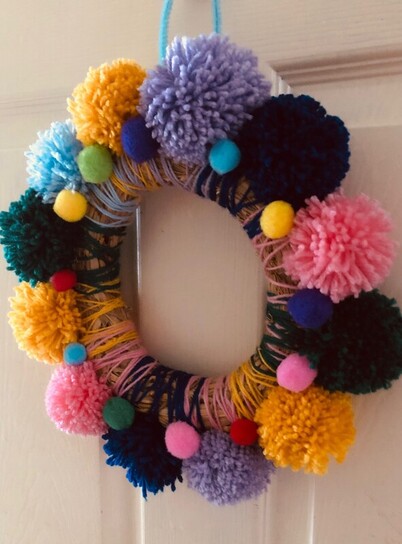
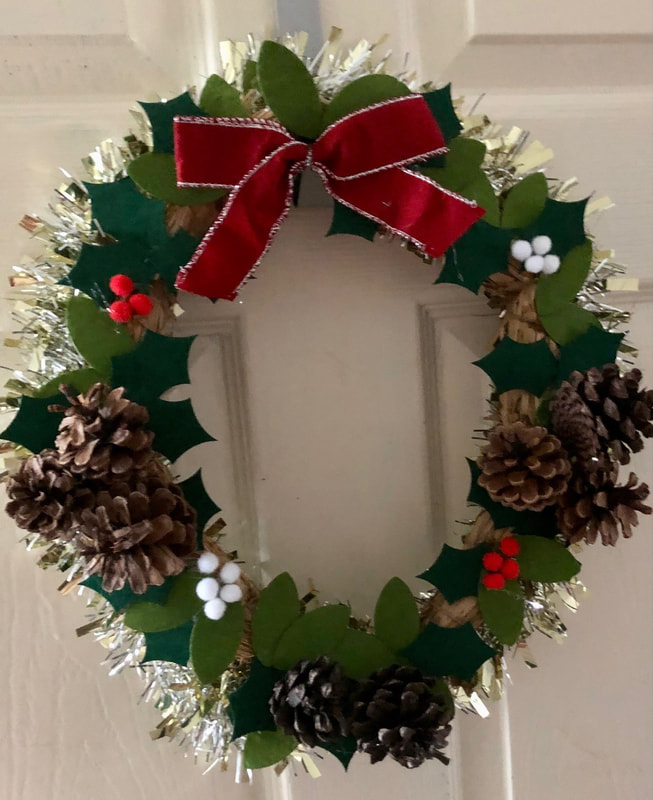
This year was a joint effort making decorations for the house. The pom pom and the holly wreaths were made from last year's old wreaths (which was packed away in the attic by mistake). Dry and tatty, I stripped off the dead leaves and saved some of the more permanent decorations to use again. The children made pom poms while watching telly, which was very wholesome. Even Daddy contributed. The wool was on sale for 20p a ball at Shaws, in Fishponds, and the felt mistletoe and holly leaves and tiny berries were £1 picked up on my rounds around the shops. Everything else was scrobbled from the old wreaths. Thank god for glue guns!
Cottage Core Mirror
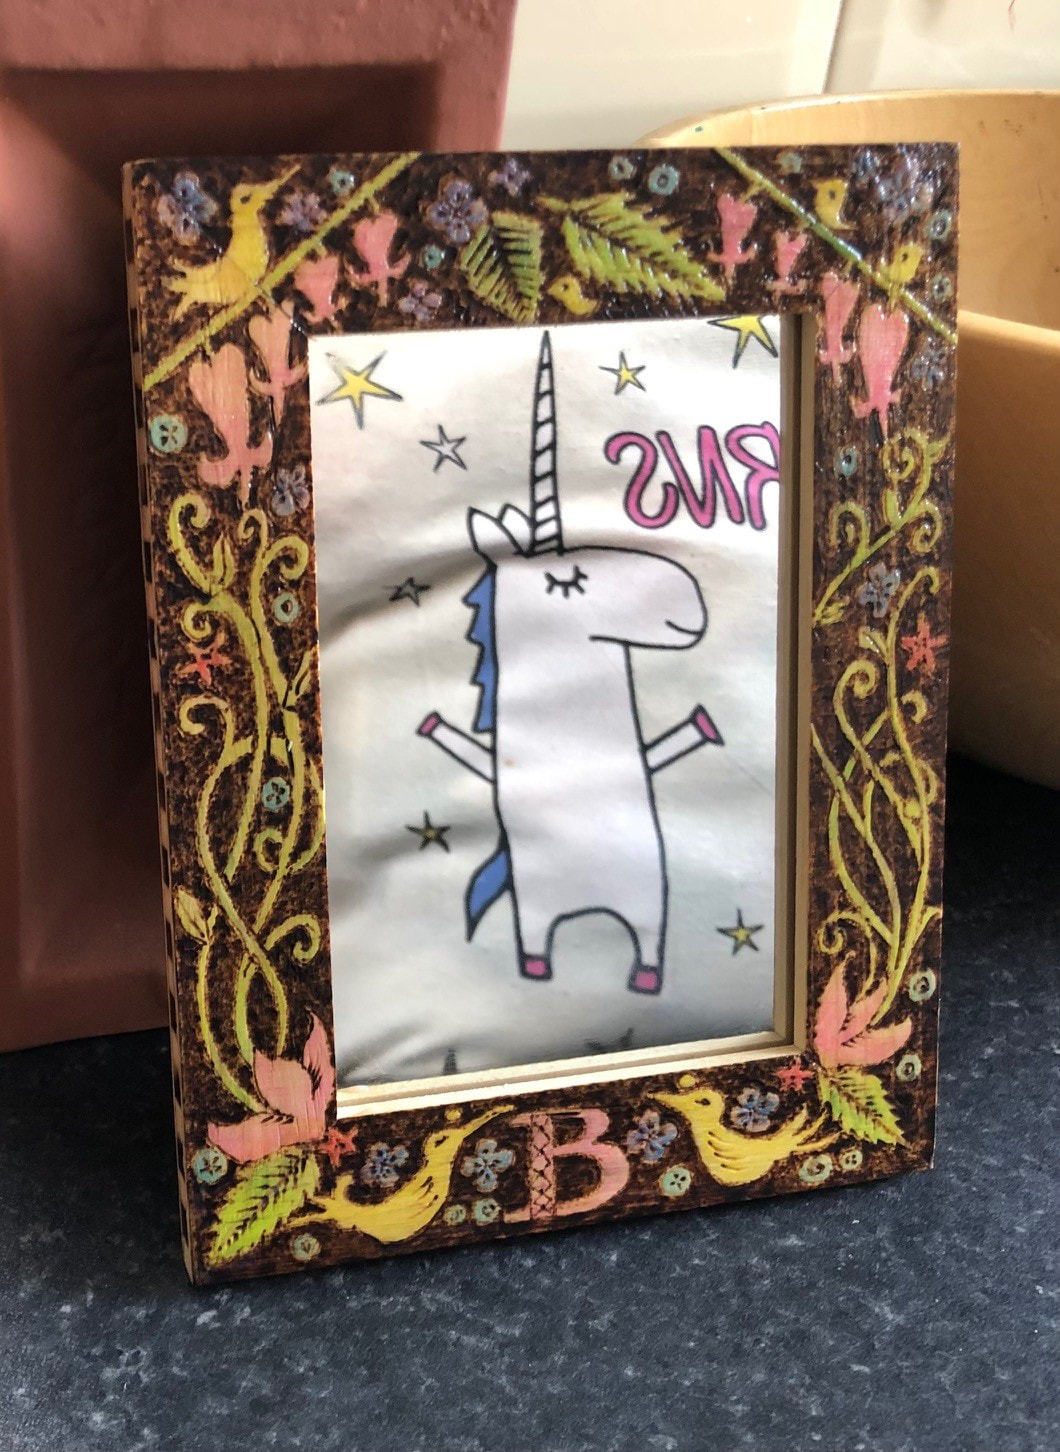
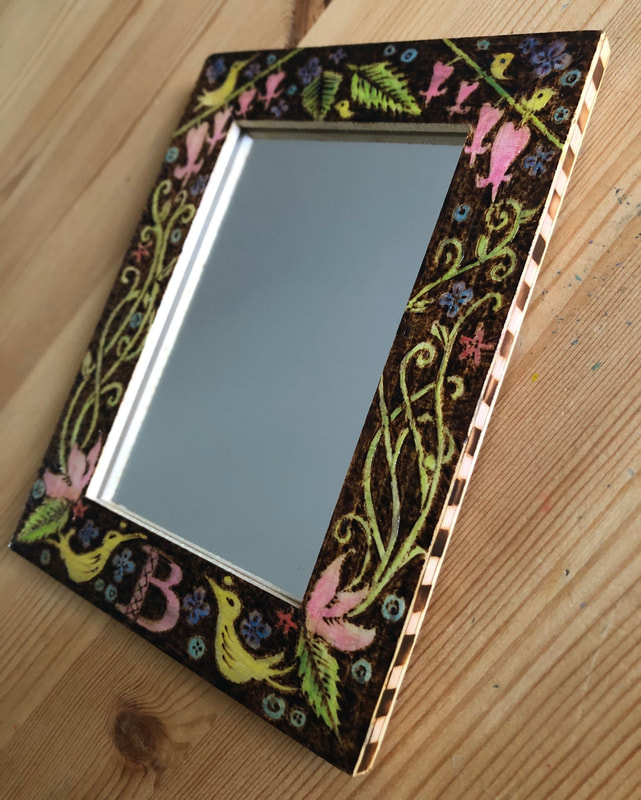
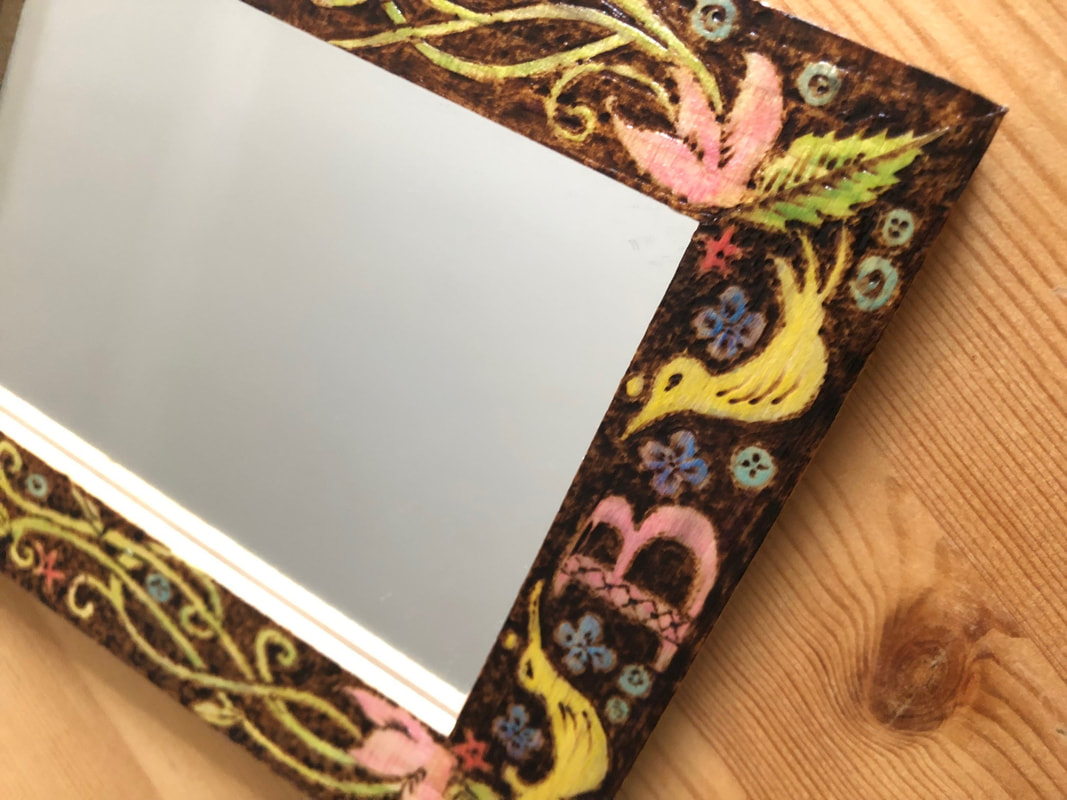
It's very 'in' isn't it, Cottage Core? I love a bit of Norwegian wood.
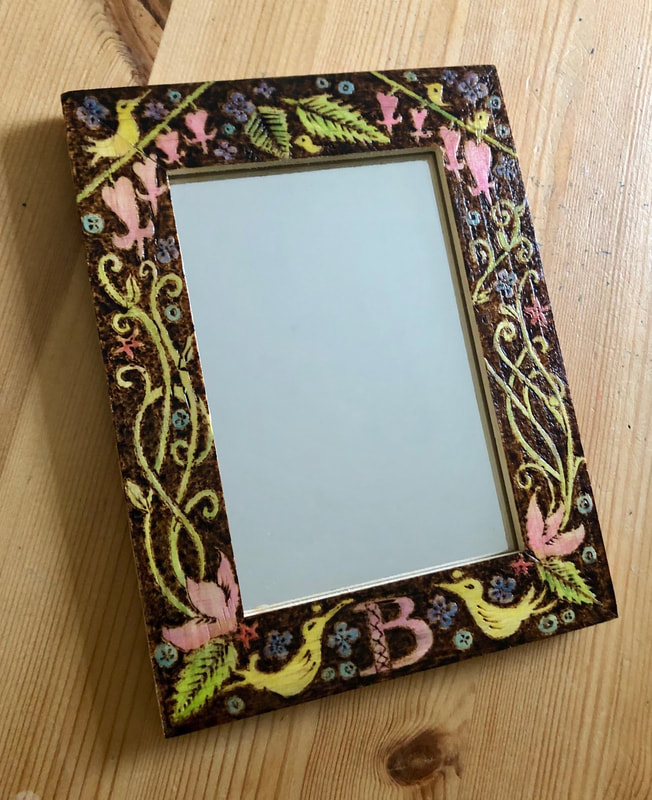
My niece's birthday is coming up, so I thought a keepsake mirror would be just right for a girlie six-year-old. Oh, she won't care too much about it now, but when she's older she won't be playing with her dollies and have this to peer in to instead. I bought the mirror from Hobbycraft for £4 and used my wood burning kit to draw out a design (check out Pinterest for some great ideas to get your design started). It took an evening to fill it - there's no rushing wood burning. I personalised the mirror with her initial to make it Her's alone. I coloured it in with water painting pencils - a very quick wash of water will help fix it. To finish, I painted a glaze over the top and, of course, a wood burned note to the special birthday girl on the back from Aunty Heidi x
My niece's birthday is coming up, so I thought a keepsake mirror would be just right for a girlie six-year-old. Oh, she won't care too much about it now, but when she's older she won't be playing with her dollies and have this to peer in to instead. I bought the mirror from Hobbycraft for £4 and used my wood burning kit to draw out a design (check out Pinterest for some great ideas to get your design started). It took an evening to fill it - there's no rushing wood burning. I personalised the mirror with her initial to make it Her's alone. I coloured it in with water painting pencils - a very quick wash of water will help fix it. To finish, I painted a glaze over the top and, of course, a wood burned note to the special birthday girl on the back from Aunty Heidi x
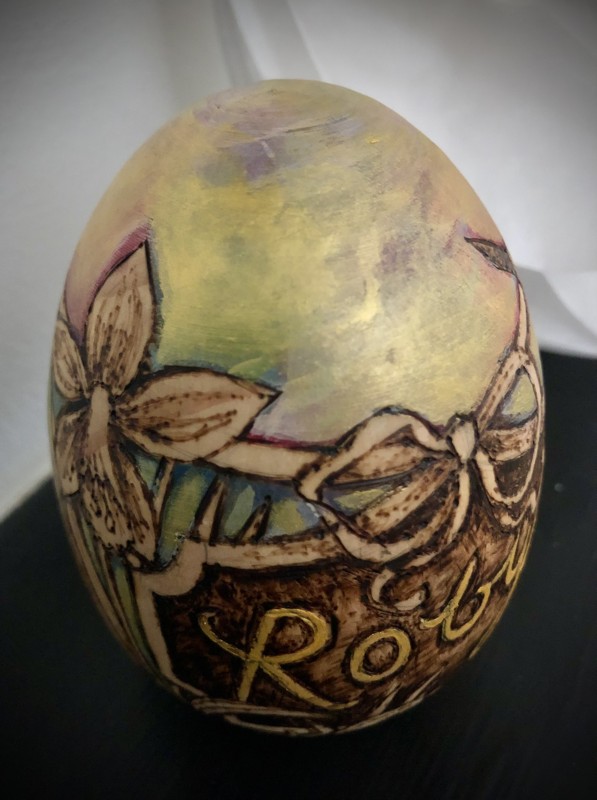
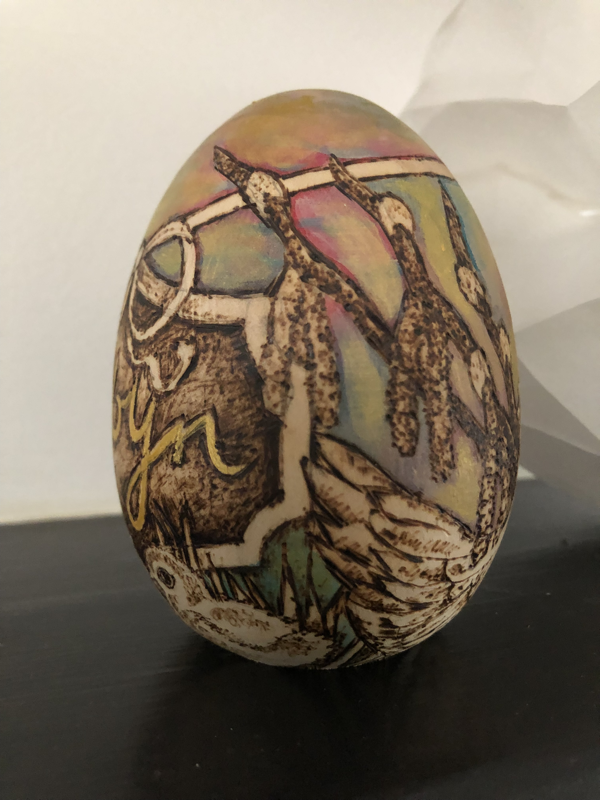
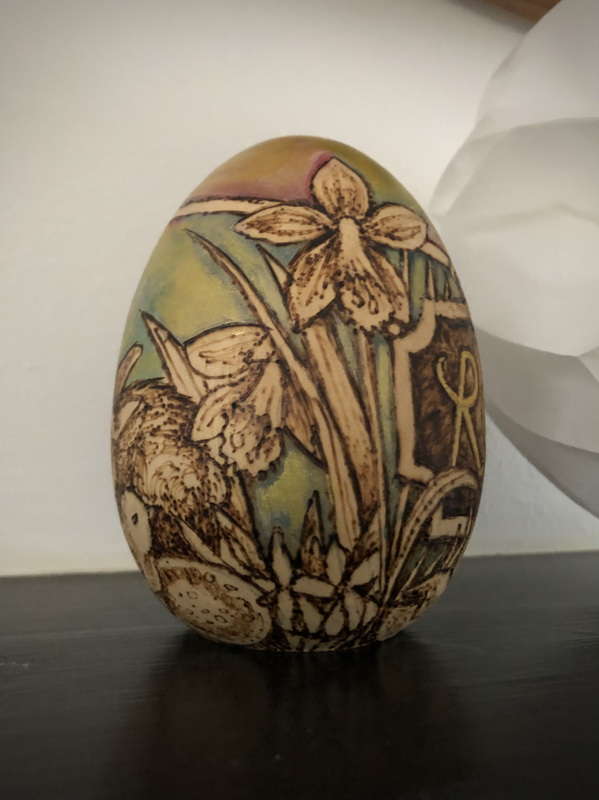
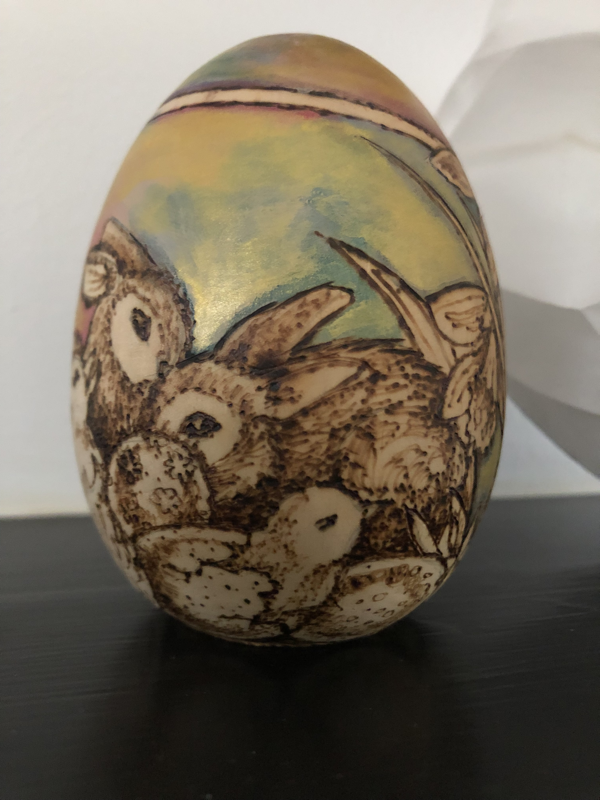
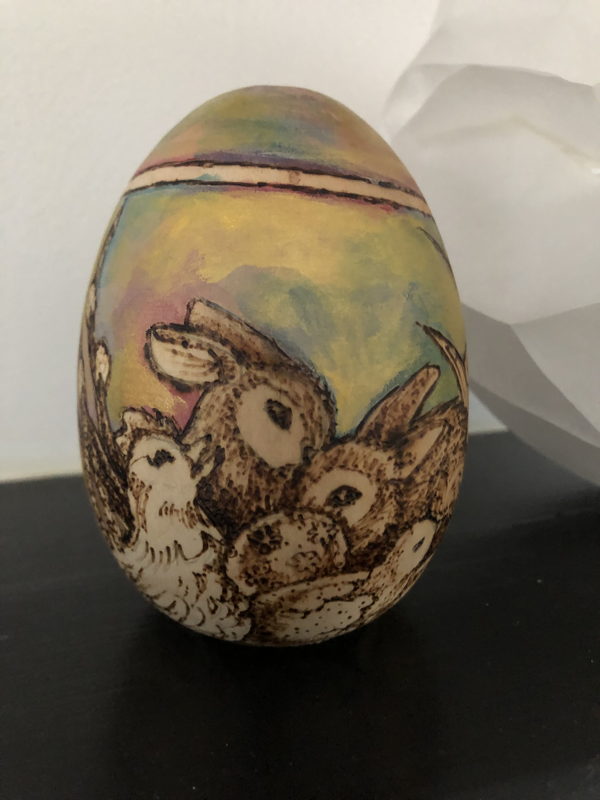
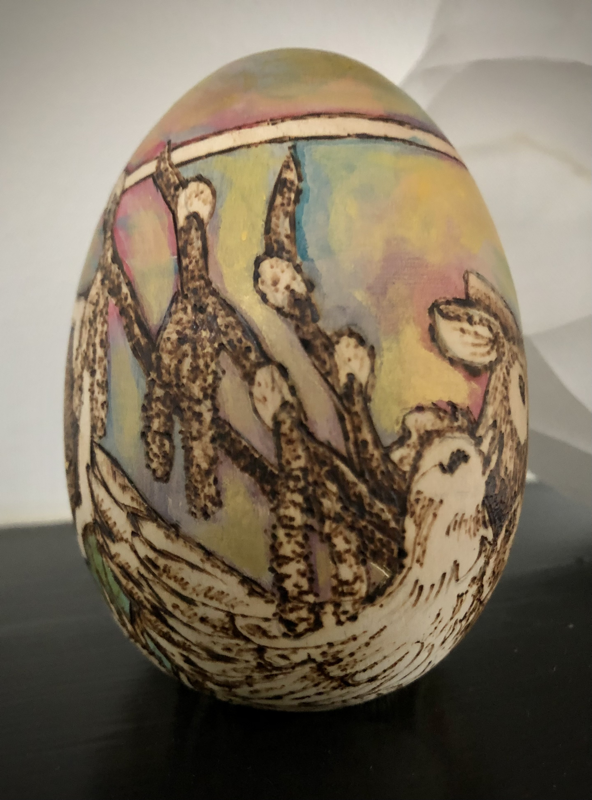
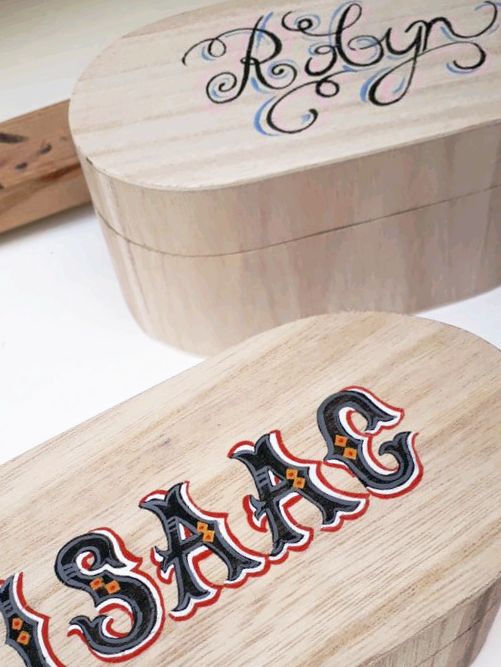
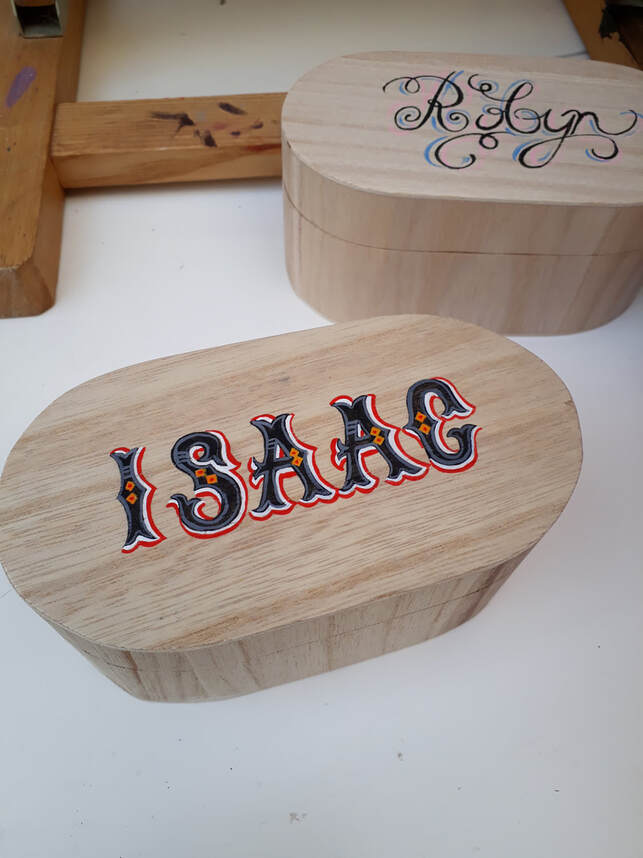
Wooden Eggs
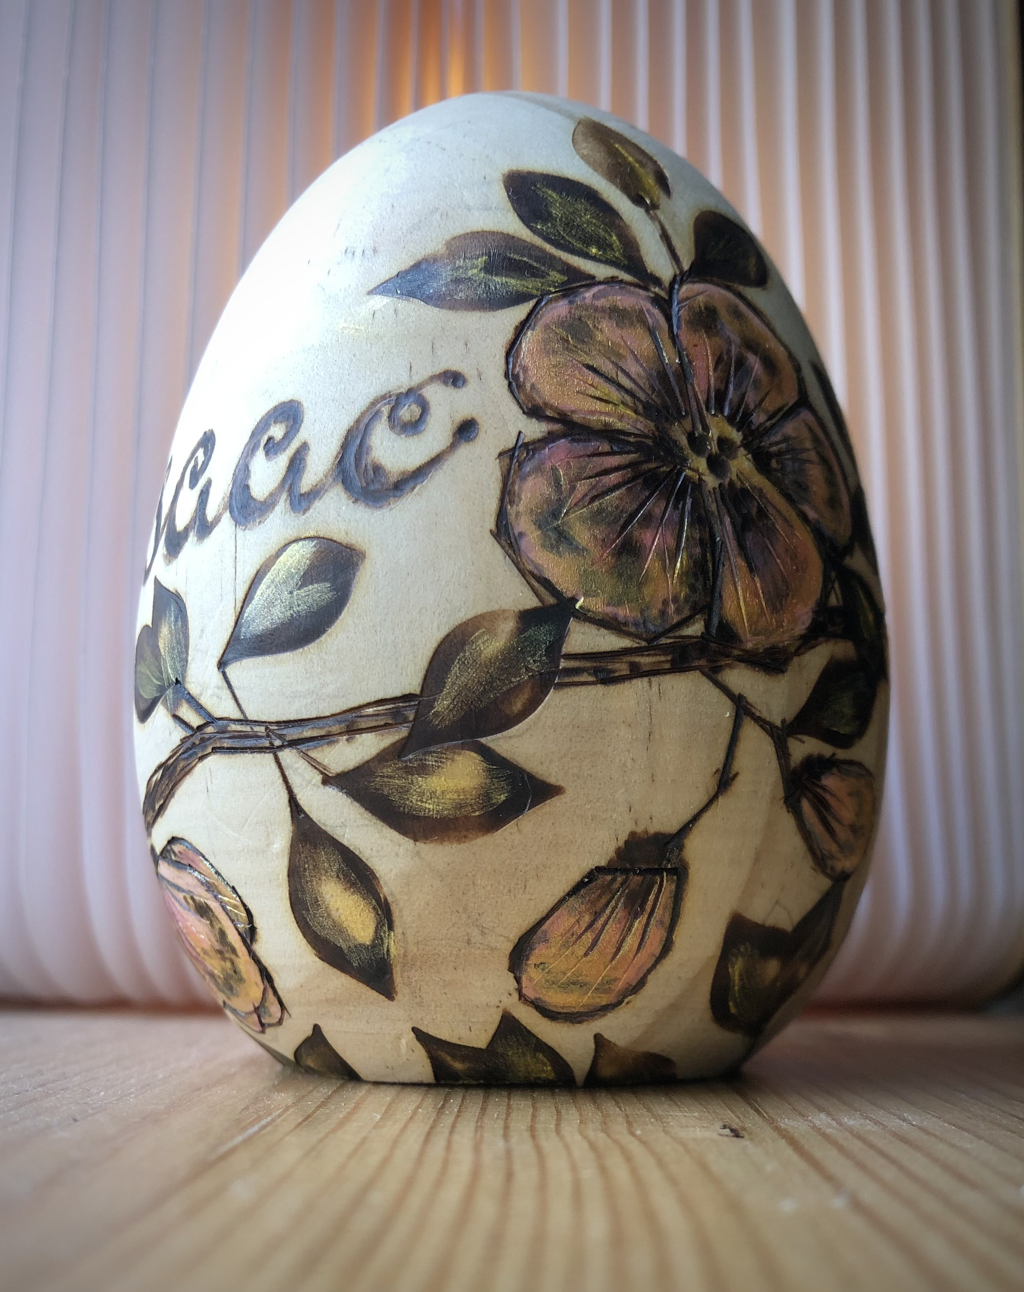
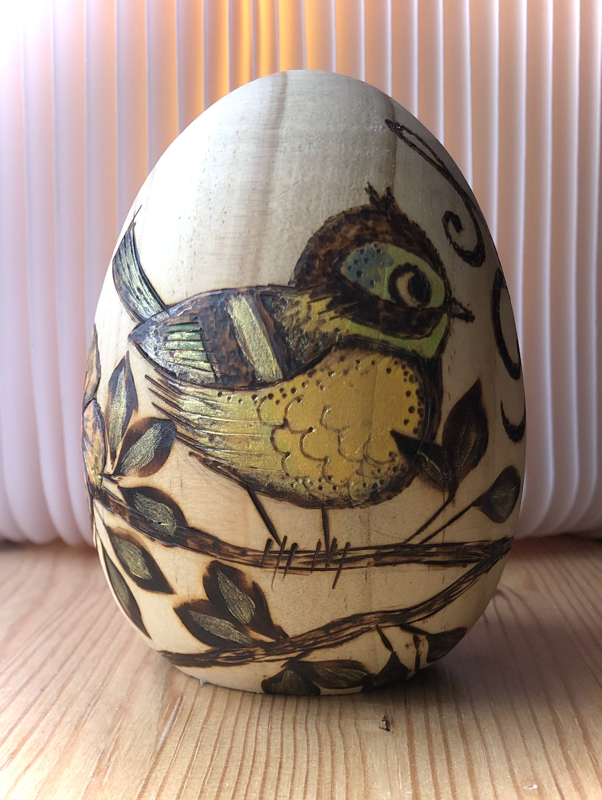
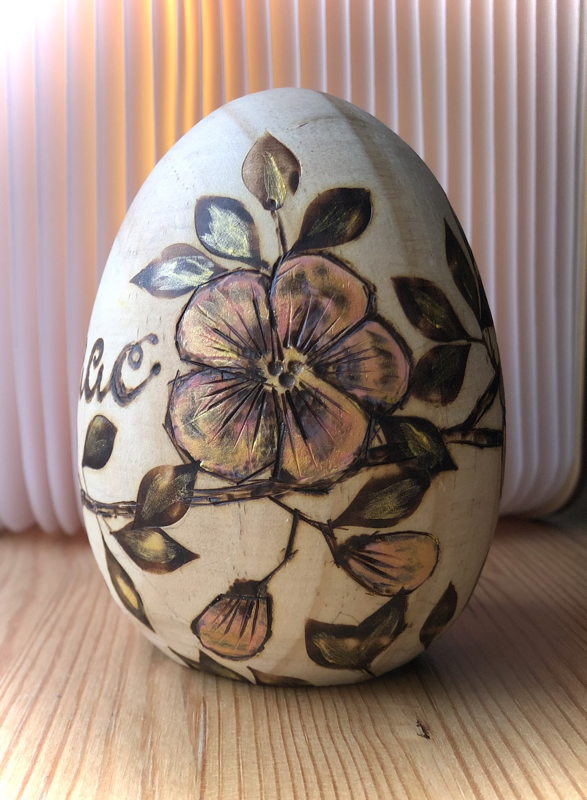
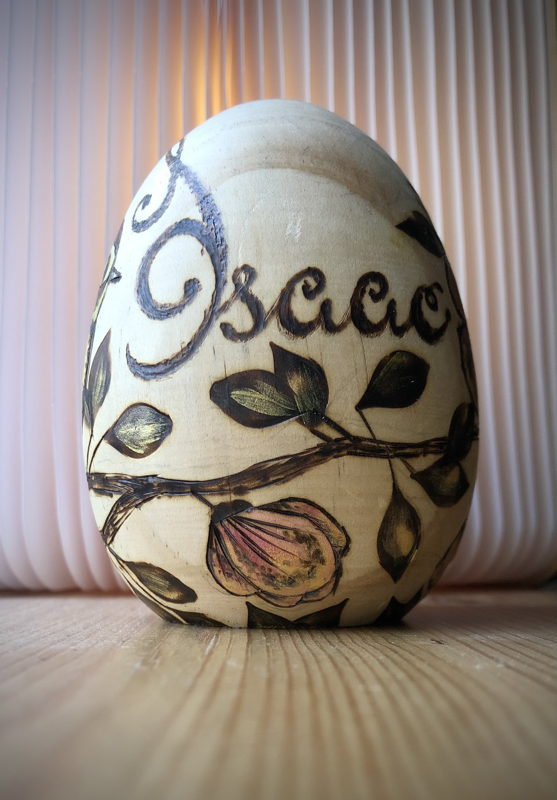
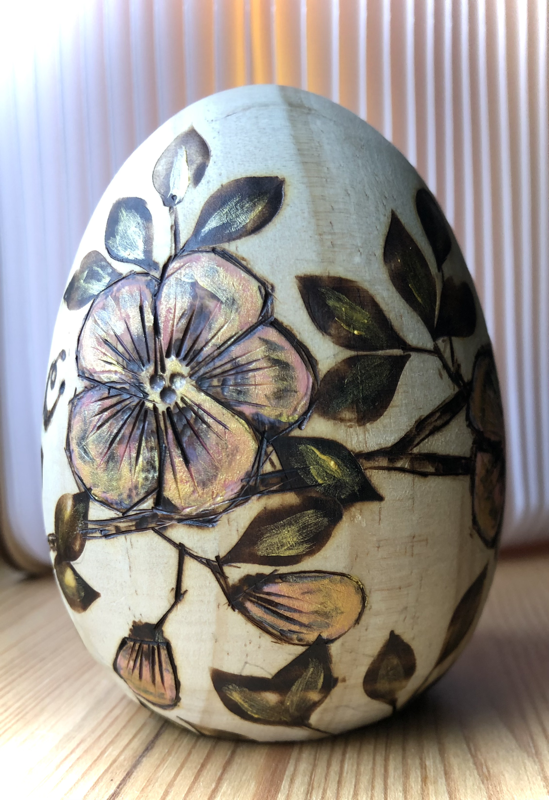
Easter comes around so soon.. another chance to get crafty for my children! I thought they would like something tactile and beautiful made by their Mummy, so they don’t forget me when I’m dead. I’m not planning on going anywhere soon, so in the meantime they can chuck them around like they do everything else they own. Why bother other than posterity!
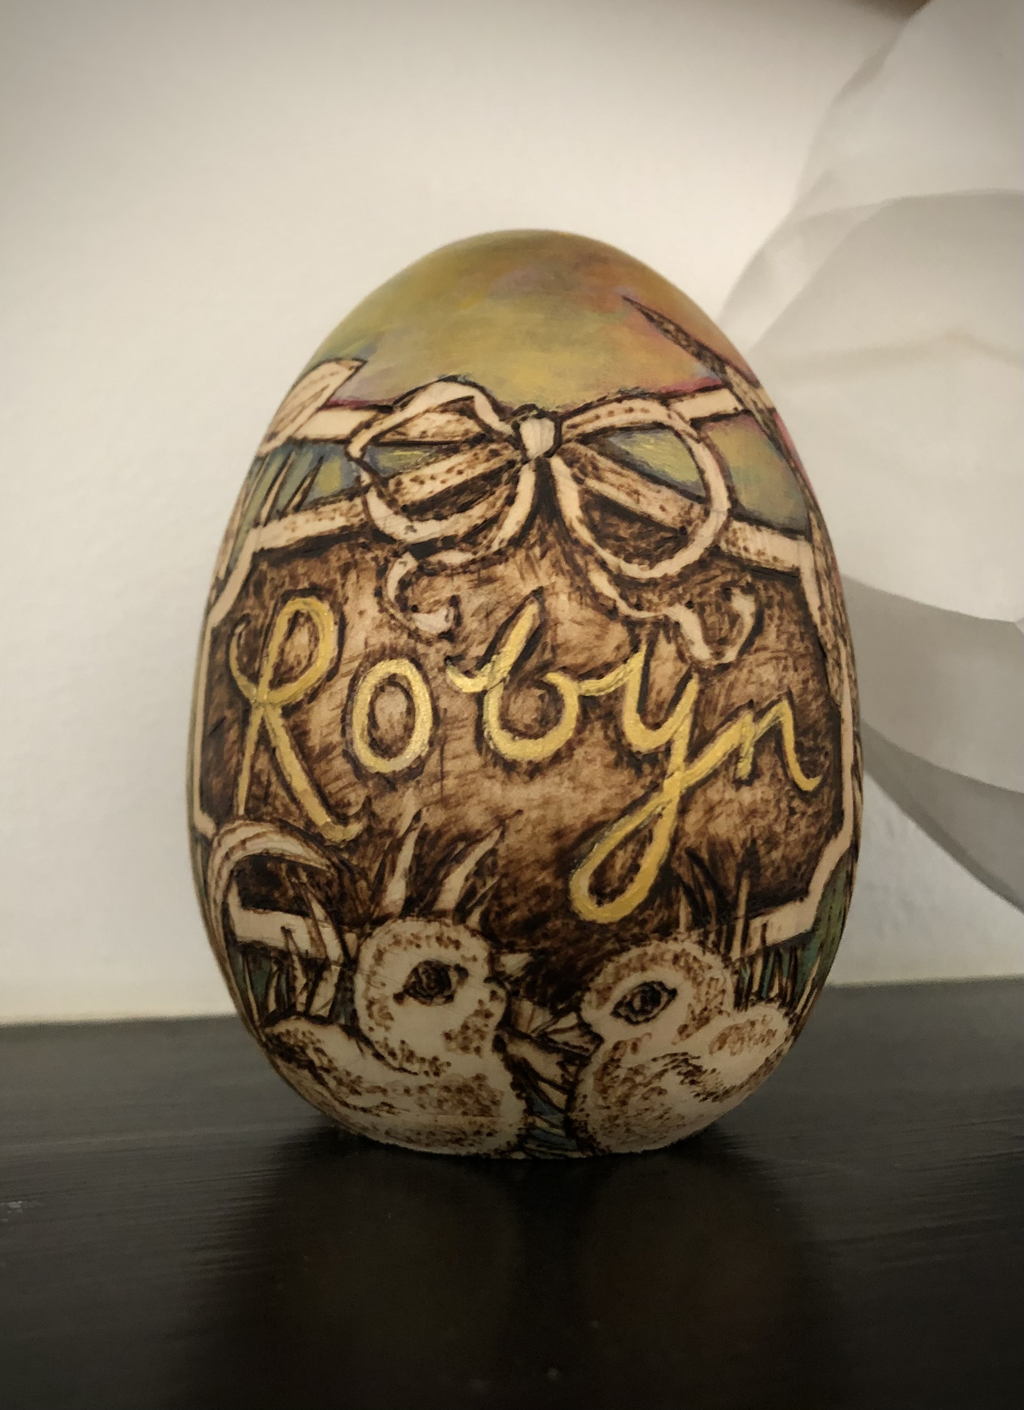
The wooden eggs were purchased from Hobbycraft for £3 each. I got to use my wood burning kit (which I adore) and coloured sections in using plain old watered down acrylic paint. To make the pearlescent effect, I used bronze acrylic, which I painted on and rubbed in with my finger, as I didn’t want any brush strokes on Robyn’s egg. For Isaac’s egg, I painted clear strokes quickly to highlight the elements I wanted.
Once in a Blue Moon..
Ah, weddings. I love a good wedding. This time my sister is marrying her beau in beautiful Shropshire, and I am honoured to be her bridesmaid. Now, this was going to be a tough gig, as she’s quite the crafter and her husband-to-be happens to be my favourite sculptor. I sound biased, but check out his mind-blowing (and V&A prize winning!) creations georgetriggs.co.uk and he will quickly become yours too!
Pressure or what?!
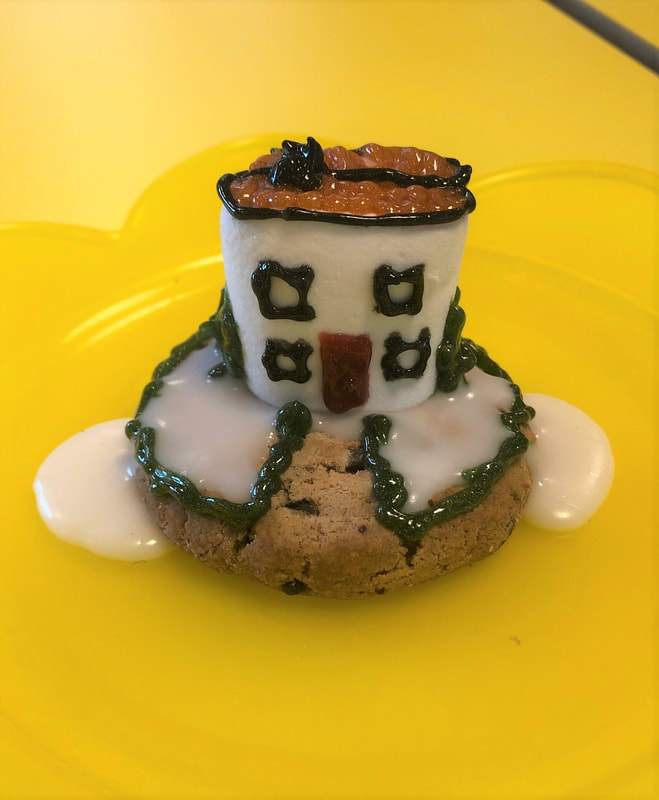
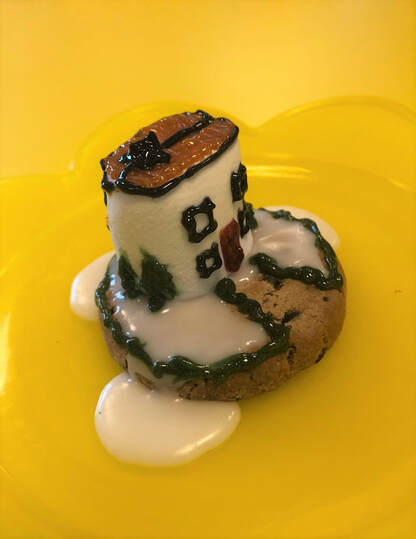
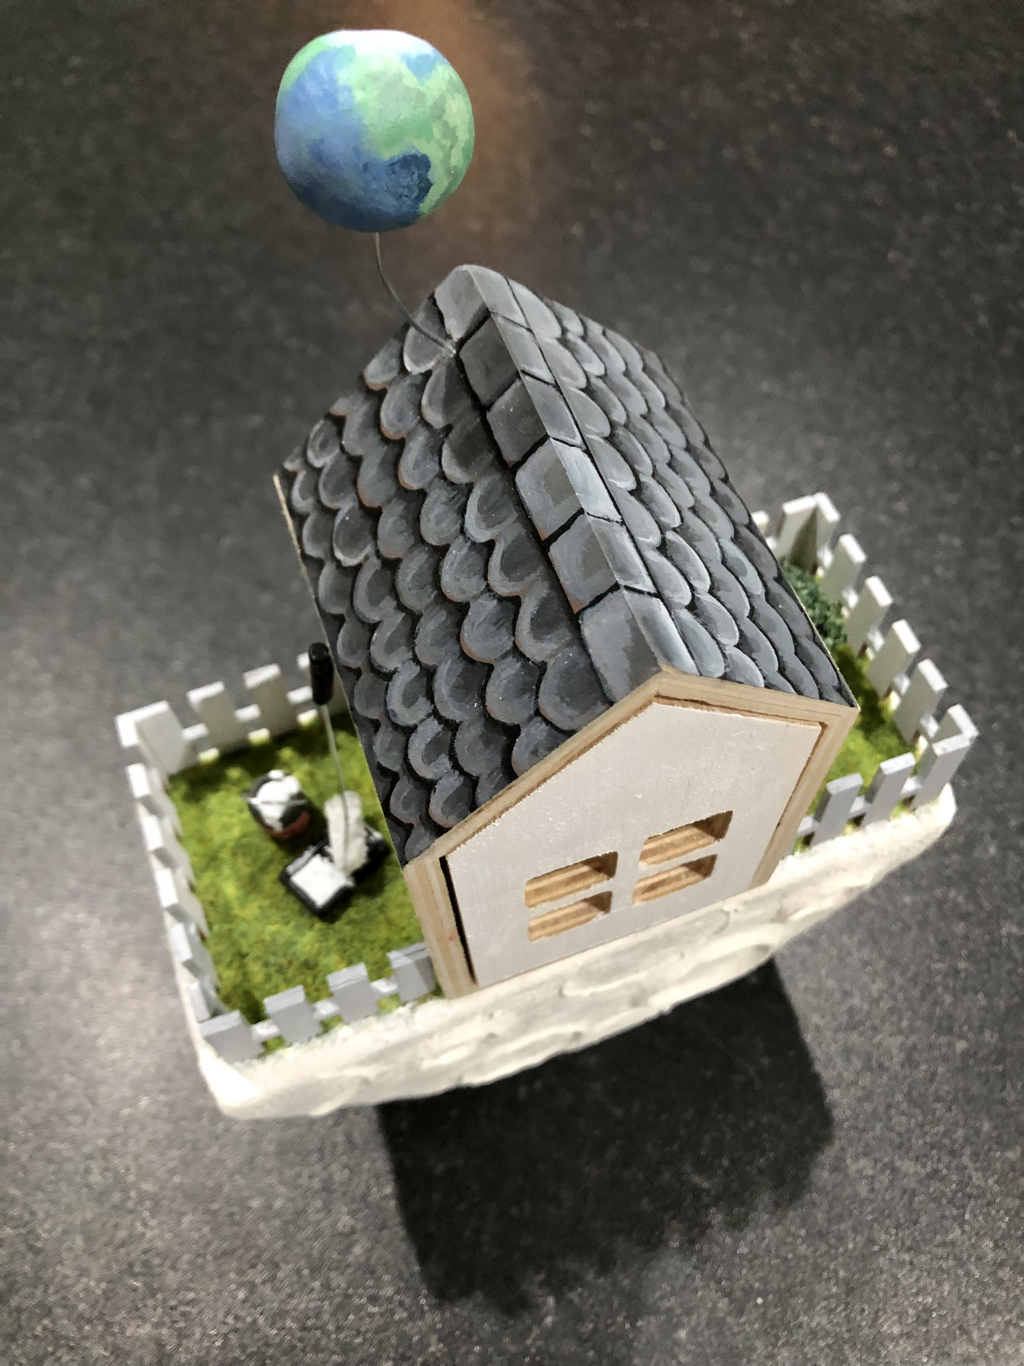
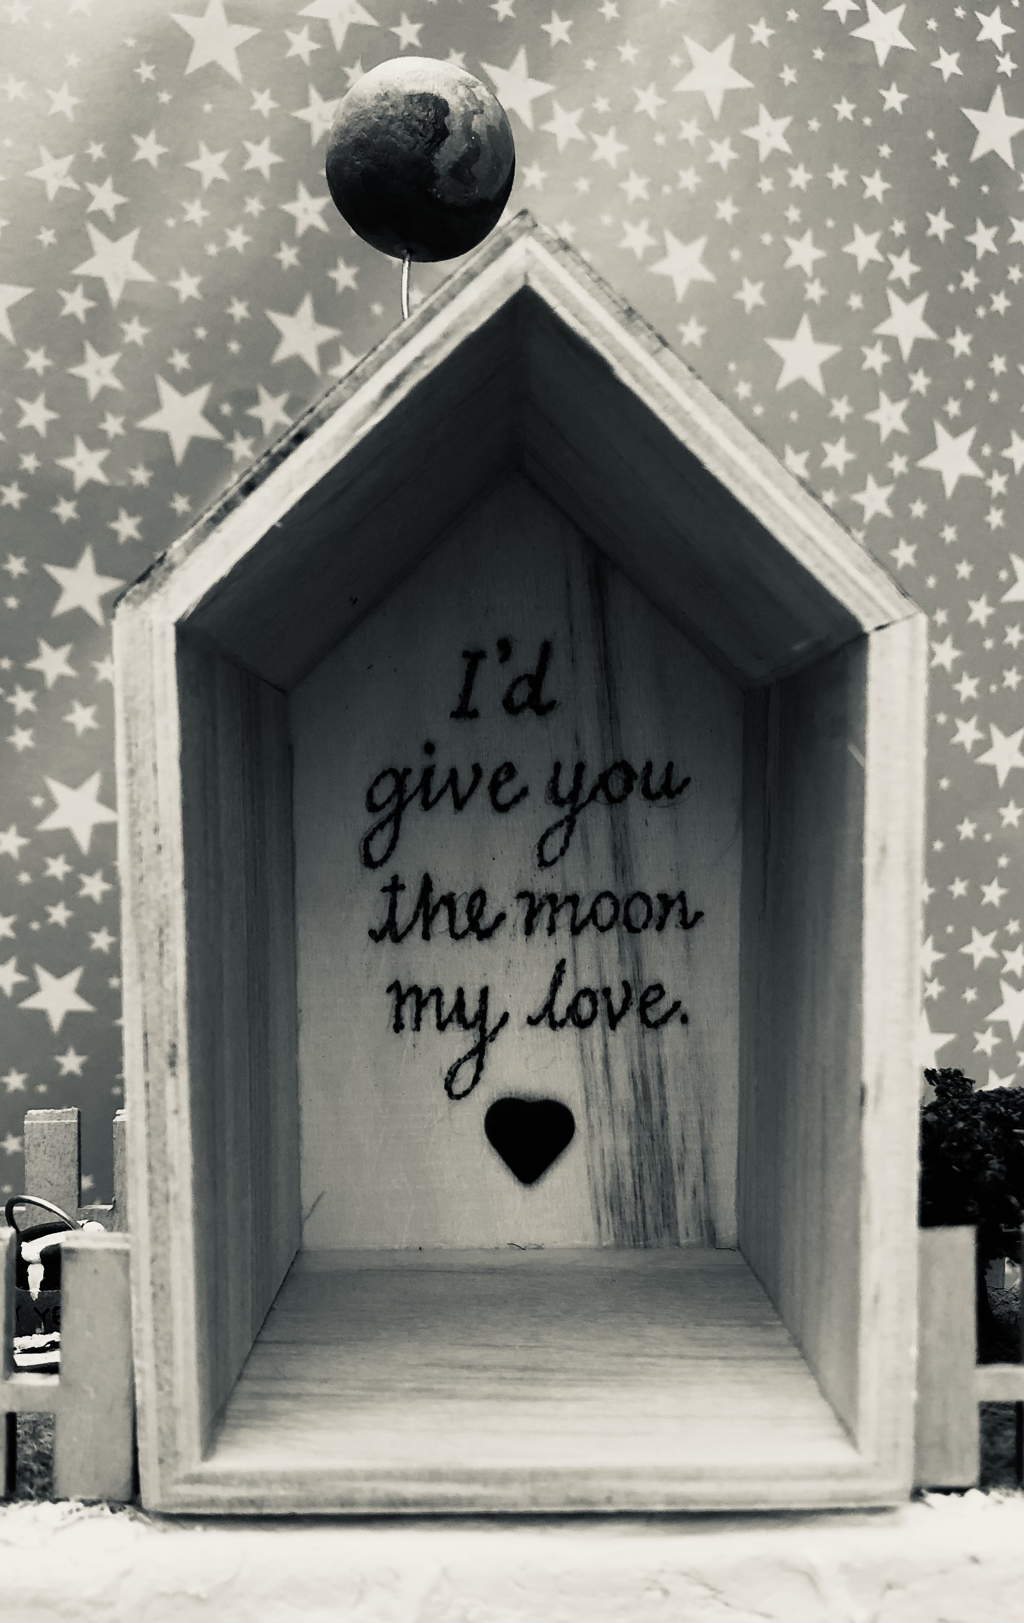
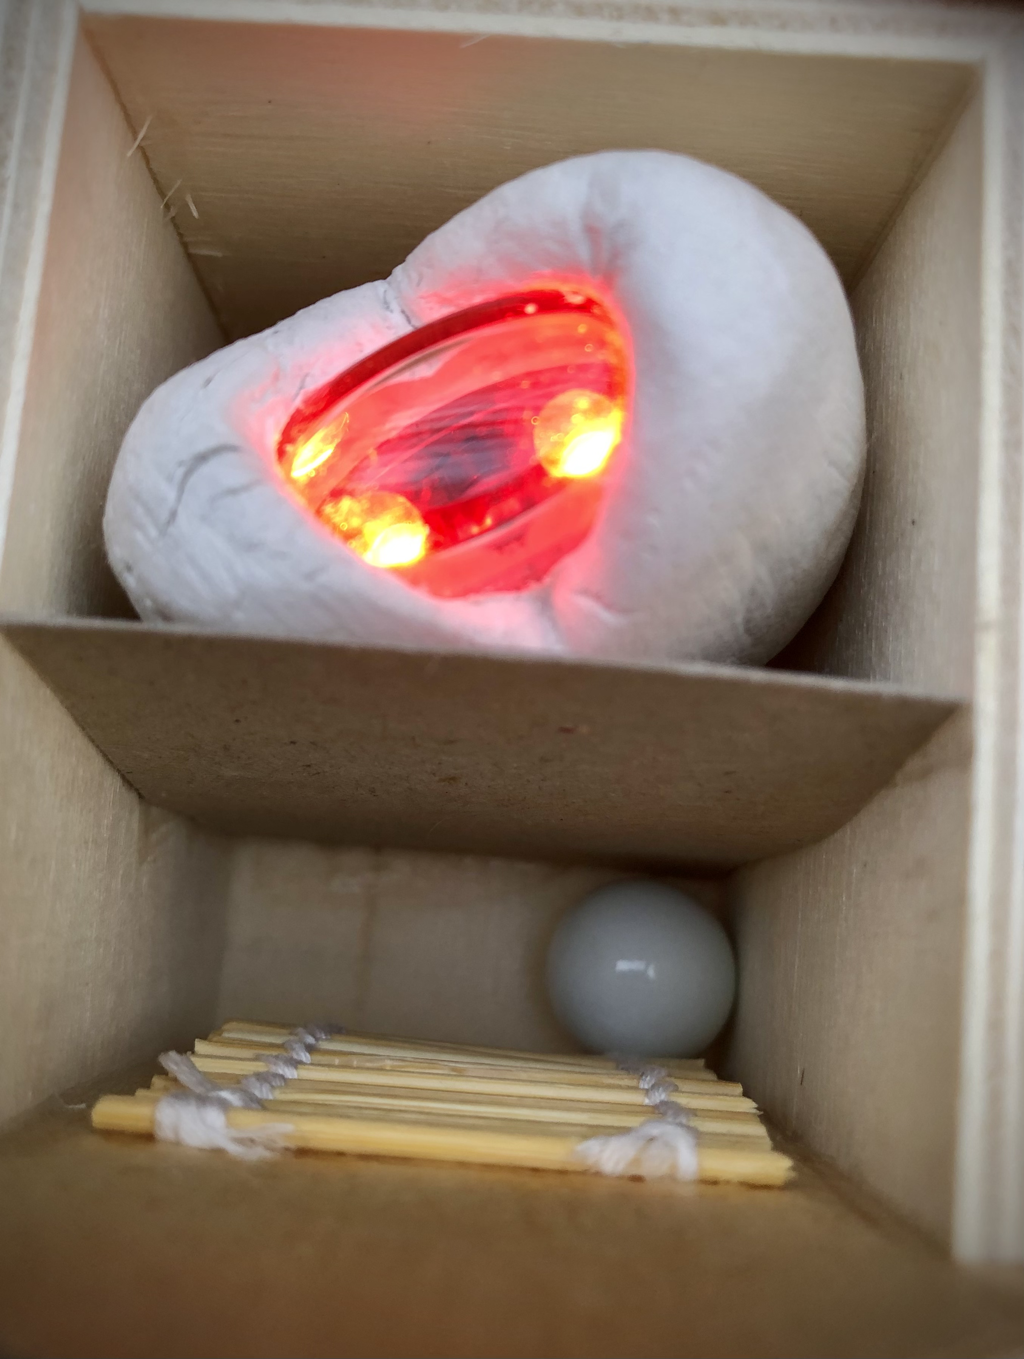
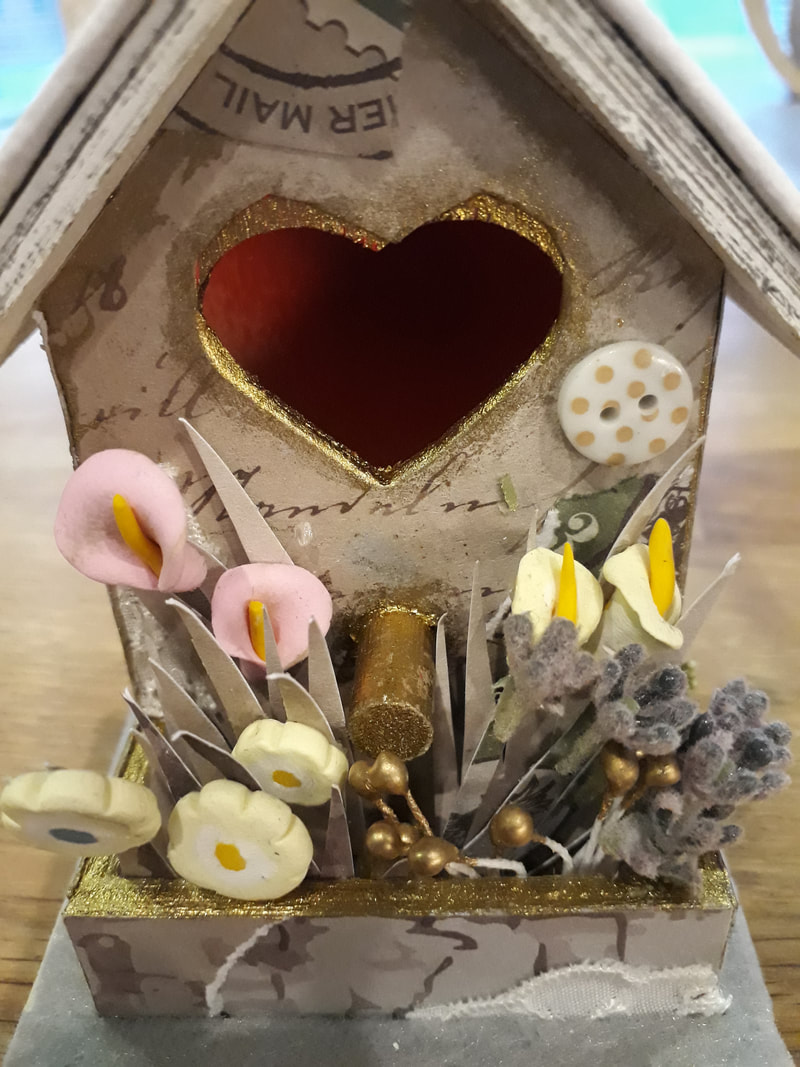
So, I thought I would make a small world, which ‘Gough girls’ are rather fond of, with a sculptural angle, which I felt reflected the groom’s interests. The result was a moon where two lovers live, interactive, with a beating heart and a glowing red interior to reflect the safety of being together in their own little world. Do I over-egg the pud or what?! Sorry, no apologies..
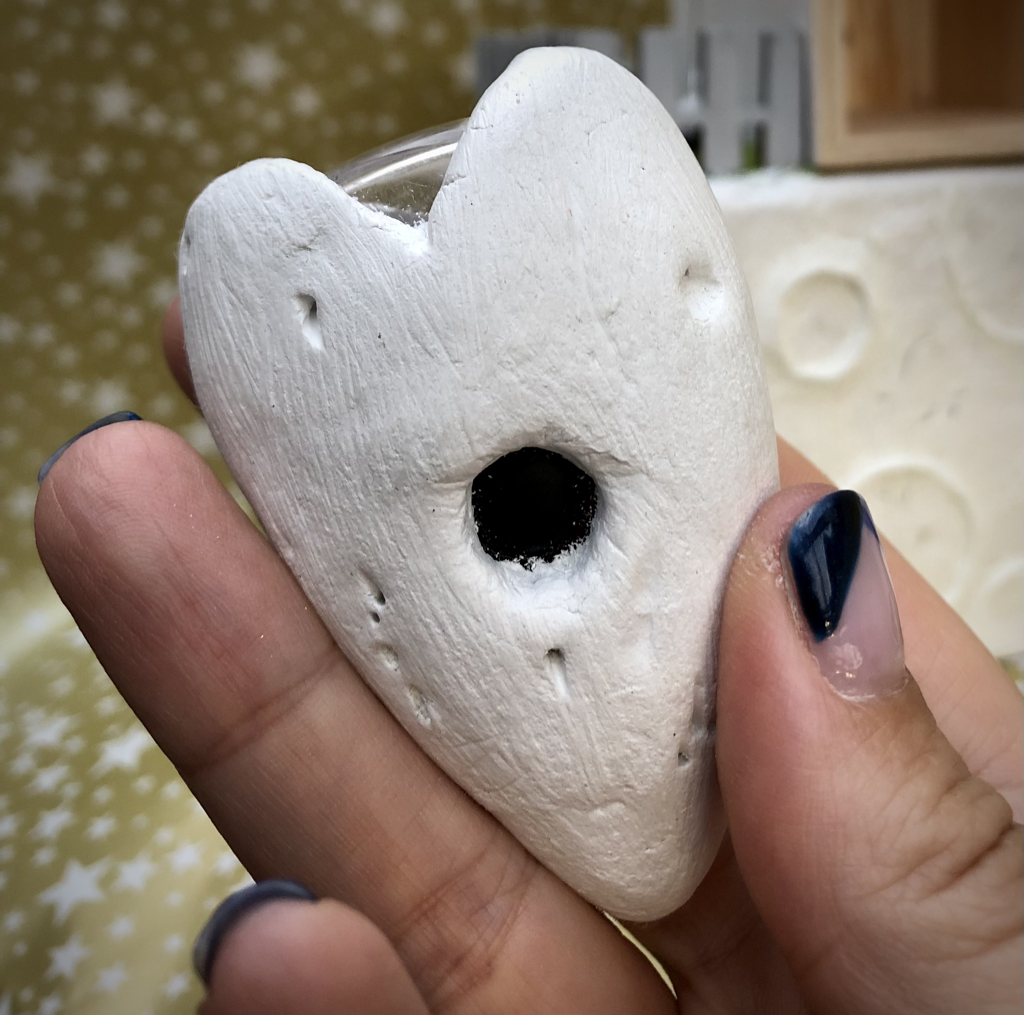
The moon can be set in motion. There is a marble inside which knocks each side of the wooden house (Hobbycraft for a couple of quid), which represents a beating heart. Aw, dreamy! I used a bicycle rear light for this (not so dreamy..), which I moulded air-drying clay around and fashioned it to look like a ‘moon rock’ - one of those rocks that looks a bit like a heart, if you are lucky enough to find one on a Cornwall beach. Of course, I had to leave room for them to push the button or that would be rubbish!
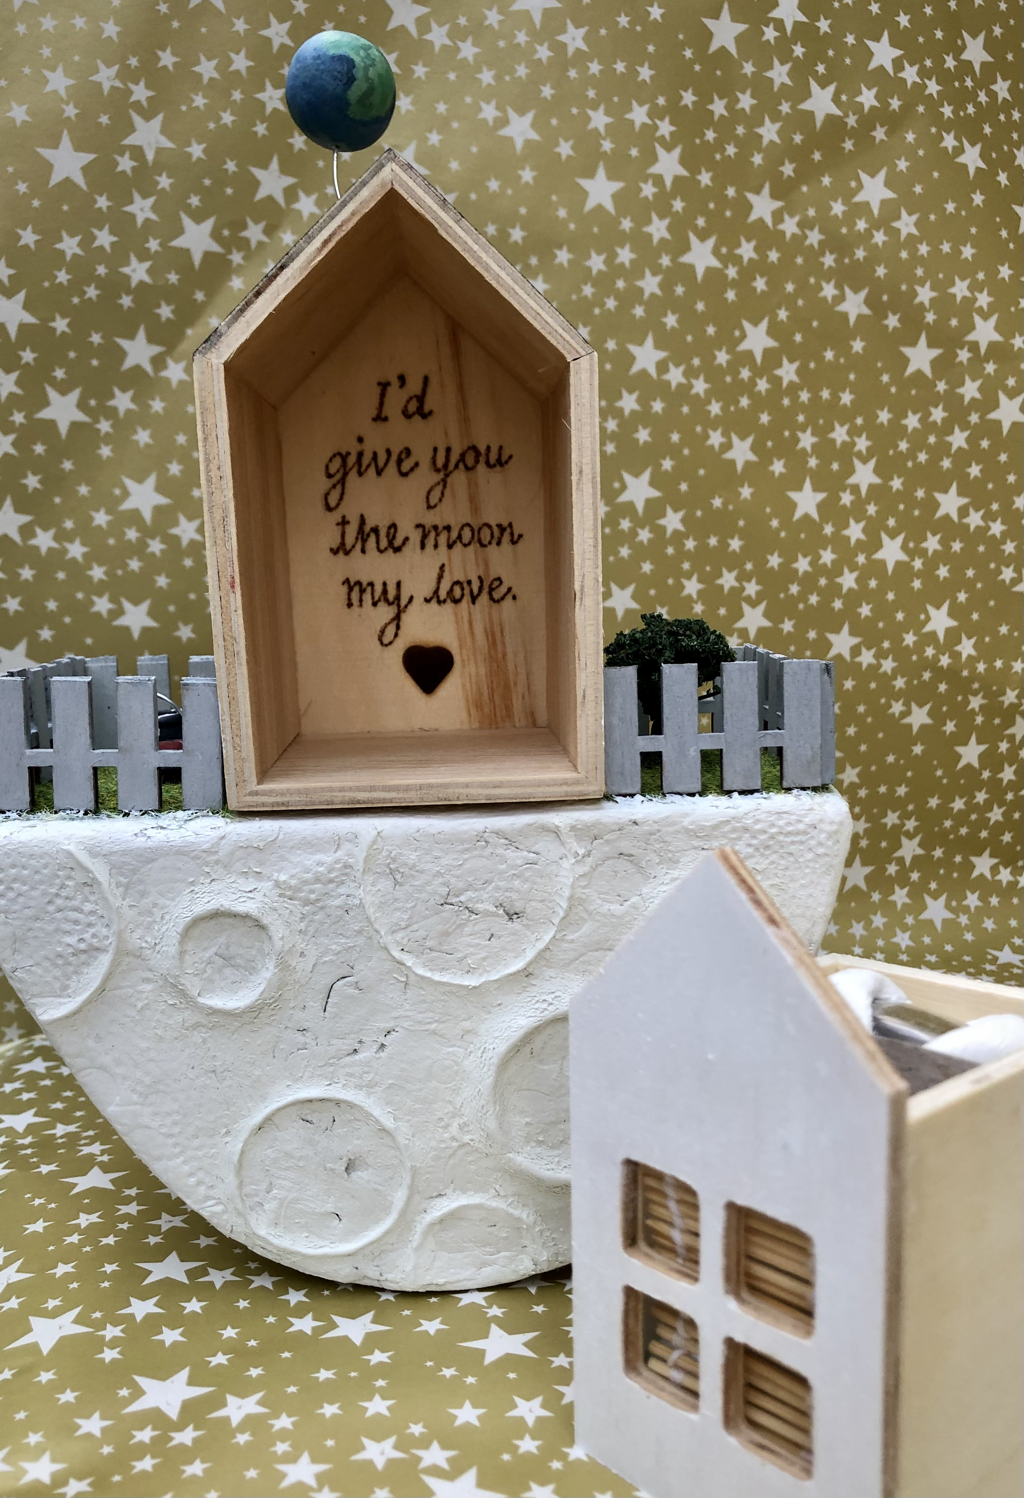
The base was also made of air drying clay, as I needed something heavy enough to be able to be rocked. It worked a treat, although it took ages to dry as it was so big.
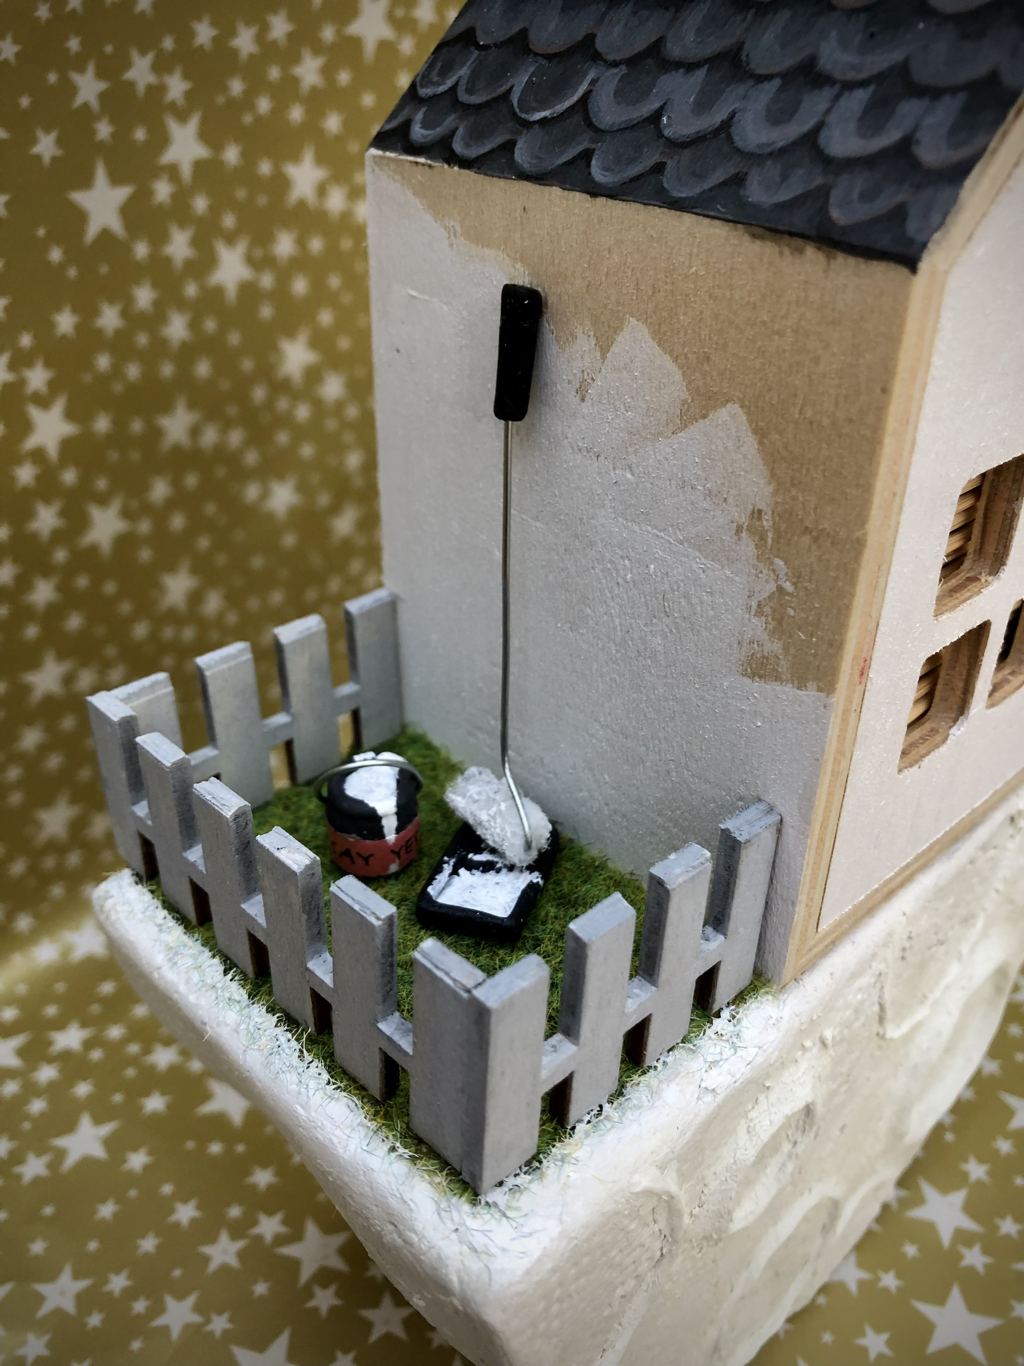
I bought the picket fence from The Works, £2, and the grass powder from anticsonline.uk in Bristol. I thought I would make it look like the exterior of the house was caught mid-white wash, so made a little bucket, paint tray and roller from Fimo and wire.
Finally, an earth poised on the sky and a poem inside, I’d give you the moon, my love., would tie the whole idea together.
I hope my creation puts a smile on their faces, even if it ends up being used as a door stop! (It would make a bloody good one ;)
Pressure or what?!
So, I thought I would make a small world, which ‘Gough girls’ are rather fond of, with a sculptural angle, which I felt reflected the groom’s interests. The result was a moon where two lovers live, interactive, with a beating heart and a glowing red interior to reflect the safety of being together in their own little world. Do I over-egg the pud or what?! Sorry, no apologies..
The moon can be set in motion. There is a marble inside which knocks each side of the wooden house (Hobbycraft for a couple of quid), which represents a beating heart. Aw, dreamy! I used a bicycle rear light for this (not so dreamy..), which I moulded air-drying clay around and fashioned it to look like a ‘moon rock’ - one of those rocks that looks a bit like a heart, if you are lucky enough to find one on a Cornwall beach. Of course, I had to leave room for them to push the button or that would be rubbish!
The base was also made of air drying clay, as I needed something heavy enough to be able to be rocked. It worked a treat, although it took ages to dry as it was so big.
I bought the picket fence from The Works, £2, and the grass powder from anticsonline.uk in Bristol. I thought I would make it look like the exterior of the house was caught mid-white wash, so made a little bucket, paint tray and roller from Fimo and wire.
Finally, an earth poised on the sky and a poem inside, I’d give you the moon, my love., would tie the whole idea together.
I hope my creation puts a smile on their faces, even if it ends up being used as a door stop! (It would make a bloody good one ;)

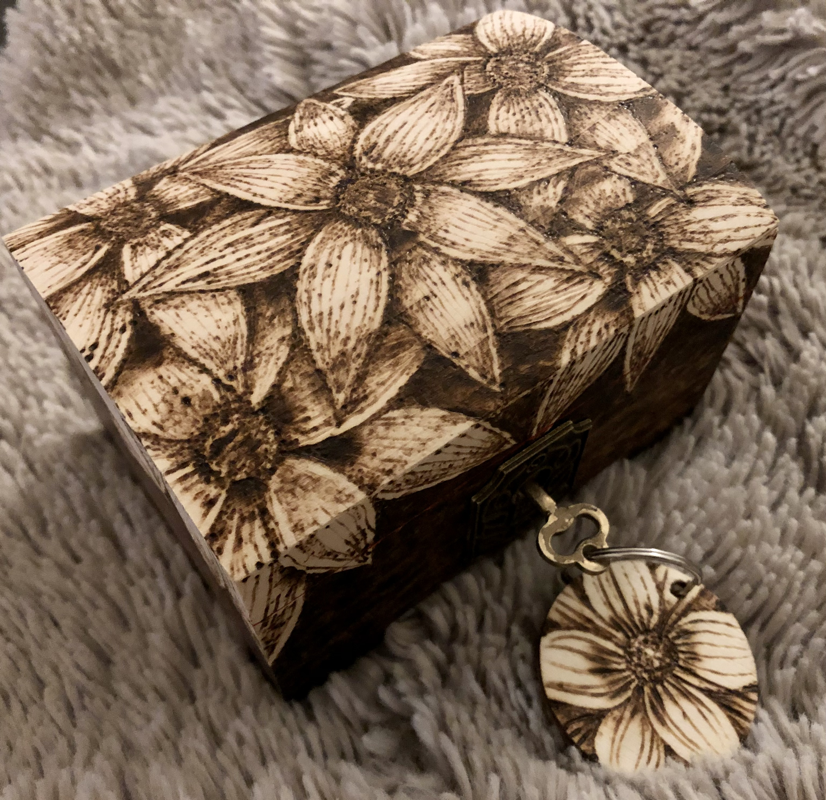
Valentine’s Day Treasure Hunt Box
My poor husband, yet another DIY gift that he doesn’t know what to do with.
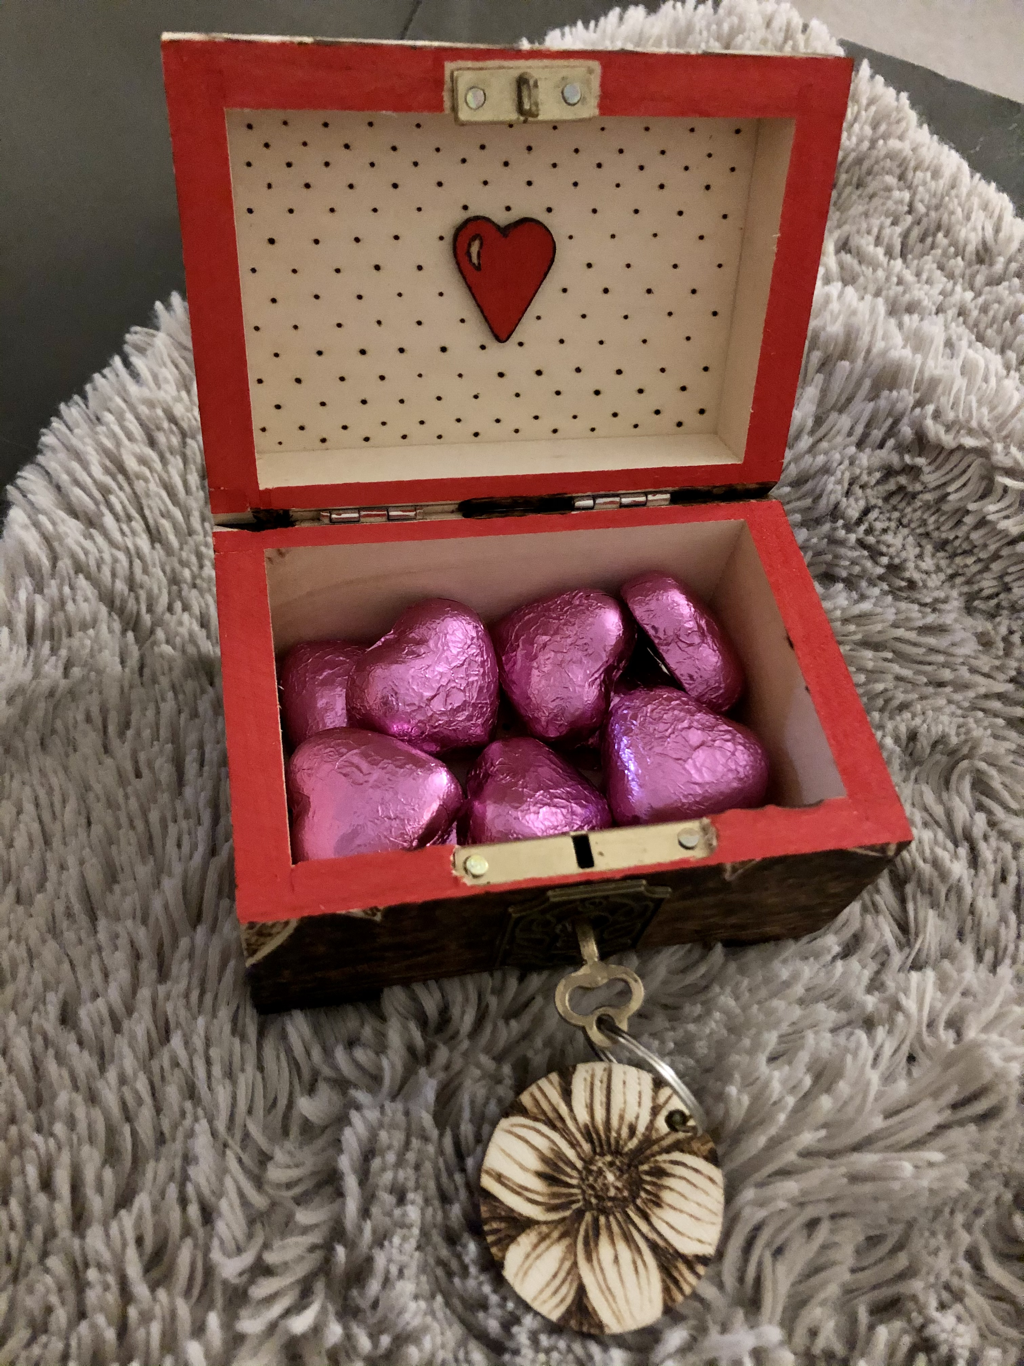
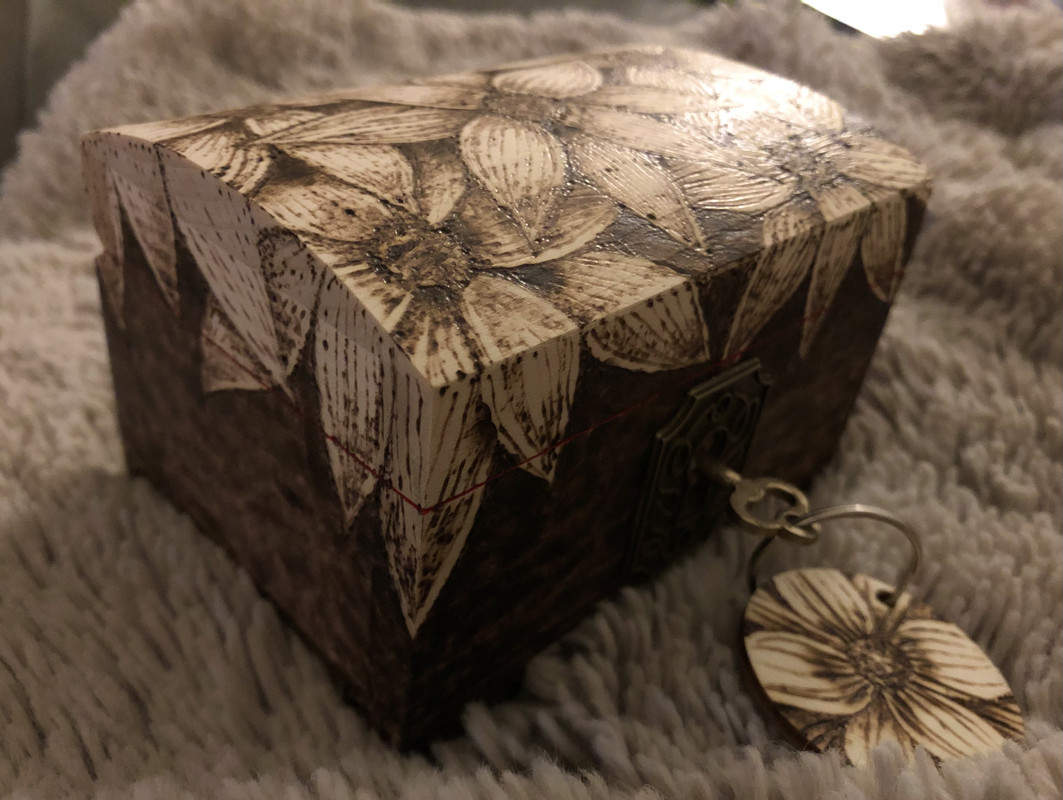
I devised a little treasure hunt for him on Valentine’s Day, and the final gift he had to find was a photo of our lovely family (eating chips, as you do). The box was cheap as chips too (boom, boom) - an Ebay acquisition for £2.50, with free postage. Whoop!
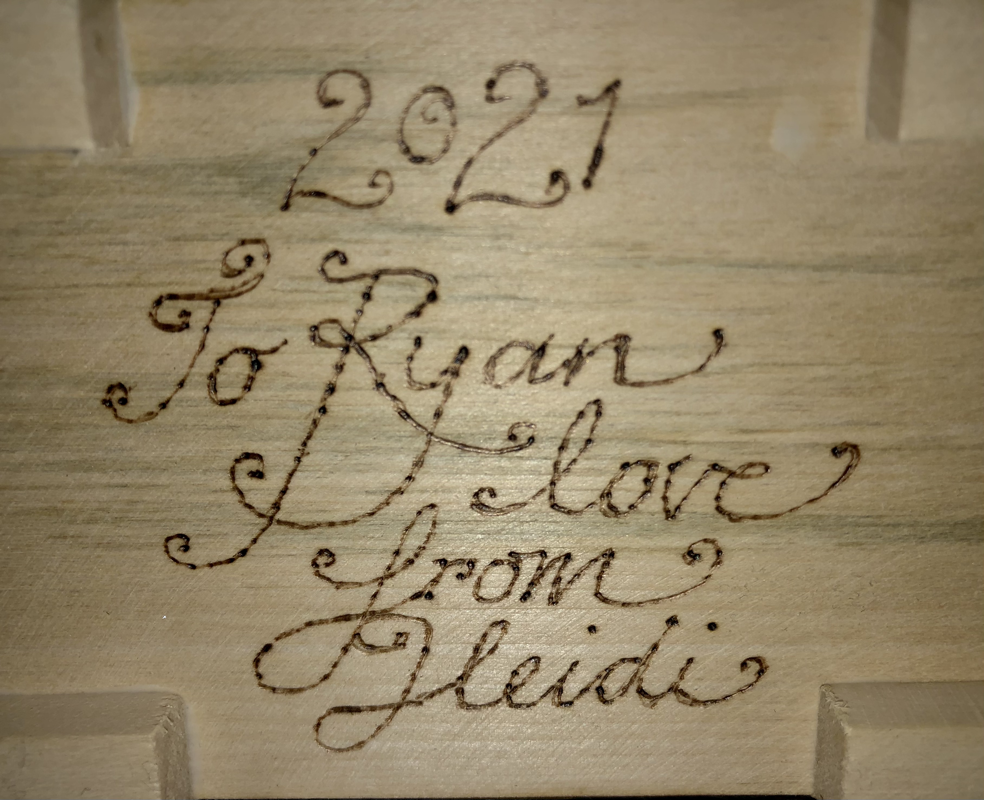
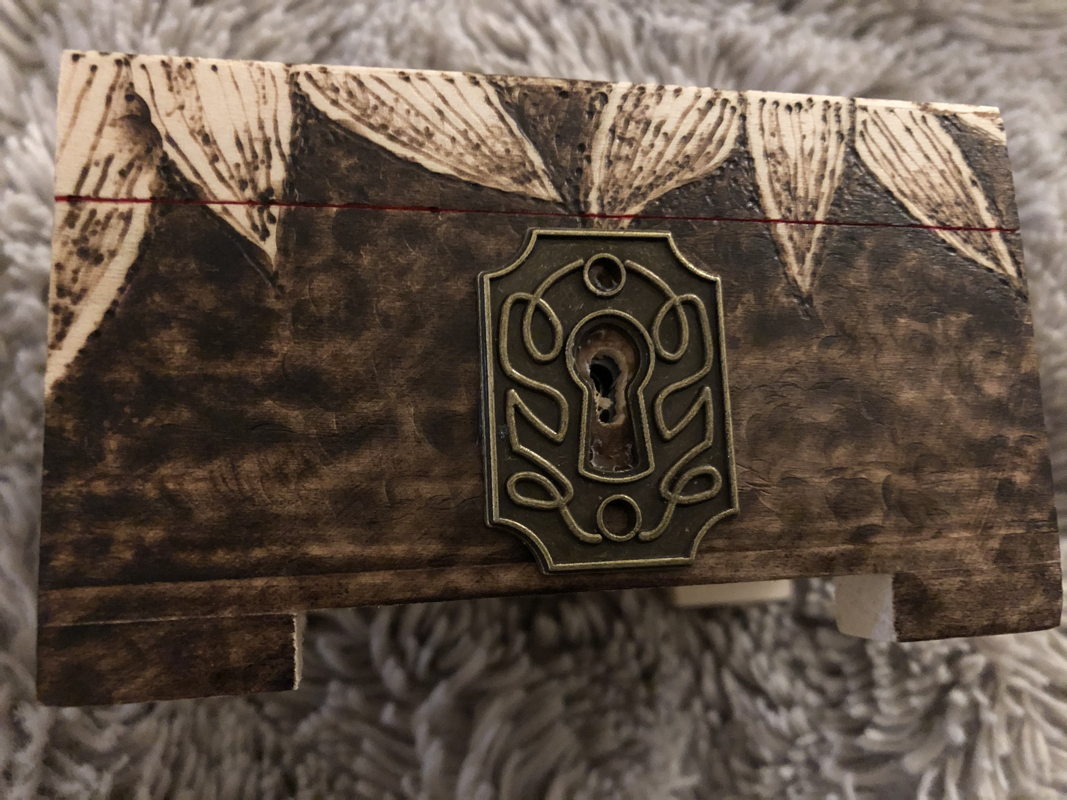
It took about 3 hours to burn the pattern in, building up tone, longer if you include the time spent drumming my fingers on the kitchen counter, the box hidden on my lap, while Ryan made lunch or coffee. I painted the rim with acrylic painting pens (very useful and give good even coverage) and super glued a wooden heart inside the lid. The box came with a key and I already had some blank wooden key rings to customise to match. He thought it was very sweet, but preferred the chocolates inside. Some people are hard to please...
I devised a little treasure hunt for him on Valentine’s Day, and the final gift he had to find was a photo of our lovely family (eating chips, as you do). The box was cheap as chips too (boom, boom) - an Ebay acquisition for £2.50, with free postage. Whoop!
It took about 3 hours to burn the pattern in, building up tone, longer if you include the time spent drumming my fingers on the kitchen counter, the box hidden on my lap, while Ryan made lunch or coffee. I painted the rim with acrylic painting pens (very useful and give good even coverage) and super glued a wooden heart inside the lid. The box came with a key and I already had some blank wooden key rings to customise to match. He thought it was very sweet, but preferred the chocolates inside. Some people are hard to please...
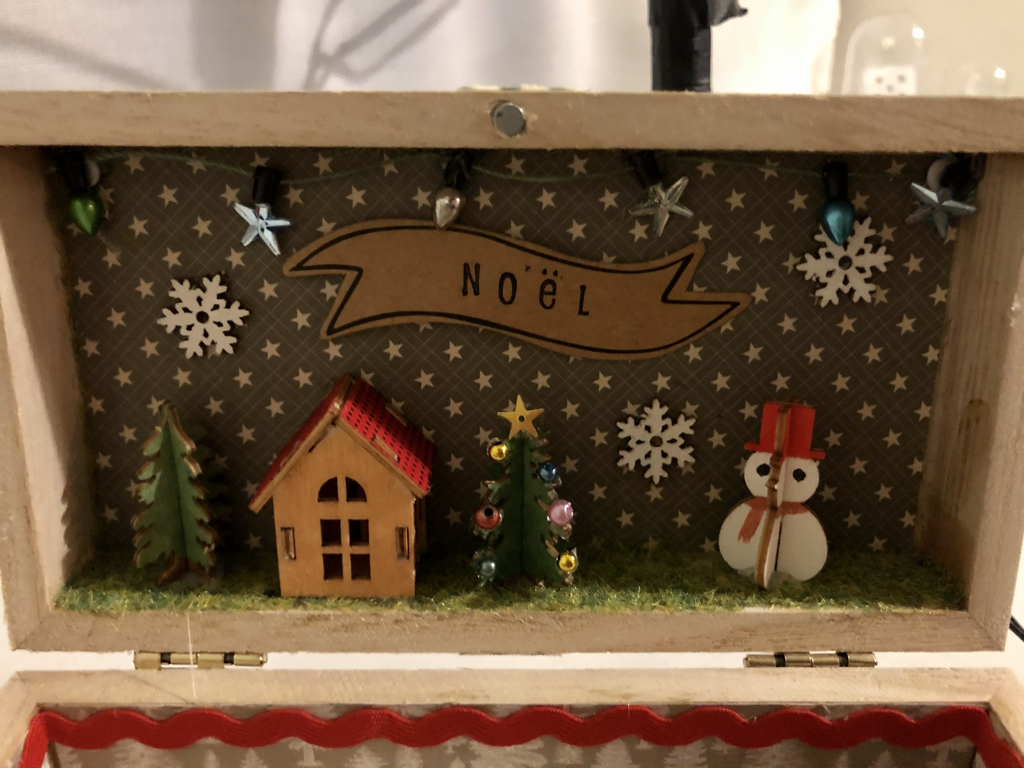
Christmas Surprise Box
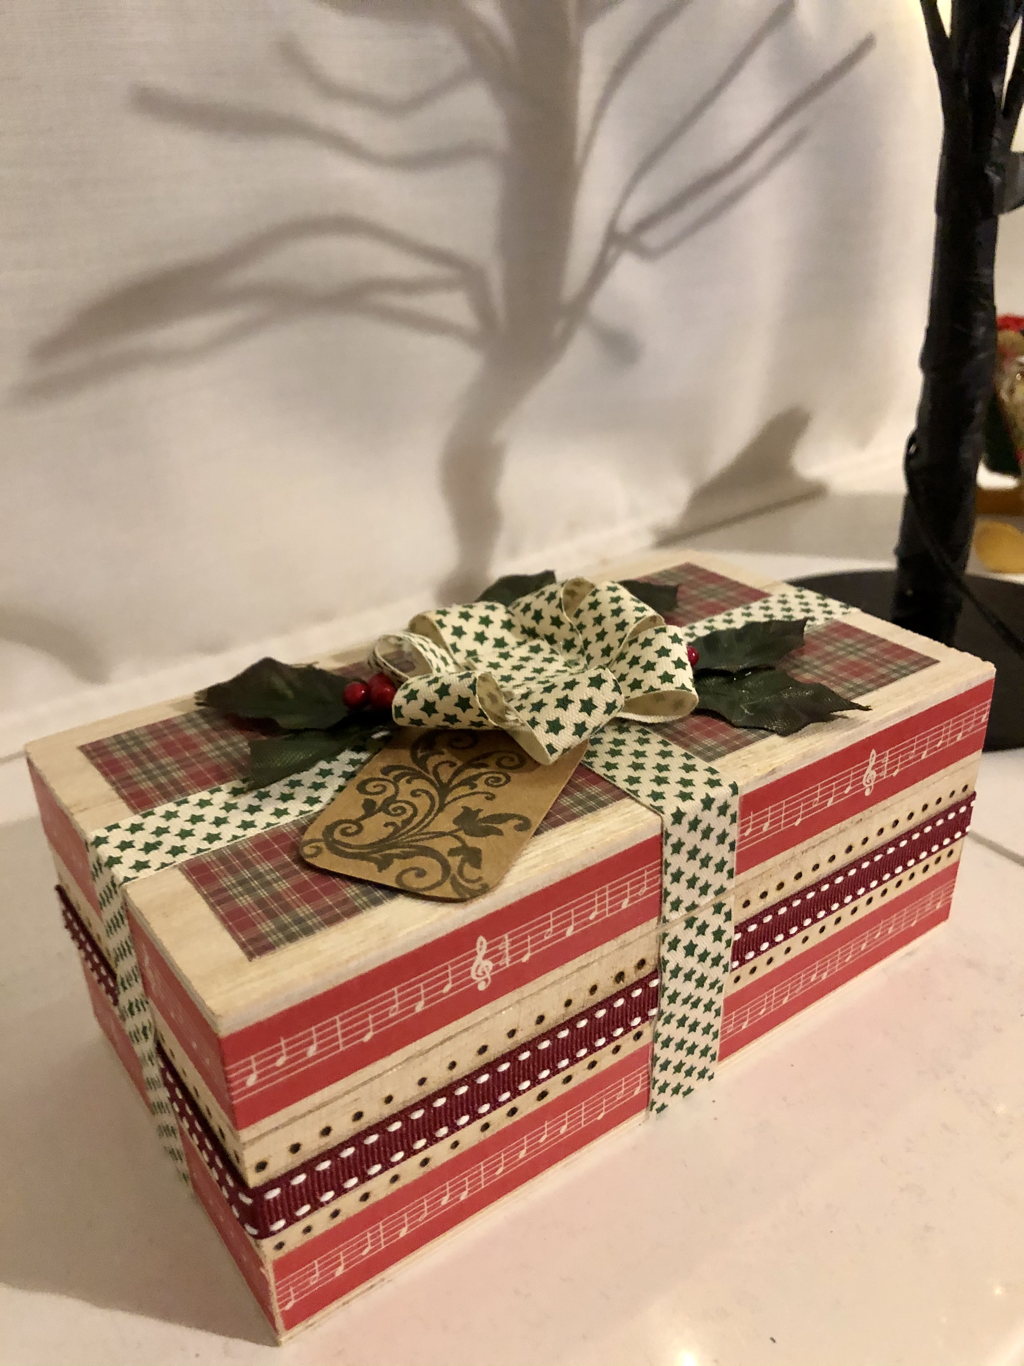
A quickie..ish.
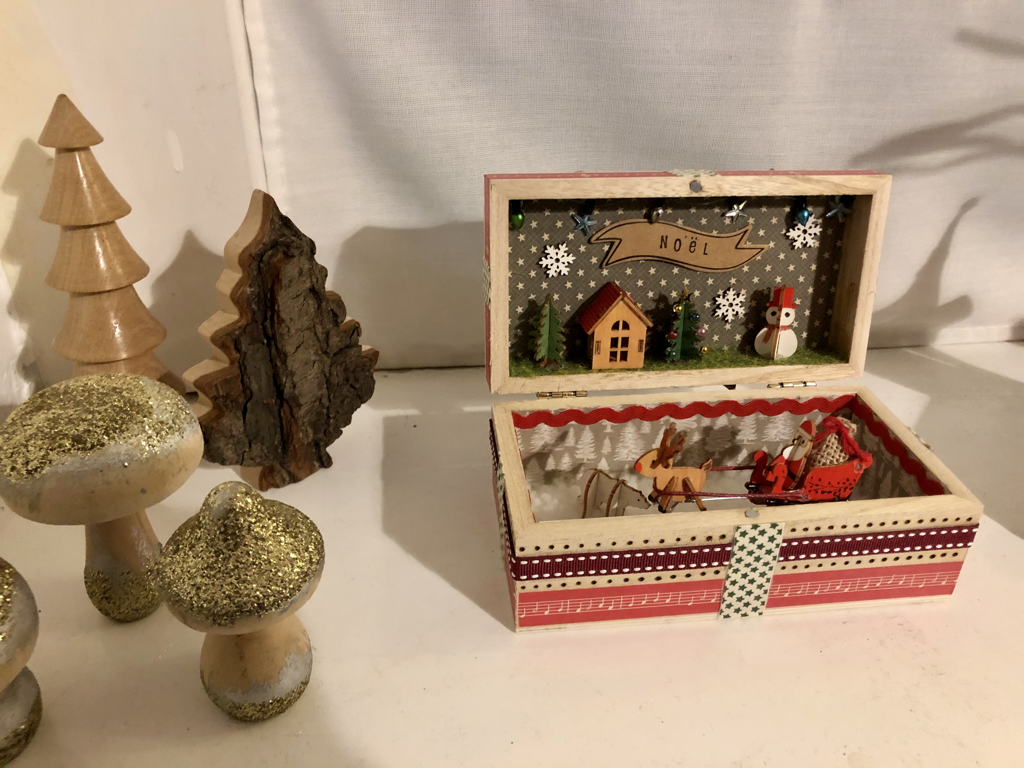
I bought a plain wooden box with a magnetic closure from The Works for £2, some washi tape, star ribbon and Christmas paper stack from The Range for around £5. The little wooden characters cost £1, also from The Range. I spent the first night painting the characters and deciding on a colour theme and vibe - traditional colours with a scandi edge. The shape of the box was perfect to transform in to a present, with the interior scene being the ‘gift’ the opener receives. (See the queue of little girls starting to form, with my daughter at the front..!) tonnes of Copydex later, the box was finished.
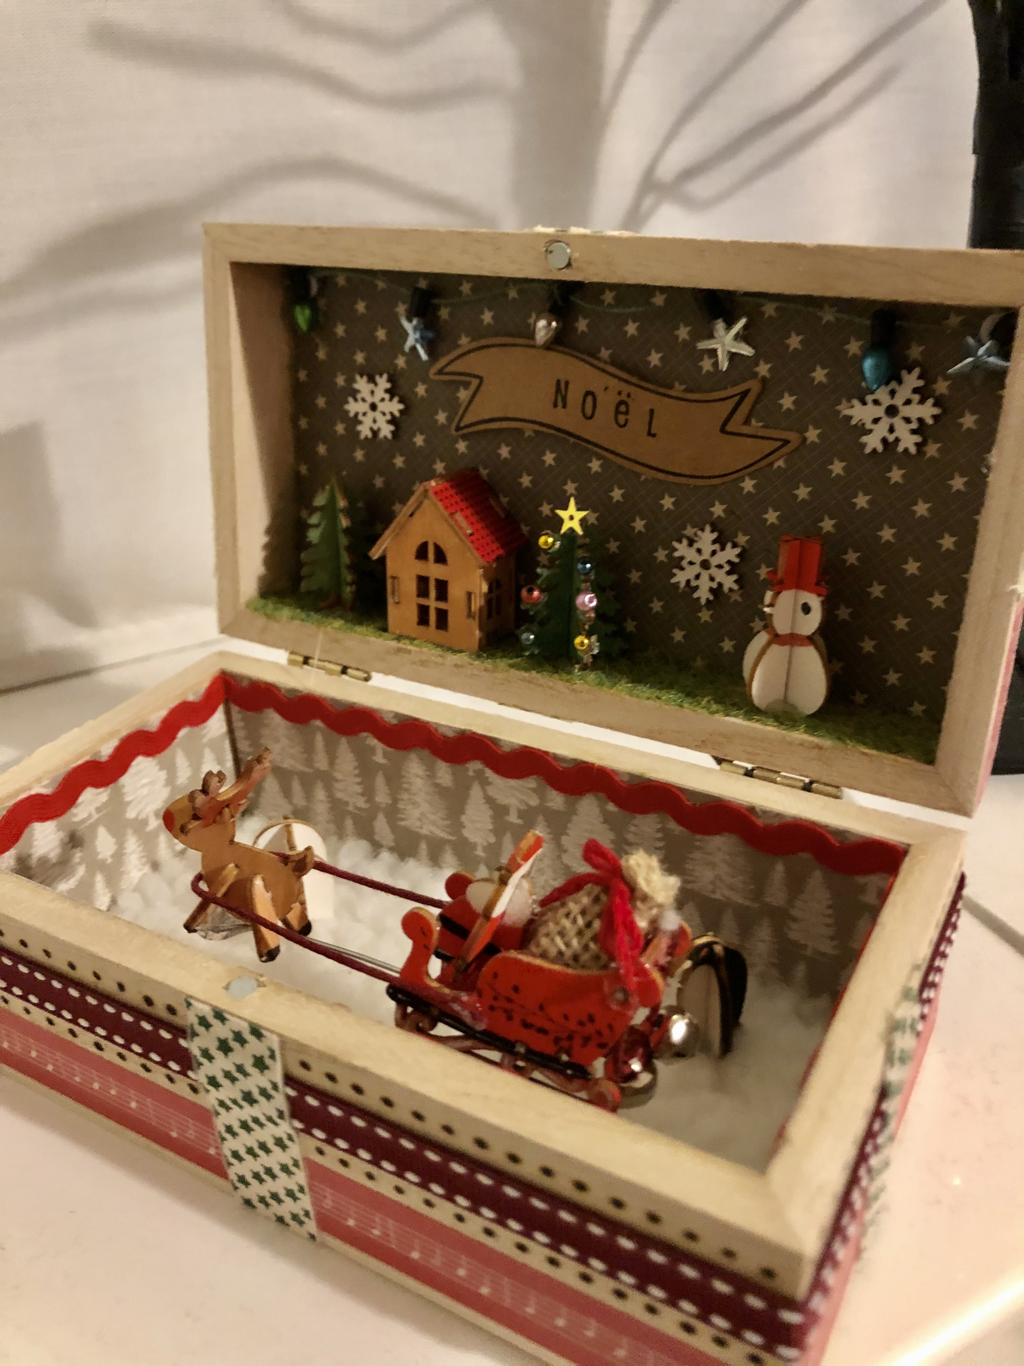
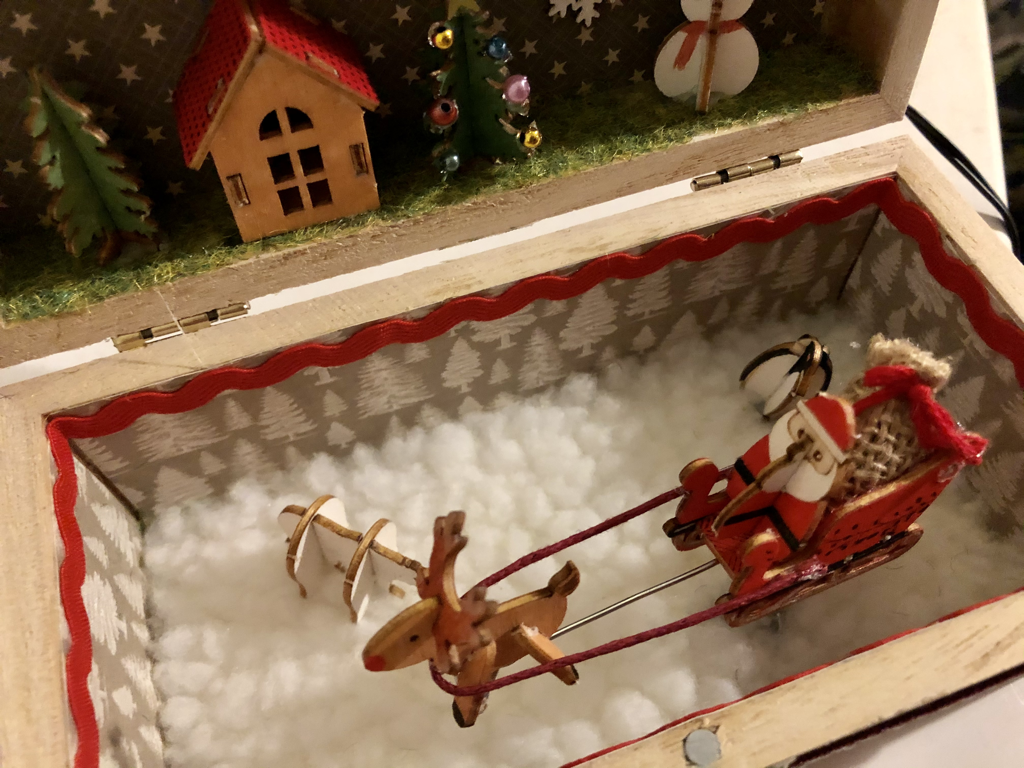
The second night I spent embellishing the rest. The inside was split in to two sections for the North Pole and a house waiting for a Christmas visit from Santa. I thought that to add more fun, Santa should be flying on his sleigh, so I suspended him using the spring from a pen and stabilised it with additional wire elements. Some little bells on the sleigh jingle when it is opened. Needless to say, my daughter loves it.
I bought a plain wooden box with a magnetic closure from The Works for £2, some washi tape, star ribbon and Christmas paper stack from The Range for around £5. The little wooden characters cost £1, also from The Range. I spent the first night painting the characters and deciding on a colour theme and vibe - traditional colours with a scandi edge. The shape of the box was perfect to transform in to a present, with the interior scene being the ‘gift’ the opener receives. (See the queue of little girls starting to form, with my daughter at the front..!) tonnes of Copydex later, the box was finished.
The second night I spent embellishing the rest. The inside was split in to two sections for the North Pole and a house waiting for a Christmas visit from Santa. I thought that to add more fun, Santa should be flying on his sleigh, so I suspended him using the spring from a pen and stabilised it with additional wire elements. Some little bells on the sleigh jingle when it is opened. Needless to say, my daughter loves it.
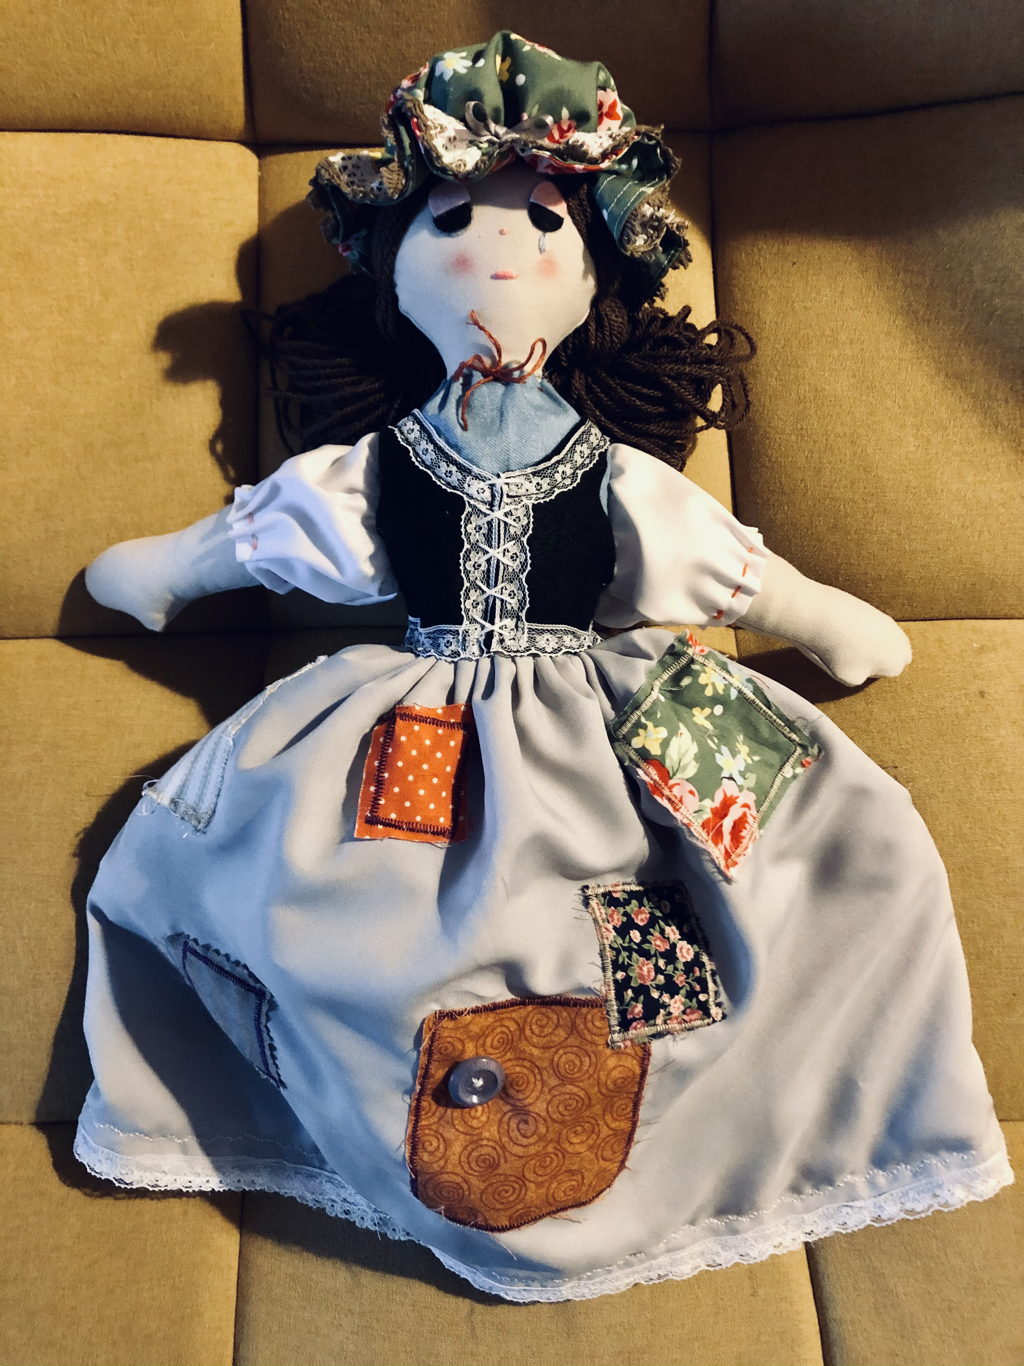
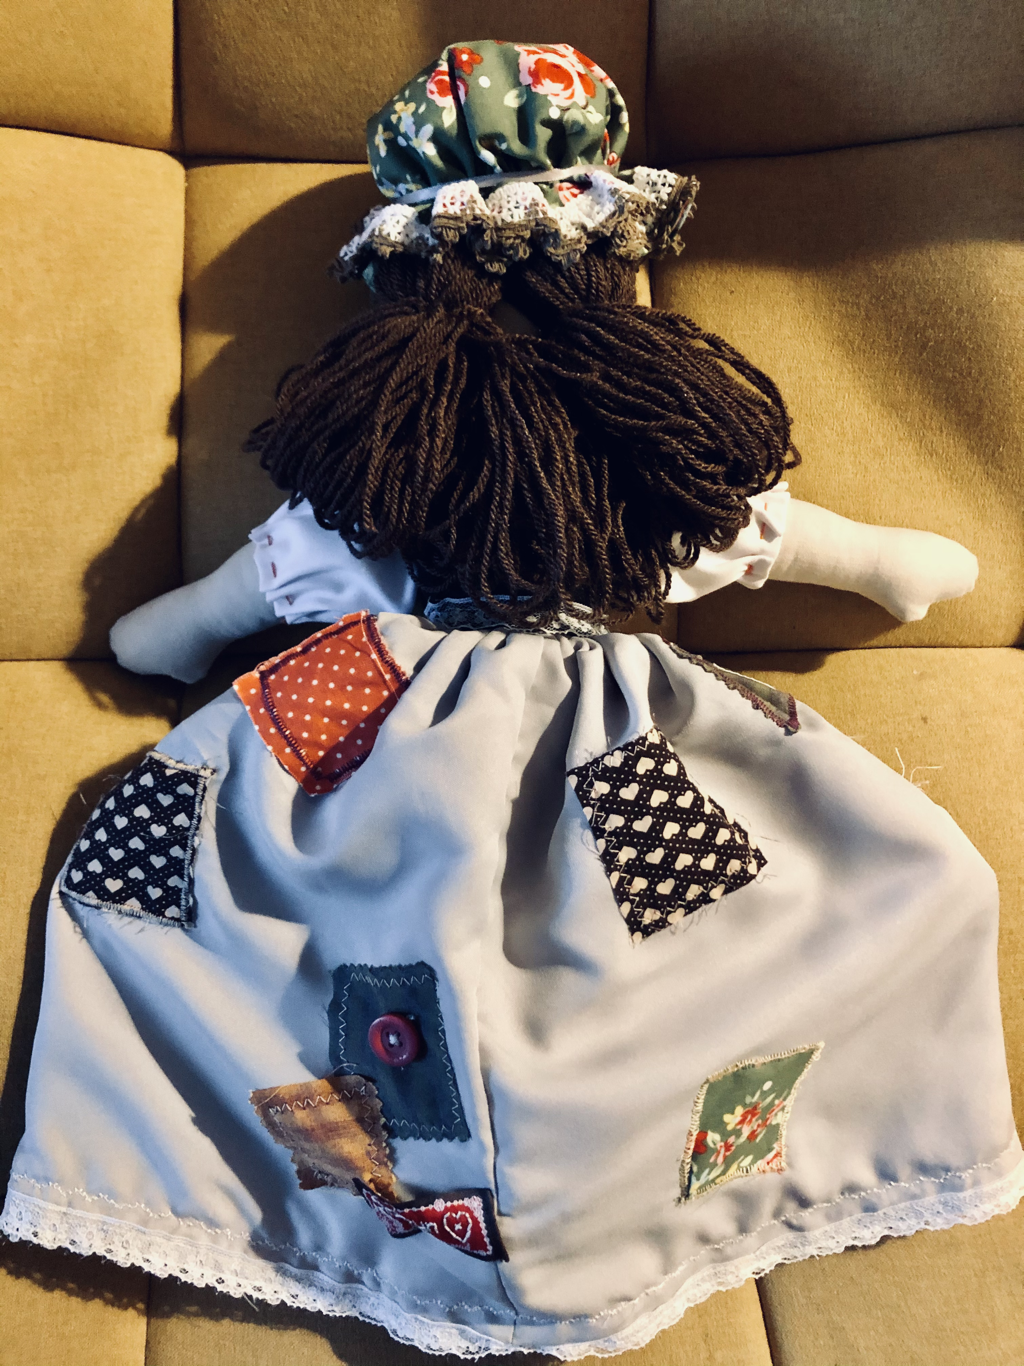
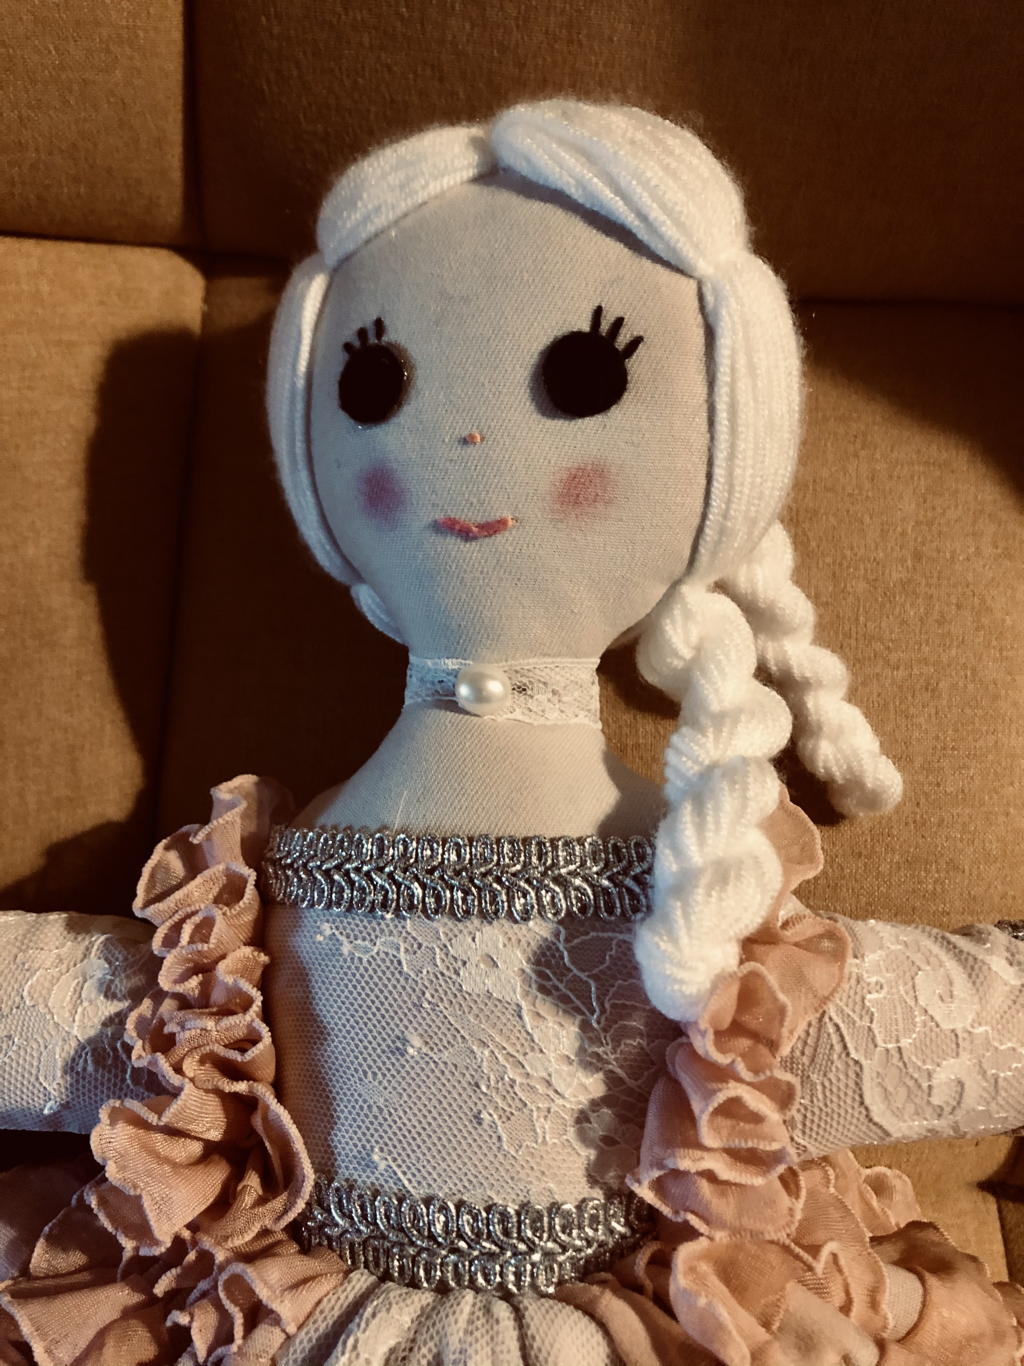
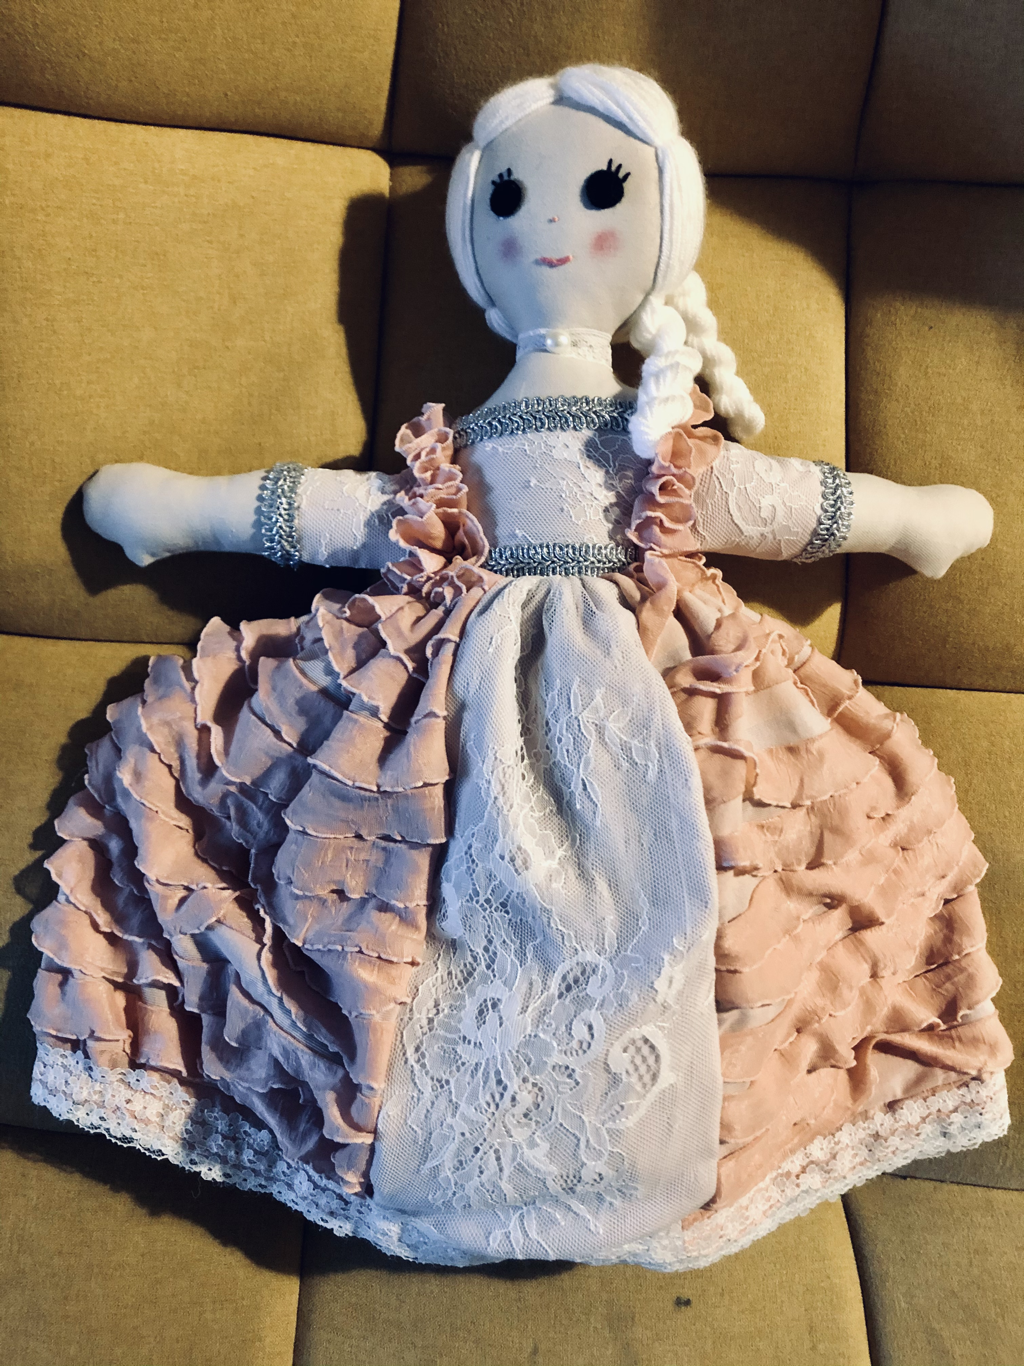
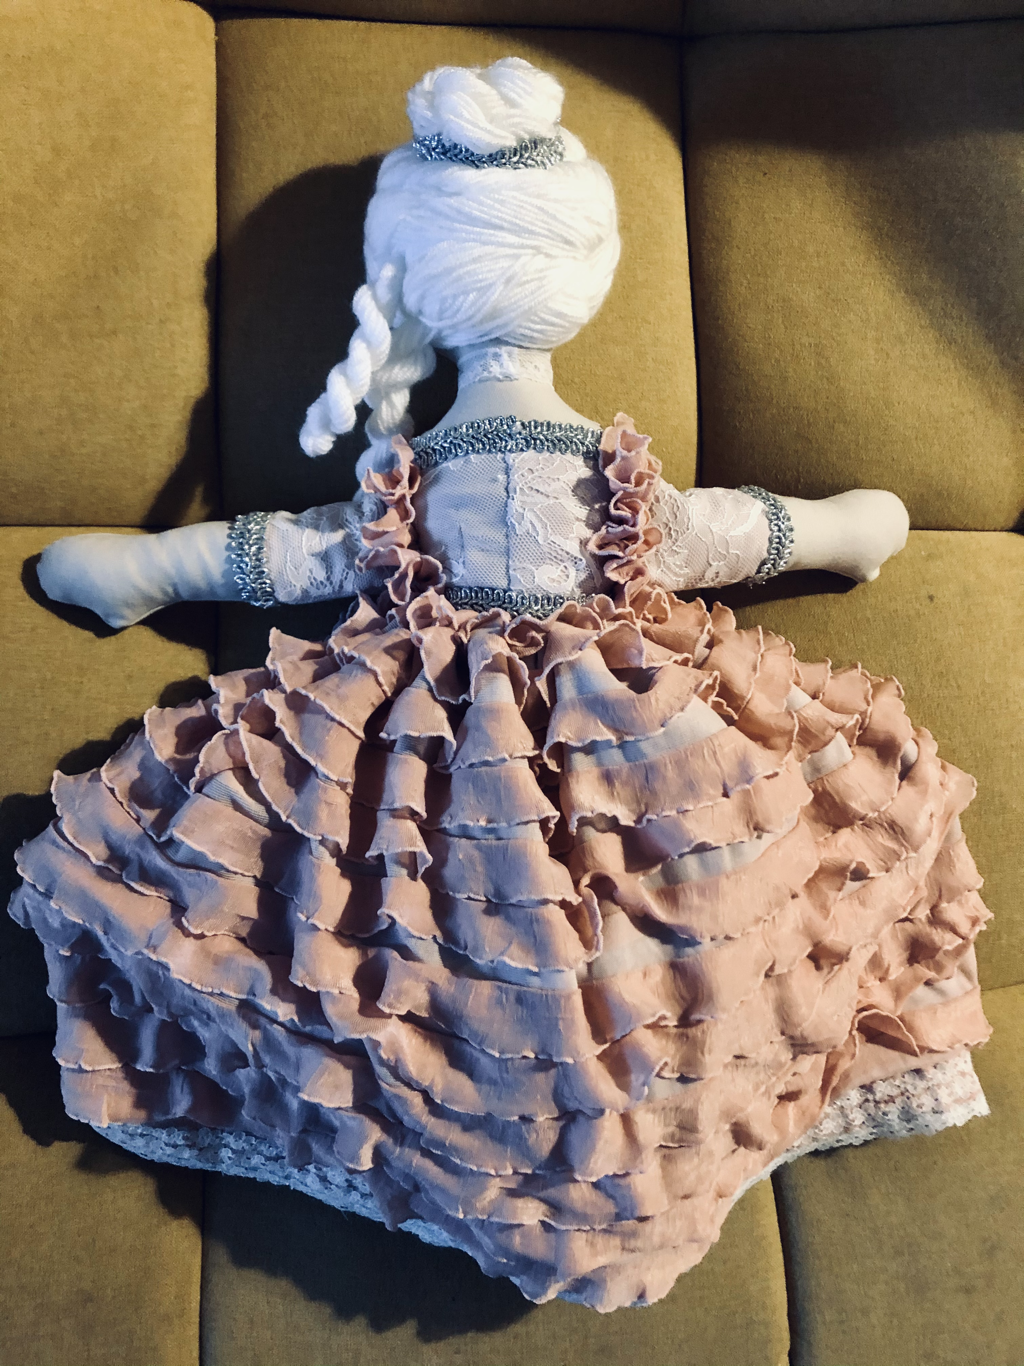
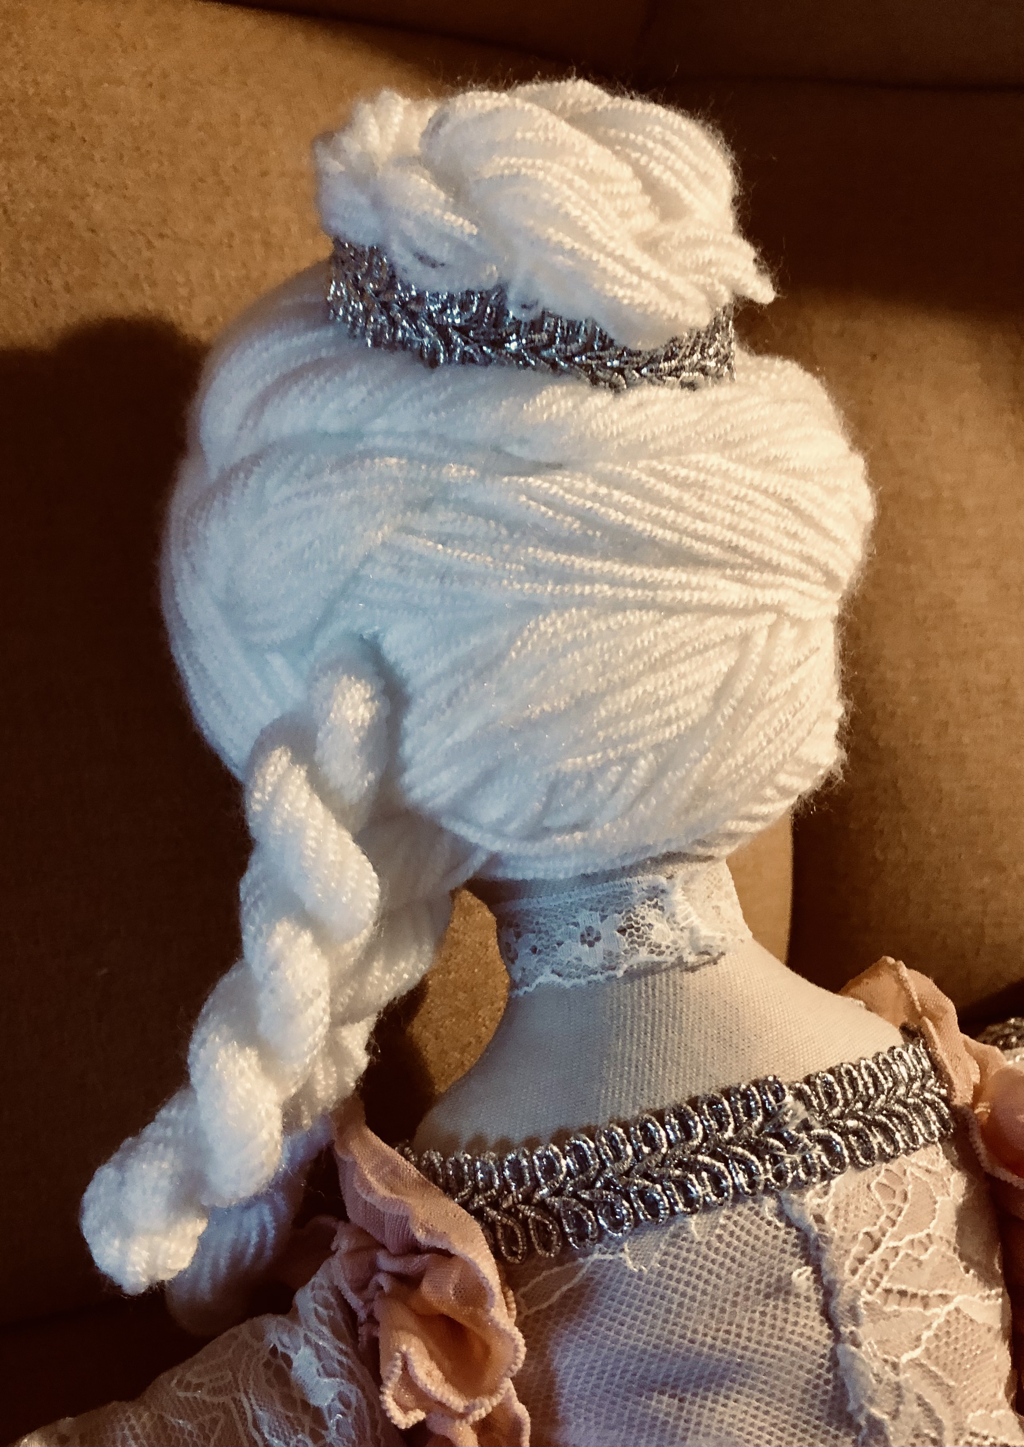
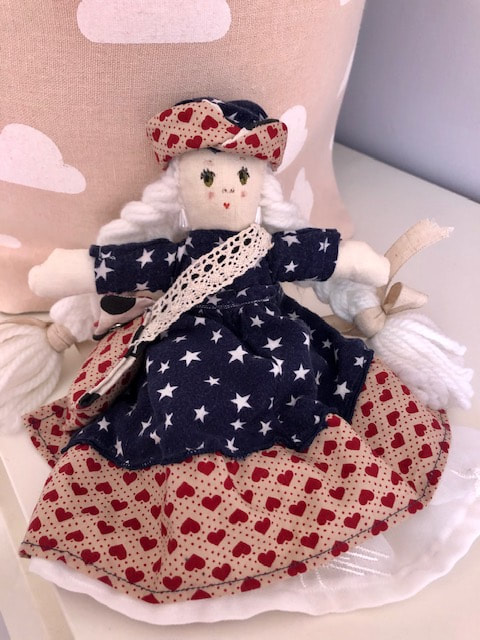
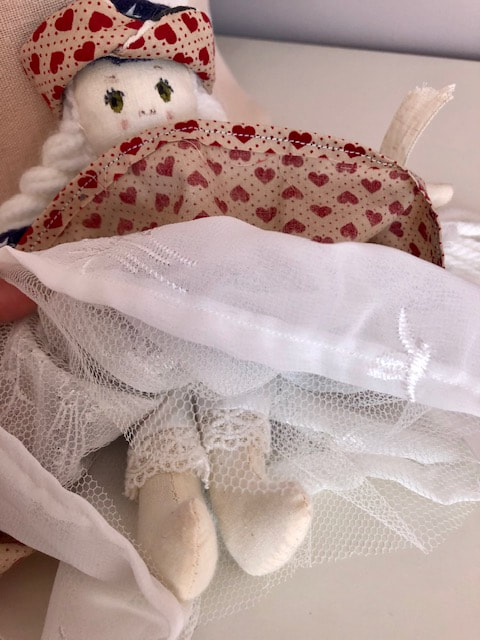
Topsy Turvey Doll
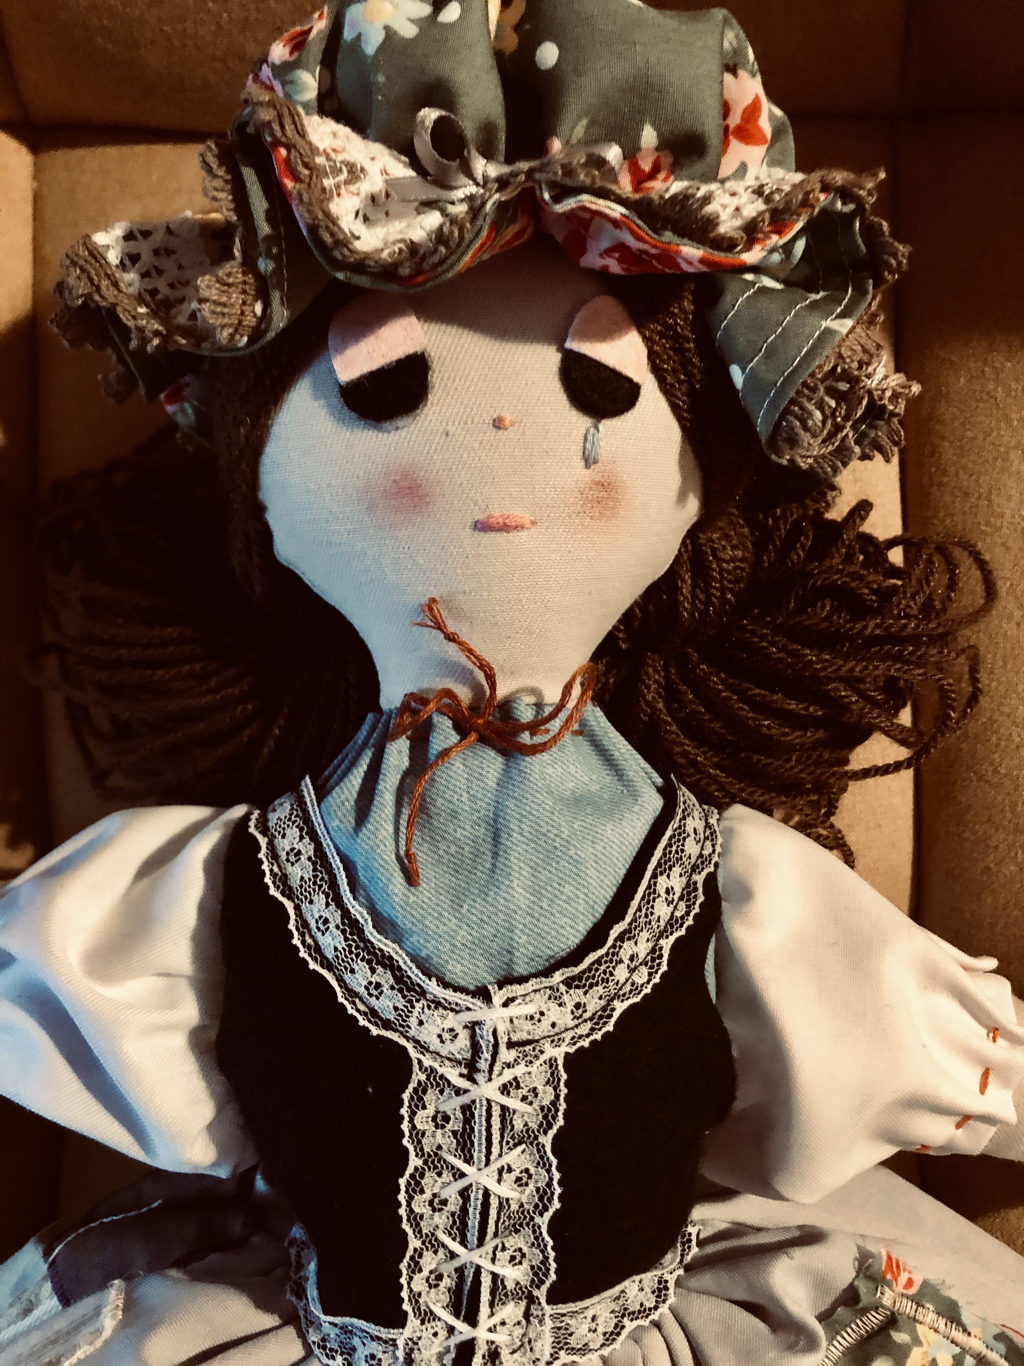
Two heads are better than one...
Did you ever see one of those Cinderella dolls that has two heads? One in rags, one in her ballgown? I had serious doll envy as a child, and my friend had one of these. I was hooked. Her mum let me borrow it from time to time. I must have been an annoying child to keep happy! I blush.
Anyway, I bought an old 70s pattern off EBay, seeing my chance to finally make one and give it to my daughter for Christmas. I shall say now that I do not recommend making this doll unless you are pretty competent with machine and hand sewing, as I unfortunately learned. I am sure I have permanently damaged my fingers. Yes, sore fingers, hours upon hours of work, ferreting around to materials with COVID limitations. Don’t do it. Get someone else to do it or buy one. However, like post birth pain amnesia, I am now the proud owner of this doll and all the pain is but a faint memory (nearly), and knowing how much my daughter will love this fills me with joy. However, I shall say it again..don’t do it.
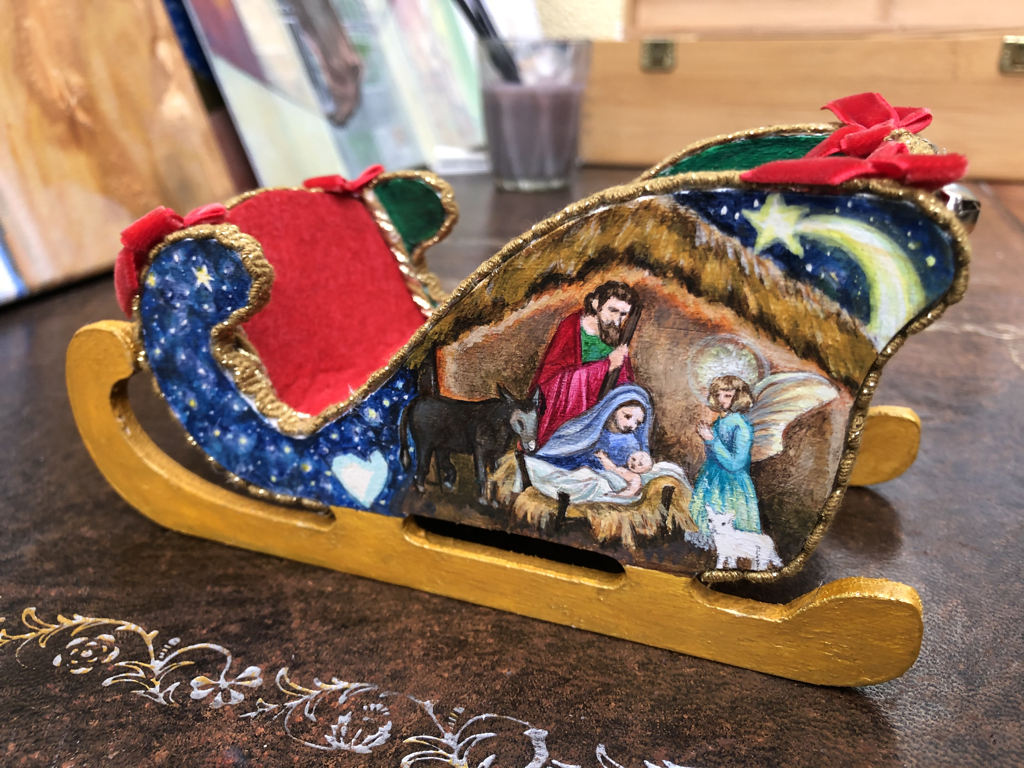
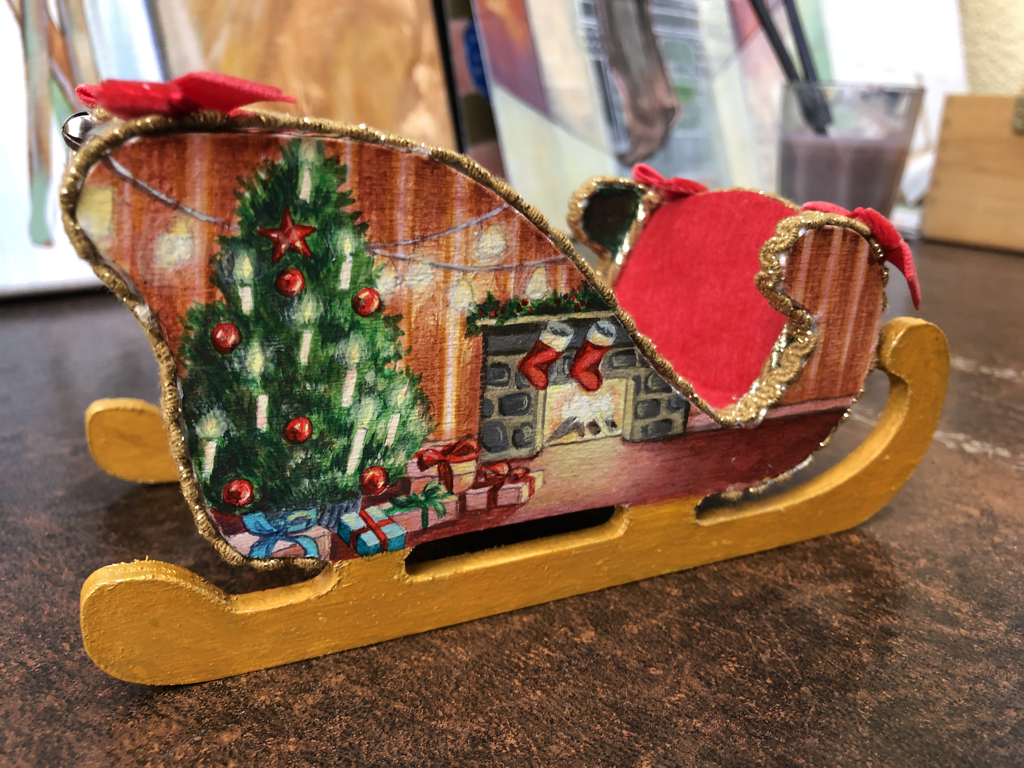
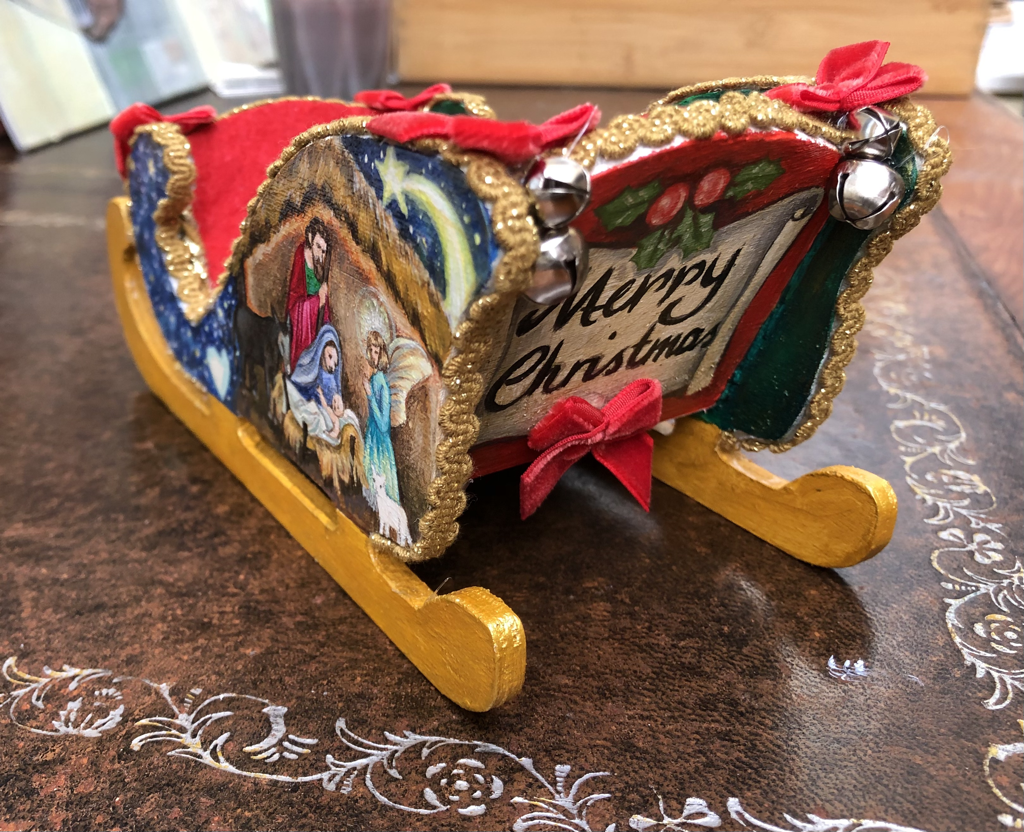
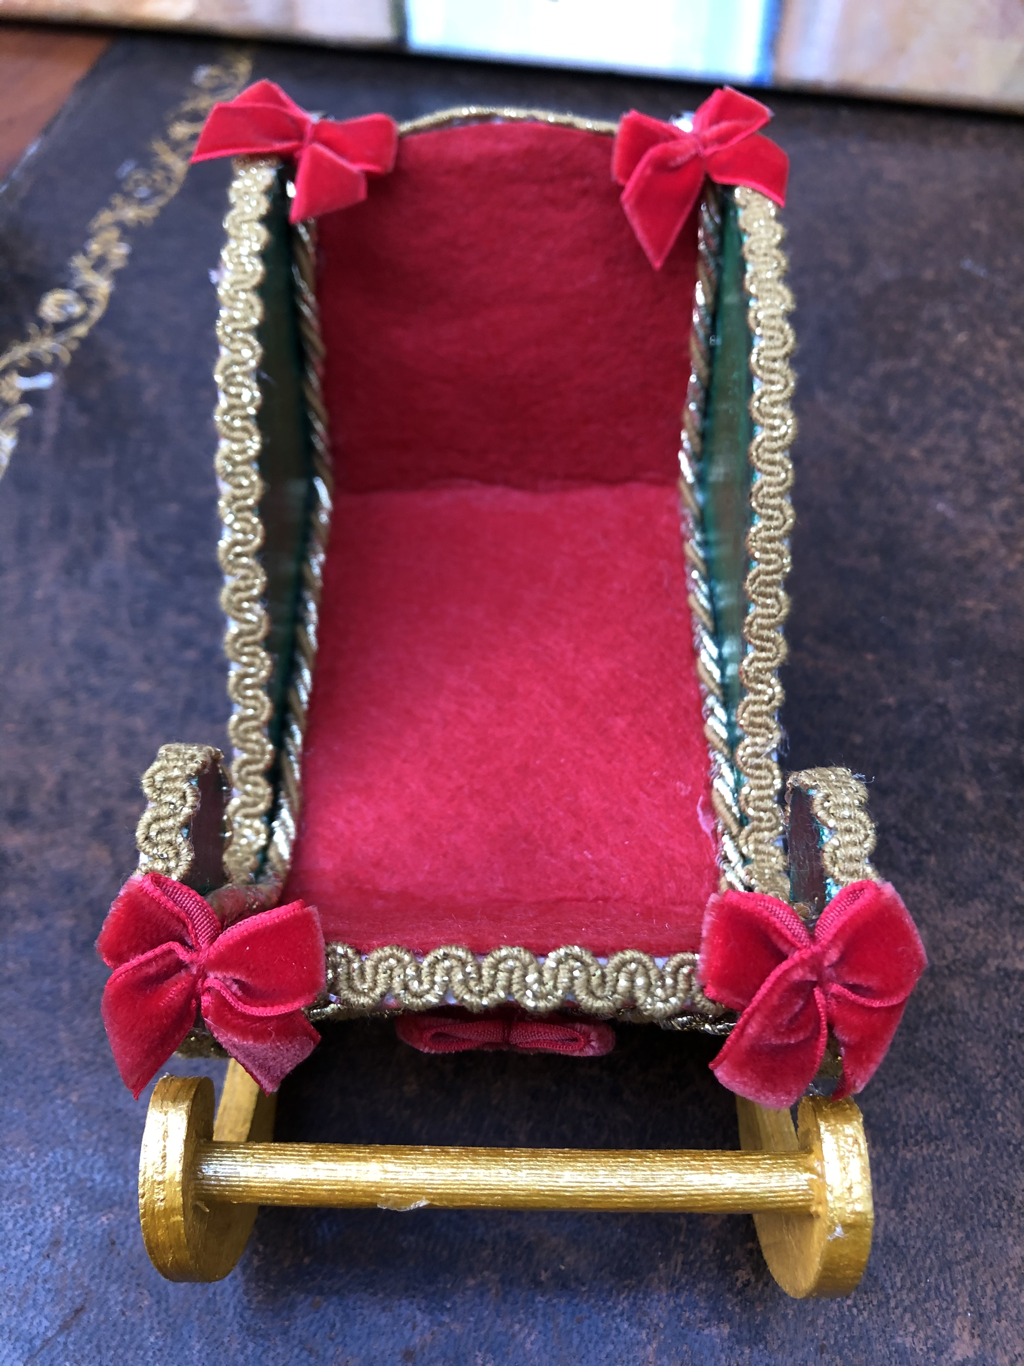
Santa’s Sleigh Sweet Dish.
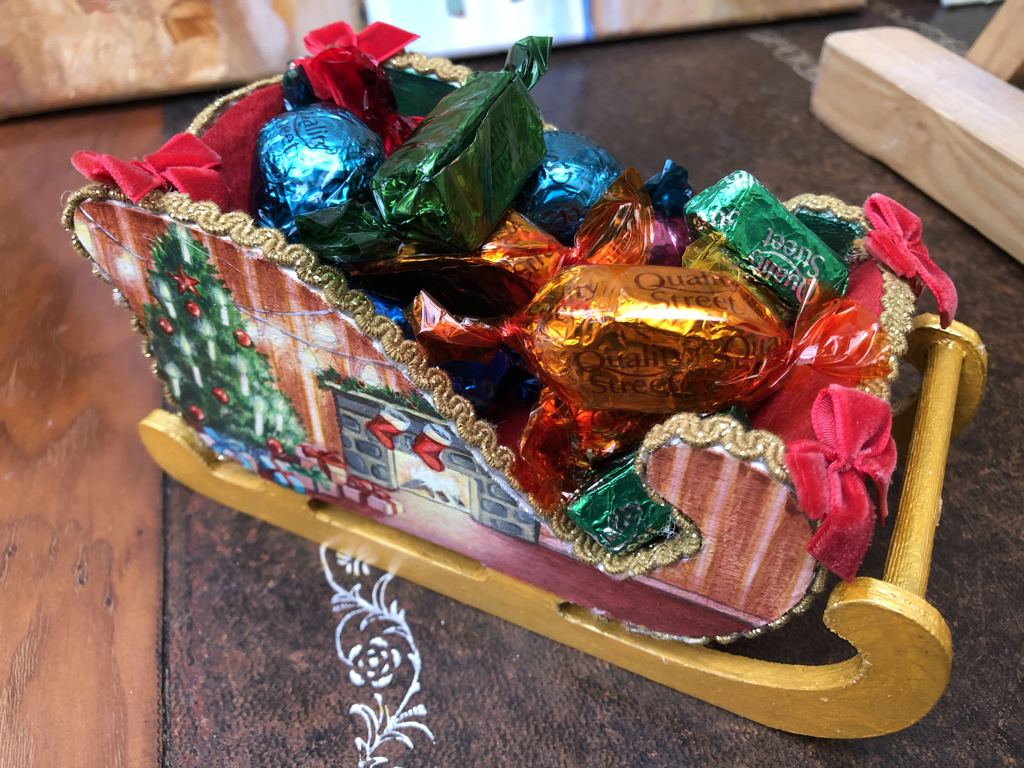
I wanted to transform a simple wooden craft sleigh in to a traditional keepsake sweet dish for the mantelpiece. The sleigh came from The Works and was £3. I started by painting the scenes on each side, in acrylic paint, which took a few days to complete. I painted the rest and varnished it with two layers of artists gloss varnish. I bought the velvet bows, bells and gold trim from The Range at minimal cost. Then it was just a matter of deciding what went where and hot glueing the lot. It will look great holding colourful chocolates and will be a bit of Christmassy fun for the kids.
Christmas Tree Decorations.
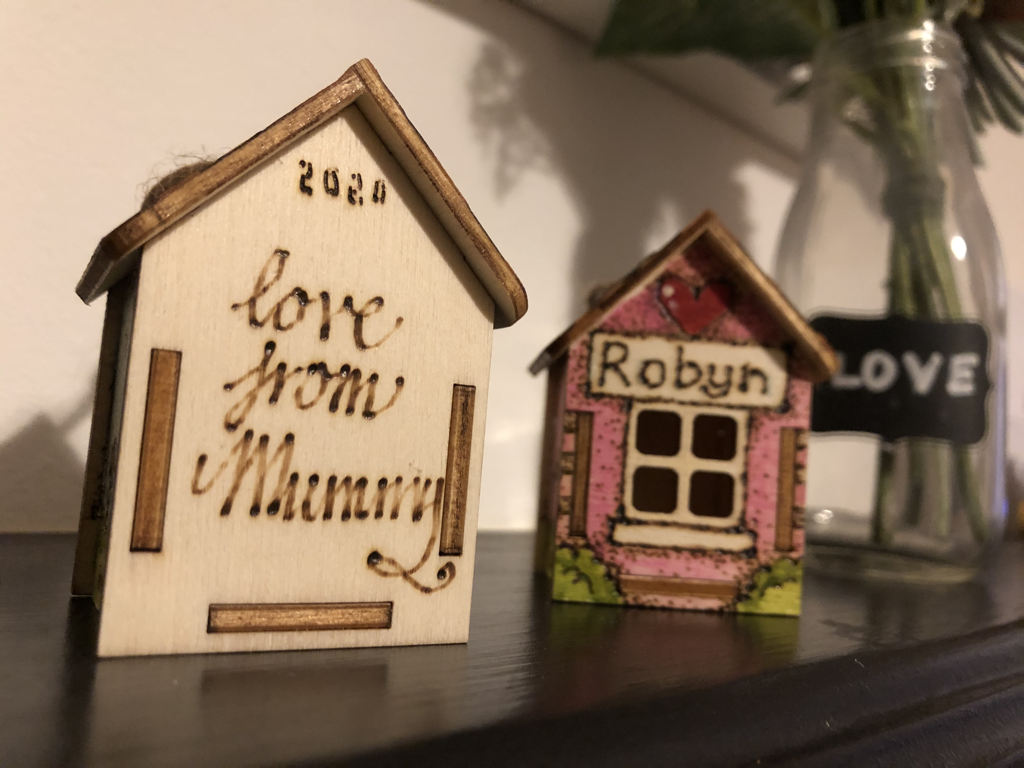
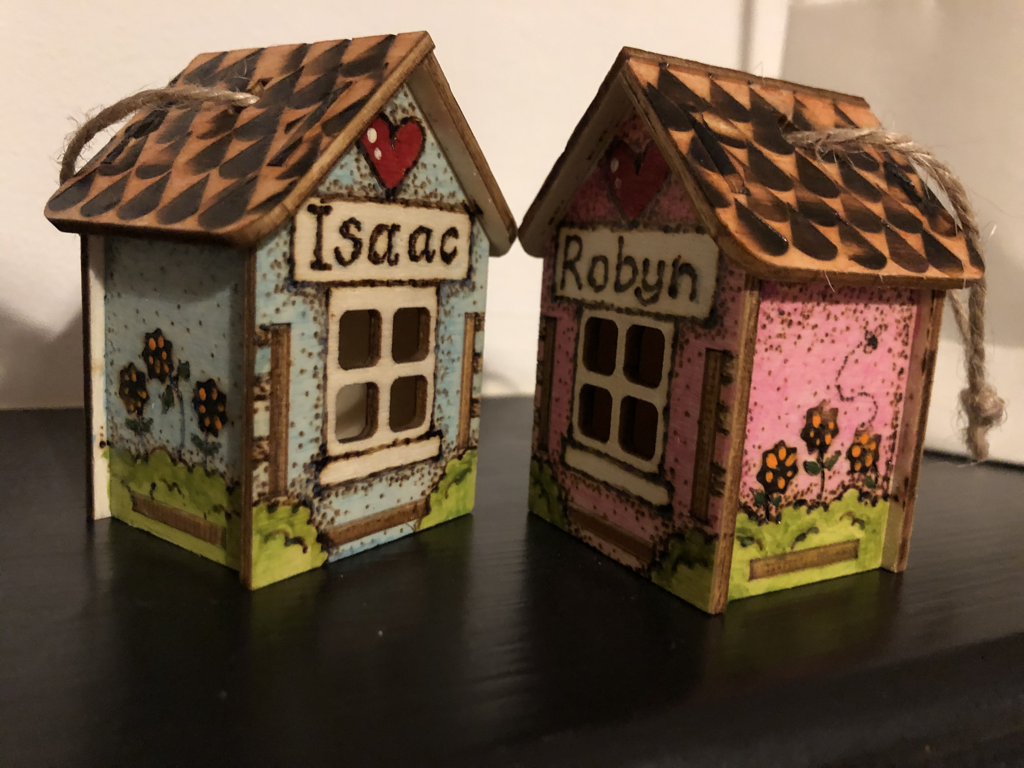
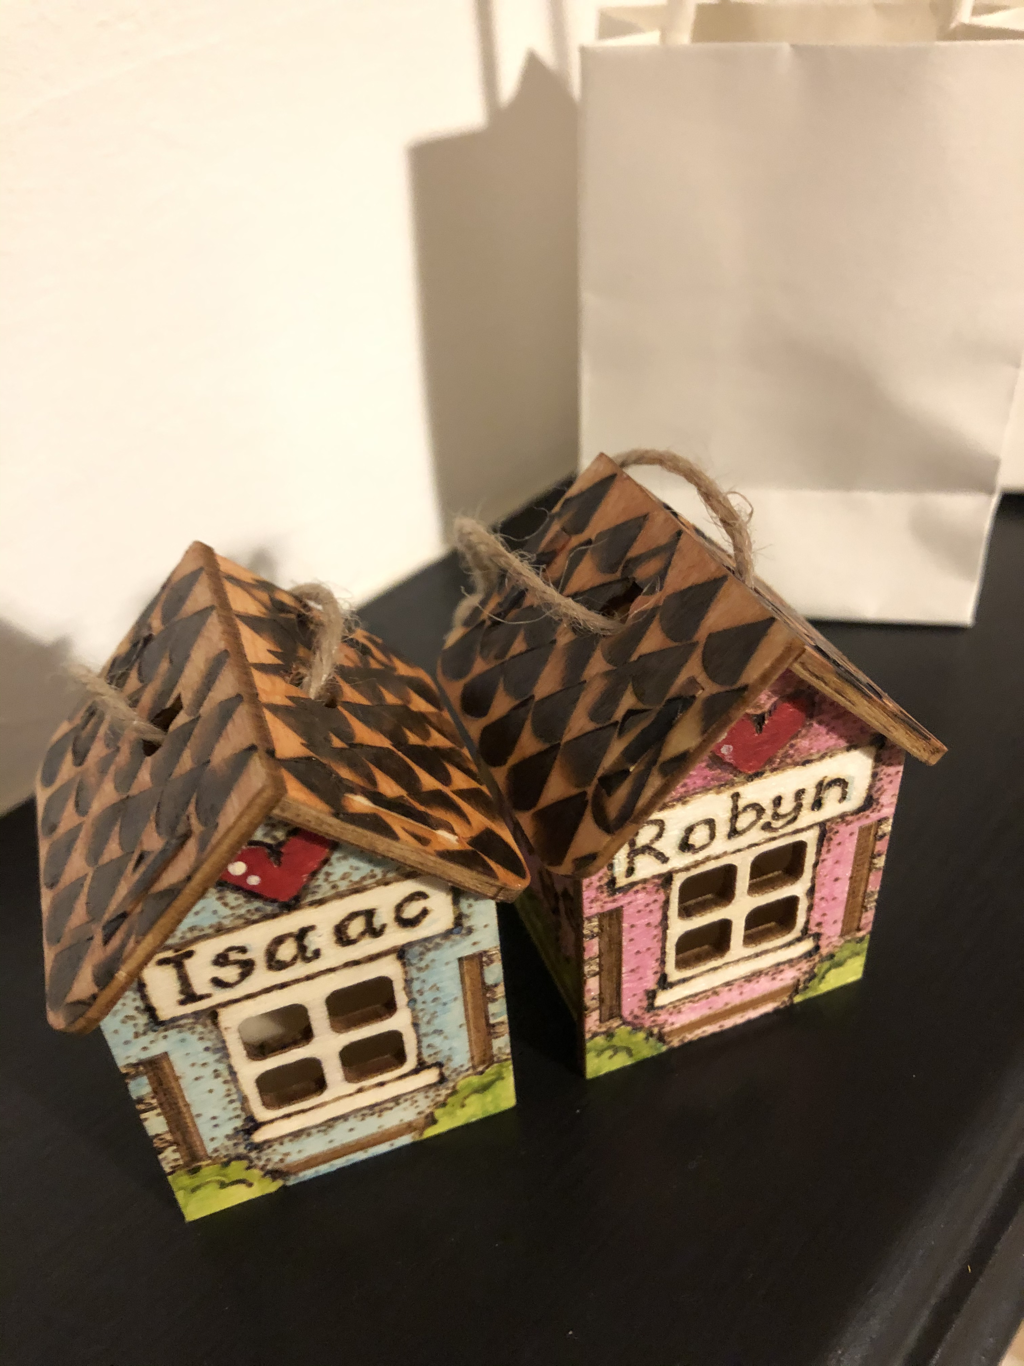
It’s that time of year again...
Yes, I’m crafting like berserk, getting ready for Christmas. Each year I try to add something new to the tree and this year it’s tiny personalised houses for my children. They took about two hours to complete, so it was a quick craft with lots of satisfaction. My husband gifted me a wood burning tool, so it was a bit of an experiment all in all. I bought the little houses from The Range. They cost £1 each. I used acrylic paint with a paint thinning medium, for a brush free and translucent wash of colour. Added bonus - the house smells of burnt wood. Very festive!
Yes, I’m crafting like berserk, getting ready for Christmas. Each year I try to add something new to the tree and this year it’s tiny personalised houses for my children. They took about two hours to complete, so it was a quick craft with lots of satisfaction. My husband gifted me a wood burning tool, so it was a bit of an experiment all in all. I bought the little houses from The Range. They cost £1 each. I used acrylic paint with a paint thinning medium, for a brush free and translucent wash of colour. Added bonus - the house smells of burnt wood. Very festive!
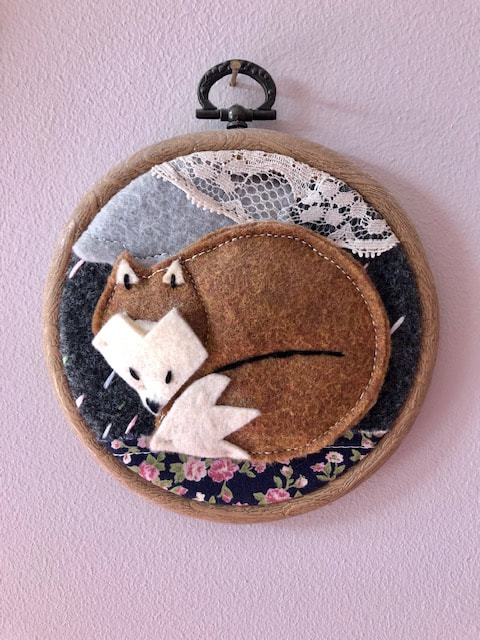
Fox Embroidery Hoop Picture.
|
|
|
This pretty picture was made using left over items from previous craft projects, cobbled together using an embroidery hoop. It was quick and easy to do, just running little pieces of fabric together, it doesn't matter if it frays.
Leather valet.
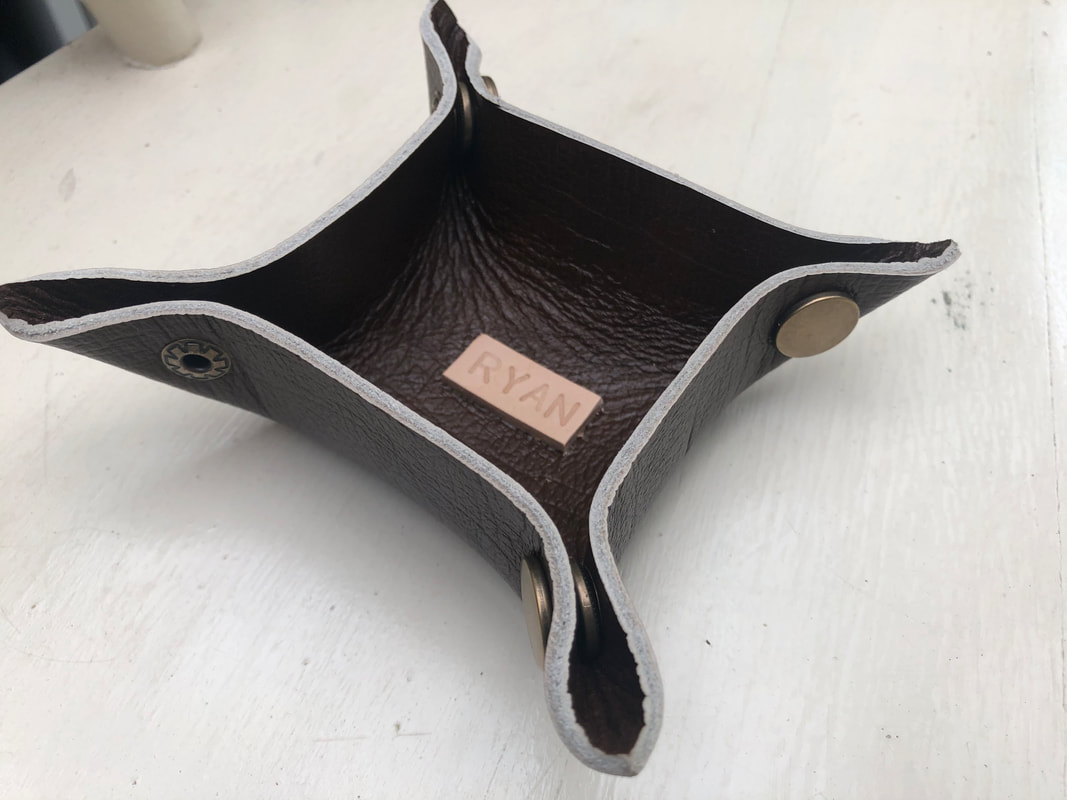
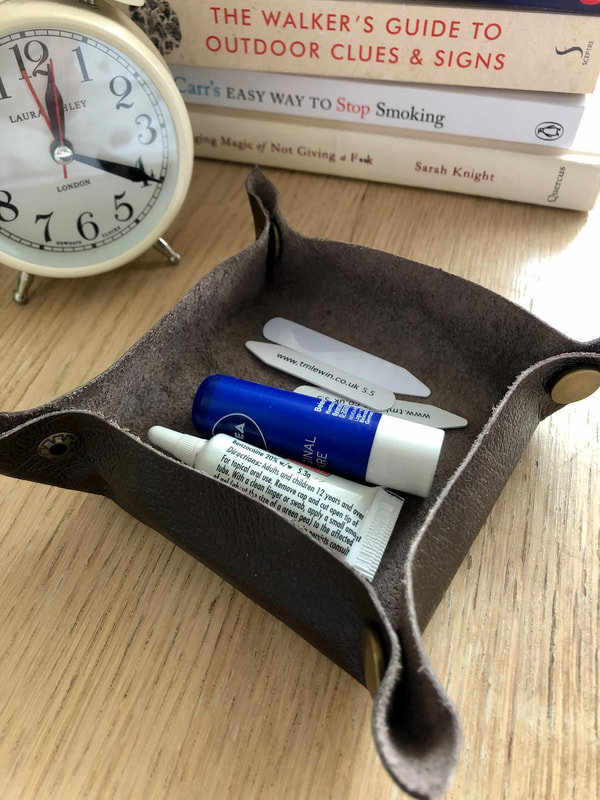
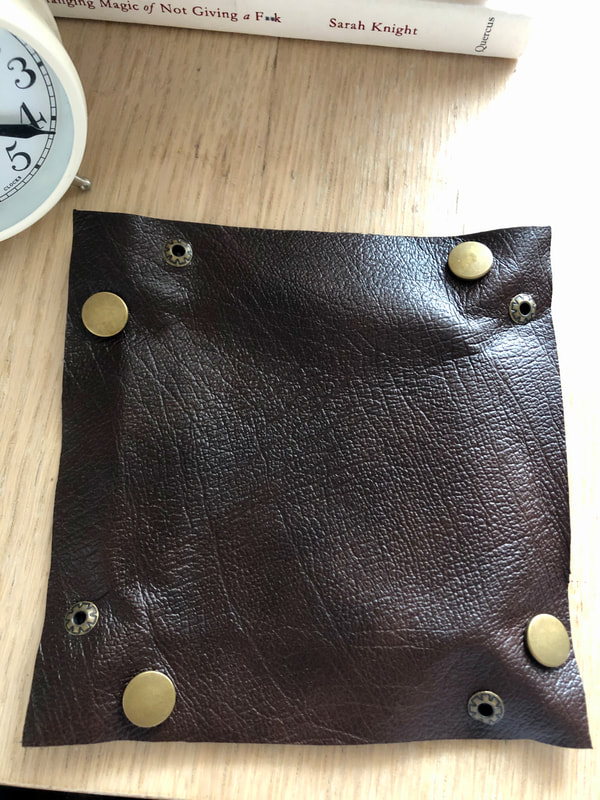
Leather is associated with durability and flexibility and the third wedding anniversary. It’s our wedding anniversary this week, so I thought I would make Ryan something he needed. This is debatable! This practical valet was make from gluing two pieces of leather back to back (so there was brown leather on both sides) and attaching the sides with poppers. I stamped his name on some natural leather and glued it to the inside. I also made him a travel version which can be which can be packed flat in a bag. Lots of tutorials on line to follow and quick and simple to make, if you have the right tools, of course. He didn’t know what to make of them, but they are both in use on this bedside table, so presumably he can see the point!
Rainy Tree Embroidery Hoop Picture.
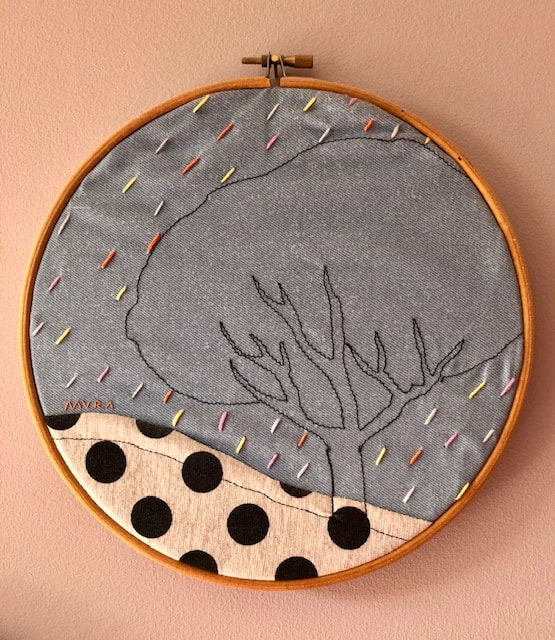
I made this to put on my daughter's bedroom wall. I t was a bit of a learning curve, as I didn't have an embroidery plate on my sewing machine, which limited what I could do. Even so, I was pleased with the result and it took under two hours to complete.
Children's Doorway Theatre.
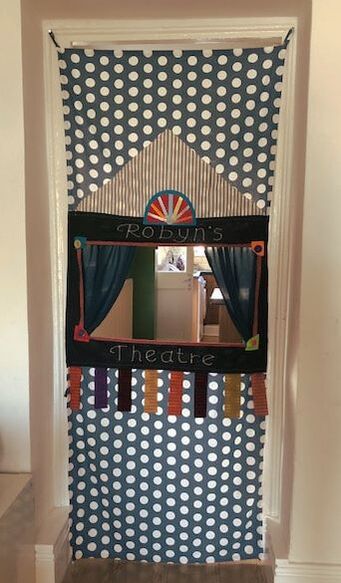
With no space to swing a cat in our house, I decided to make a space-saving treat for my daughter, which could be rolled up and put away easily. The solution? A door way theatre! Looks pretty simple, but it was a nightmare to make. The stage window needed supporting with blind rods, which I didn't anticipate, but it worked out well enough in the end. I thought of making her some puppets to go with it, but after all the energy put in to the theatre itself, I thought I would save that for a craft day with the kids instead. I hope she likes it!
Ballet Pal Rag Doll.
I made this dolly for my daughter, Robyn, who was starting ballet classes at the time, and was asked to bring along a teddy or doll to dance with. The doll's body was pre-made and bought from The Works, for under £5. The rest was rooted out from my crafting drawers. The clothes are removeable, as little girls like it this way, and I even made a little bag for her with a Fimo make-up set and an ice-cream (which every self-respecting dolly should have!)
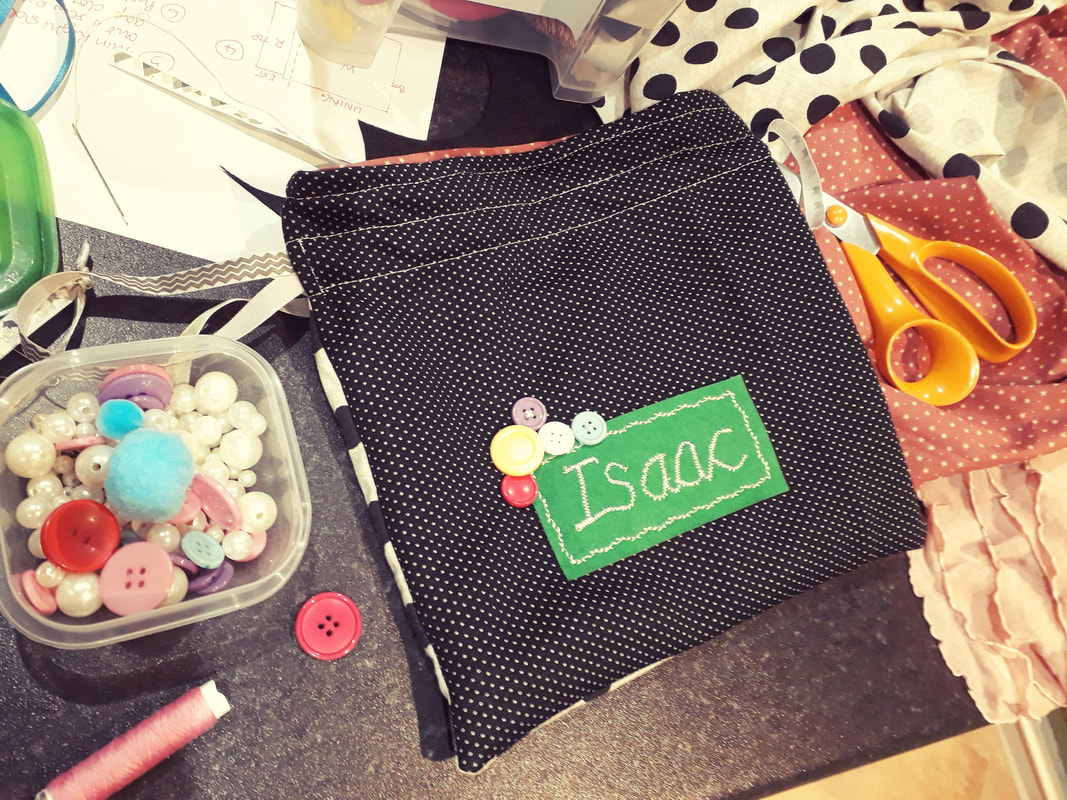
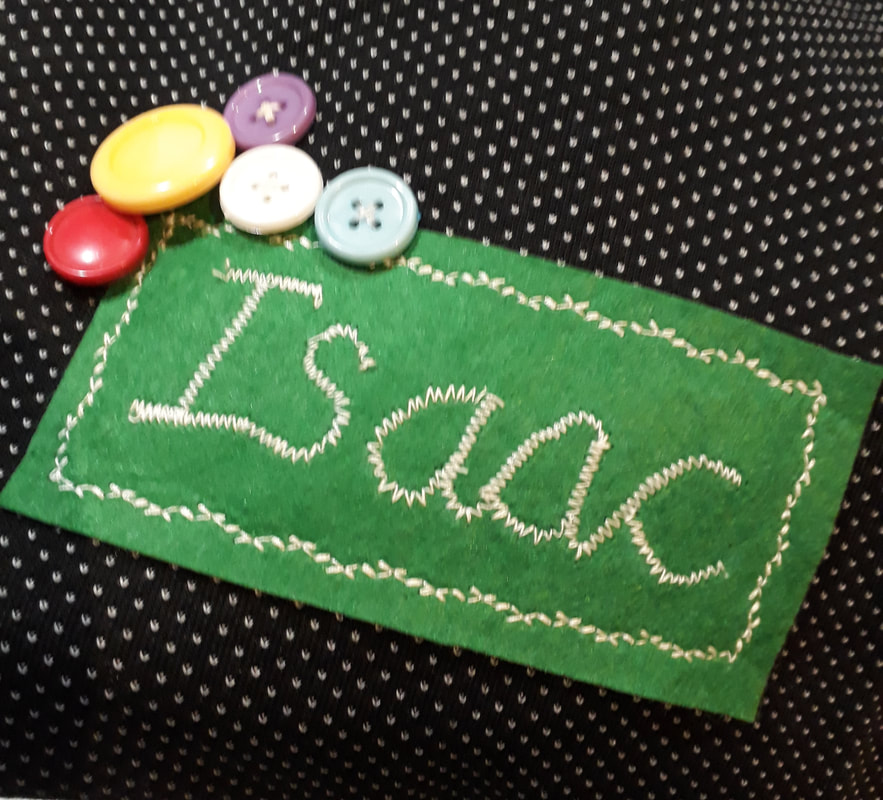
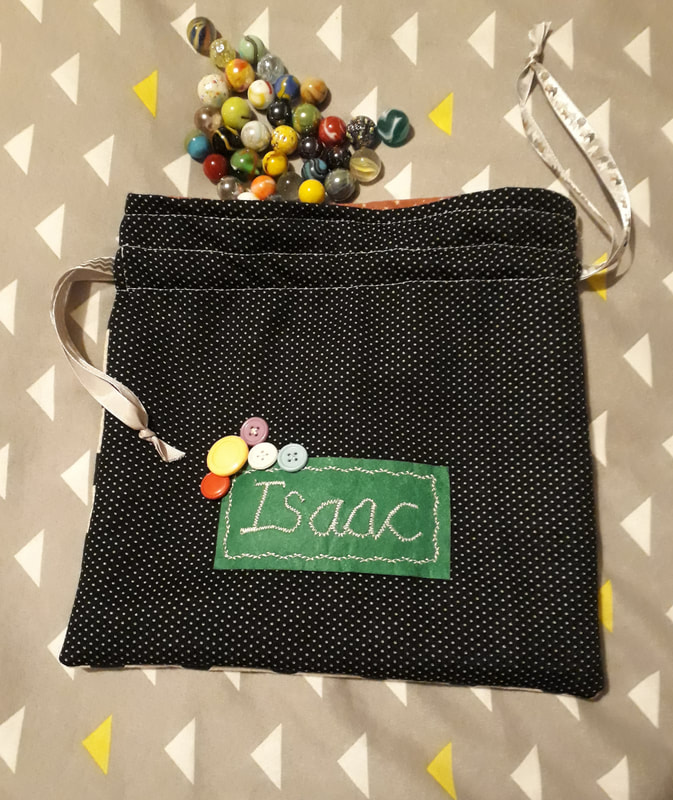
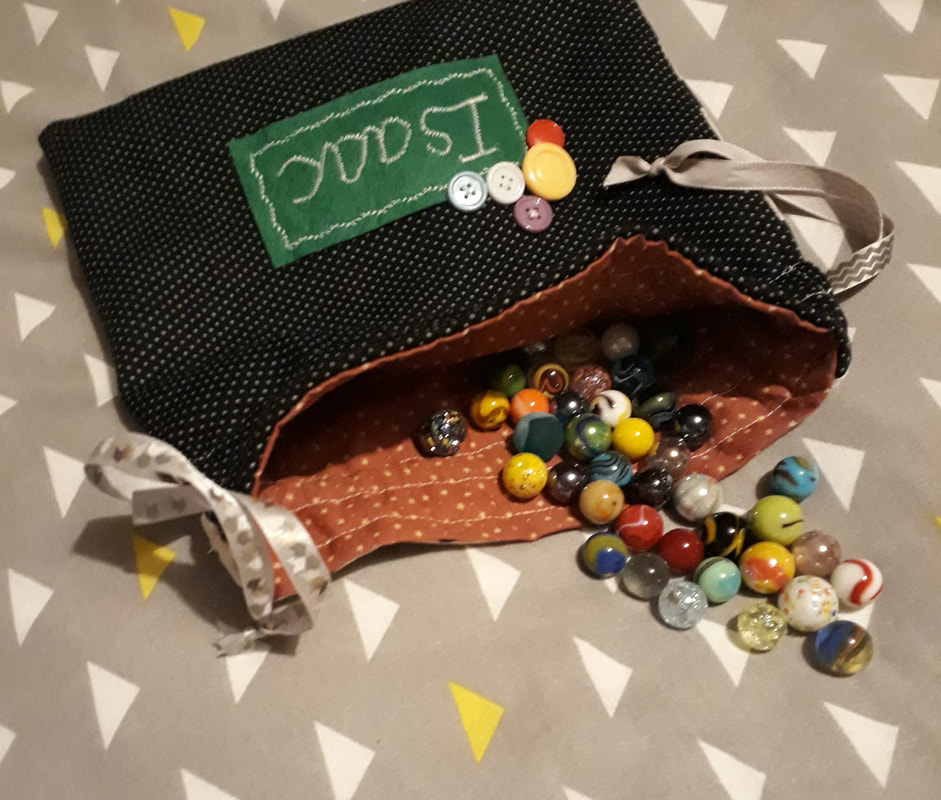
Upcycled Cushion for Isaac.
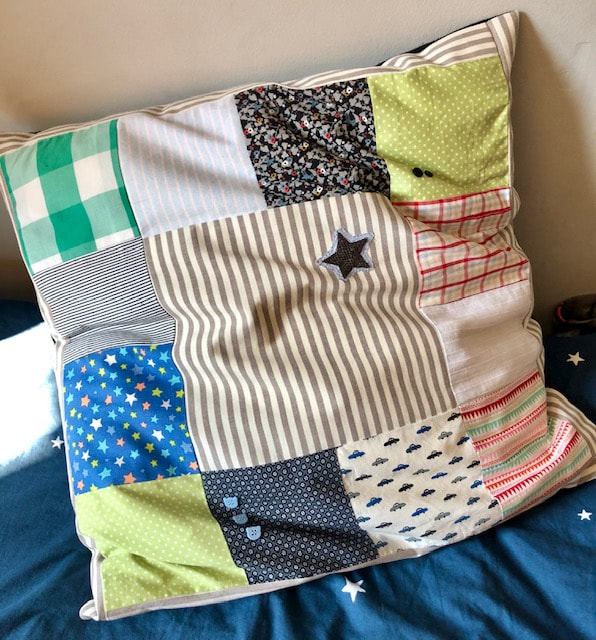

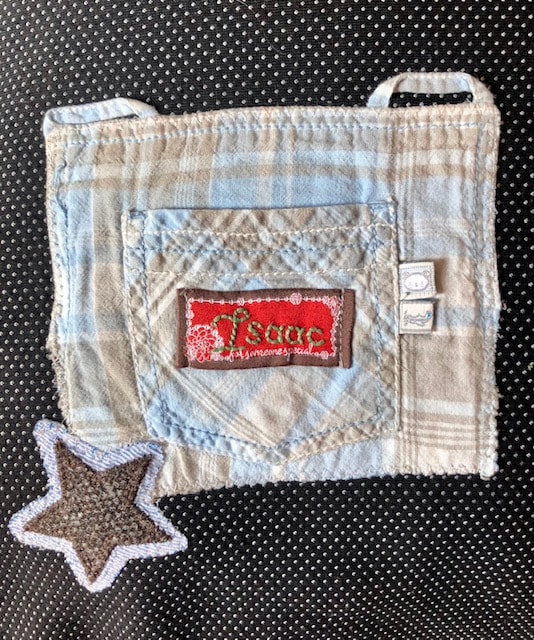
When I was pregnant with my daughter, I had the plan to make both children a huge cushion for their rooms. Isaac's was made using some of his old baby clothes, which was one way of keeping them and putting them to good use at the same time. As you can see, I used a pocket from a pair of dungarees to make a personalised label on the reverse.
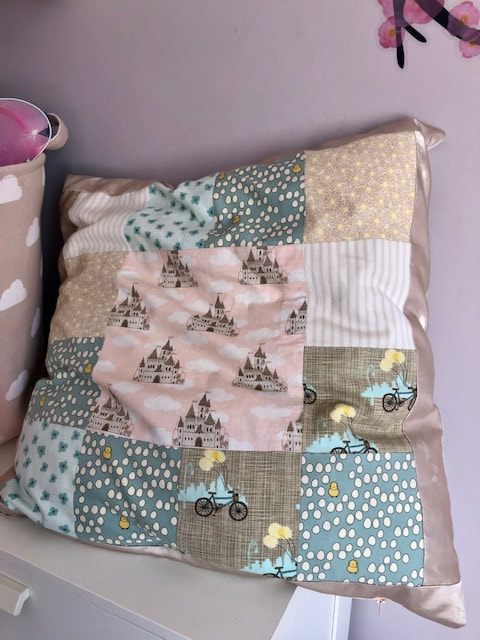
Pastel Cushion for Robyn.

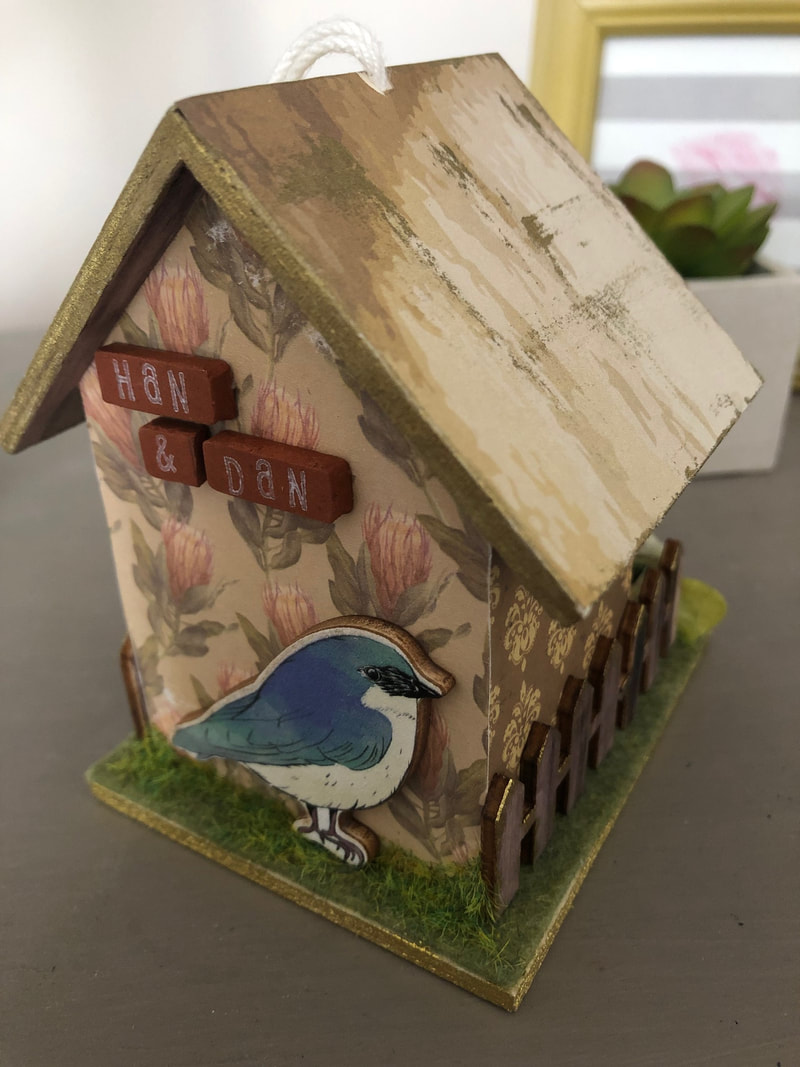
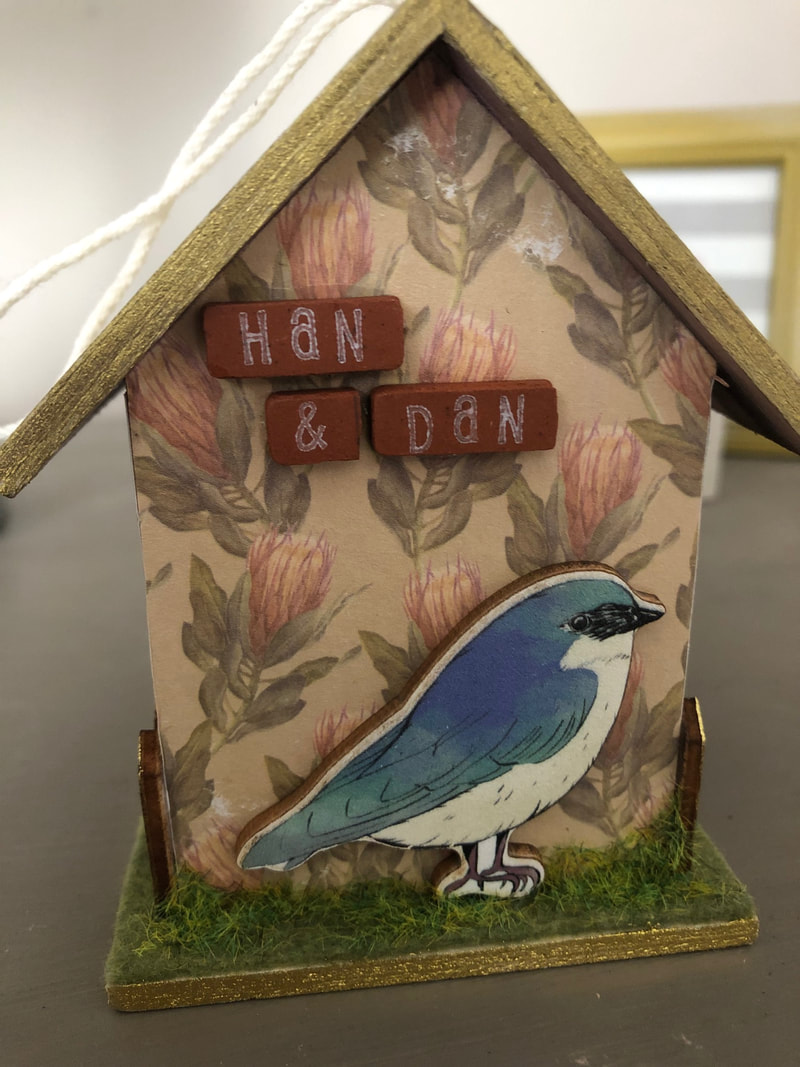
'Han and Dan' Love Nest
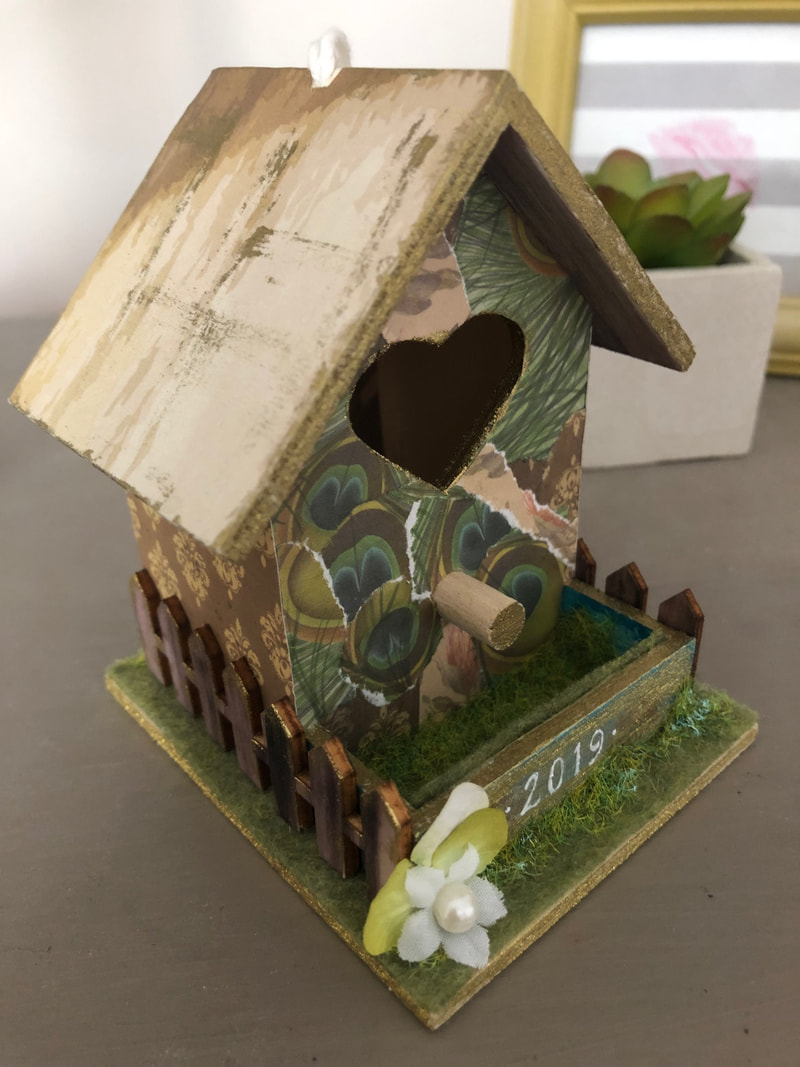
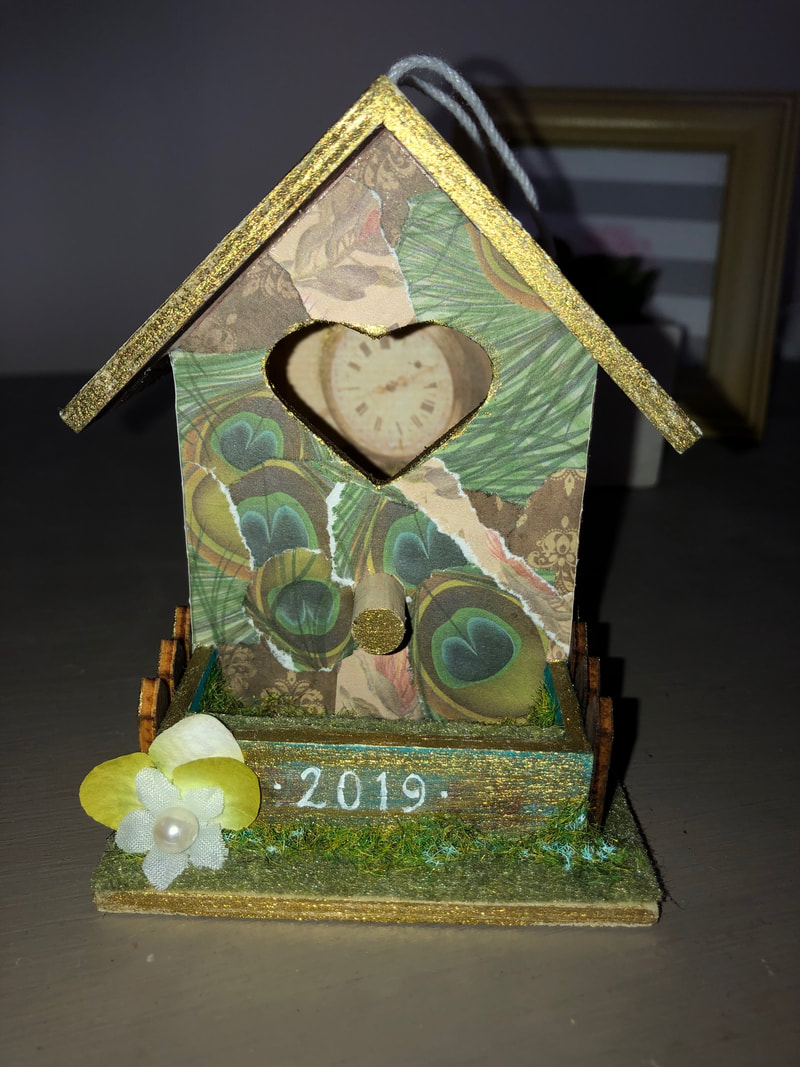
Another wedding, another Love Nest! I adore making these cute houses...
This time, the happy couple were having a boho post-nuptials party at Bromwich Park in Shropshire (highly recommended unique venue if you are looking..!) https://bromwichpark.com/
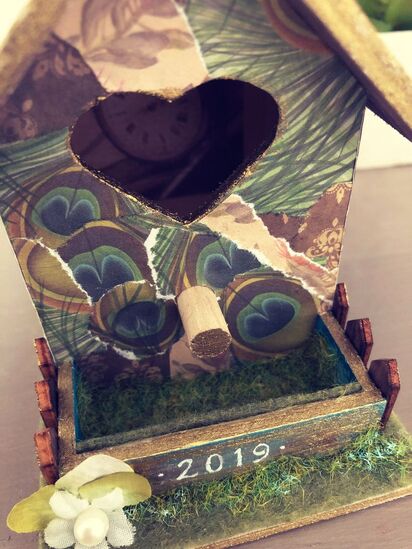
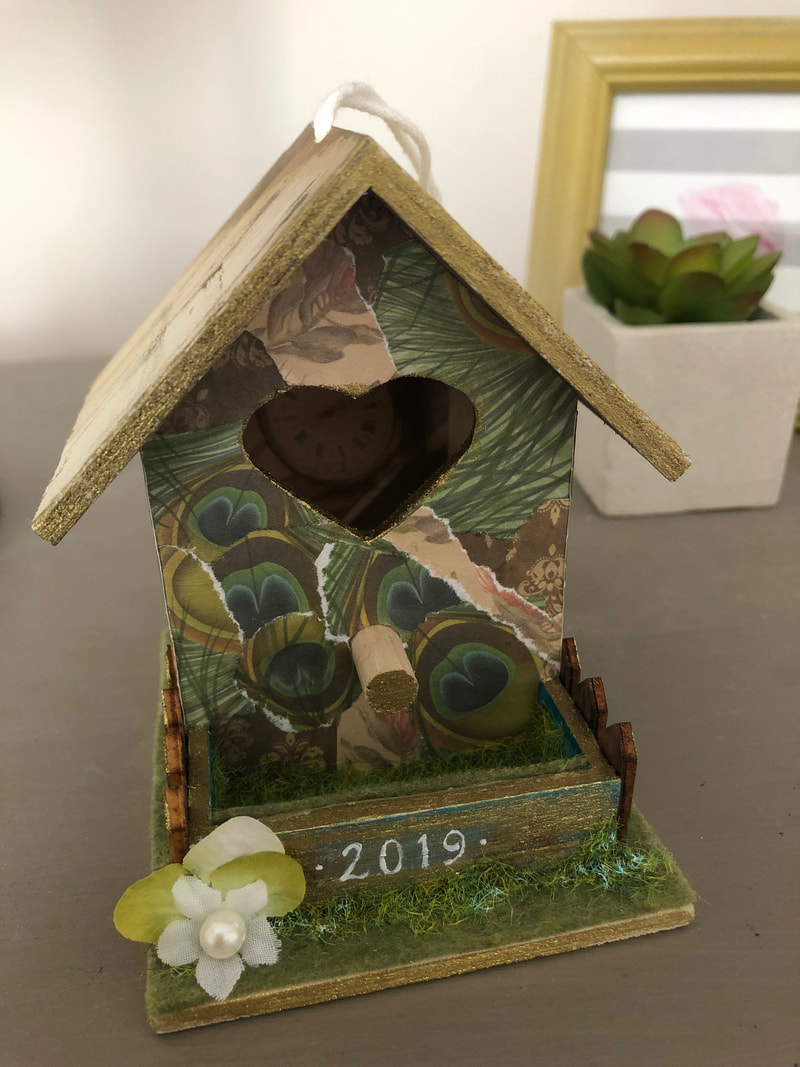
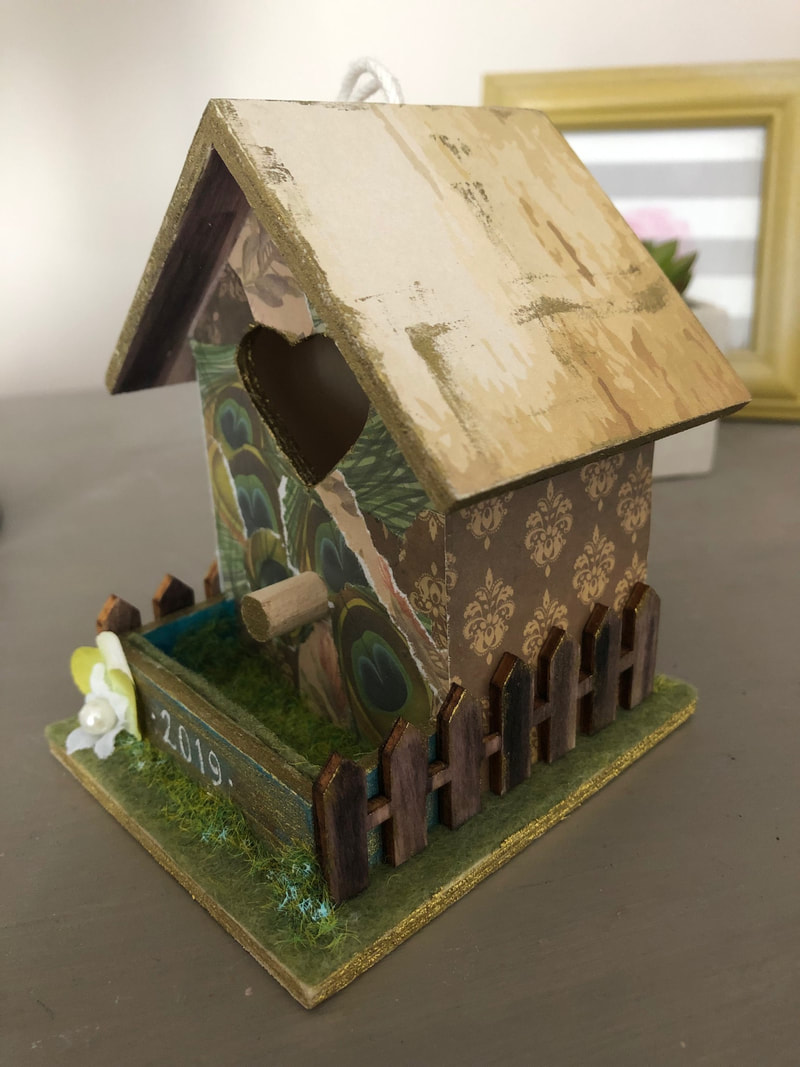
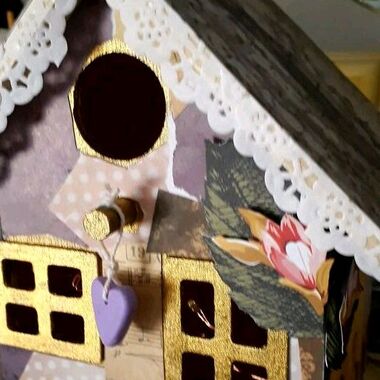
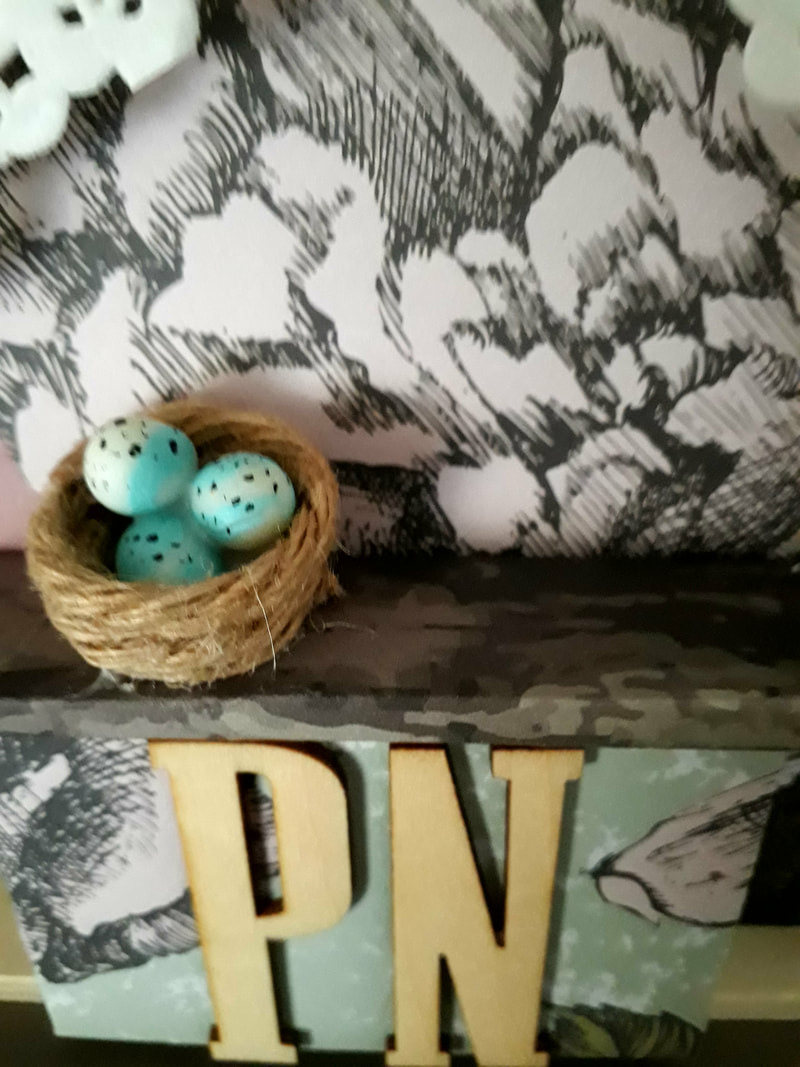
I wanted something based around peacock feathers, as they are meant to be lucky. I found peacock craft paper at The Range - quite cheaply - in a book, so lots more paper for other projects. I picked up some cute lazer-cut birds and embellishments at the same time. Randomly, I decided I wanted a tree in the 'front garden', but this didn't look right, so I favoured using model-making grass instead, which made the ground look mossy. I had some tiny bricks left over from a project my husband had done, which were perfect to stamp the couple's names on to and personalise the nest. Everything was gold-tipped which gave the nest a lovely glow. Finally, I put a little vintage-style clock inside. It's always nice to see hidden details when you pour over your Love Nest!
This time, the happy couple were having a boho post-nuptials party at Bromwich Park in Shropshire (highly recommended unique venue if you are looking..!) https://bromwichpark.com/
I wanted something based around peacock feathers, as they are meant to be lucky. I found peacock craft paper at The Range - quite cheaply - in a book, so lots more paper for other projects. I picked up some cute lazer-cut birds and embellishments at the same time. Randomly, I decided I wanted a tree in the 'front garden', but this didn't look right, so I favoured using model-making grass instead, which made the ground look mossy. I had some tiny bricks left over from a project my husband had done, which were perfect to stamp the couple's names on to and personalise the nest. Everything was gold-tipped which gave the nest a lovely glow. Finally, I put a little vintage-style clock inside. It's always nice to see hidden details when you pour over your Love Nest!
Cotton 2nd Year Wedding Anniversary
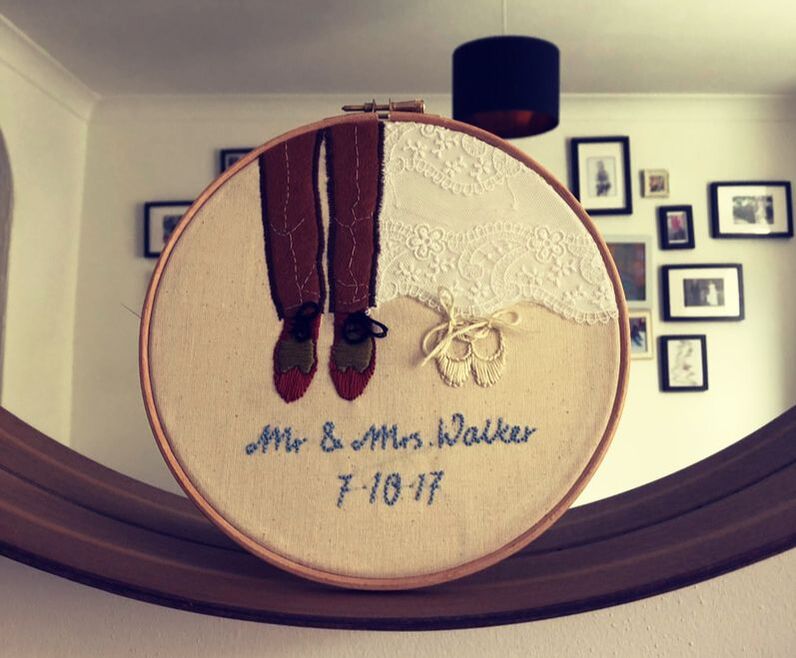
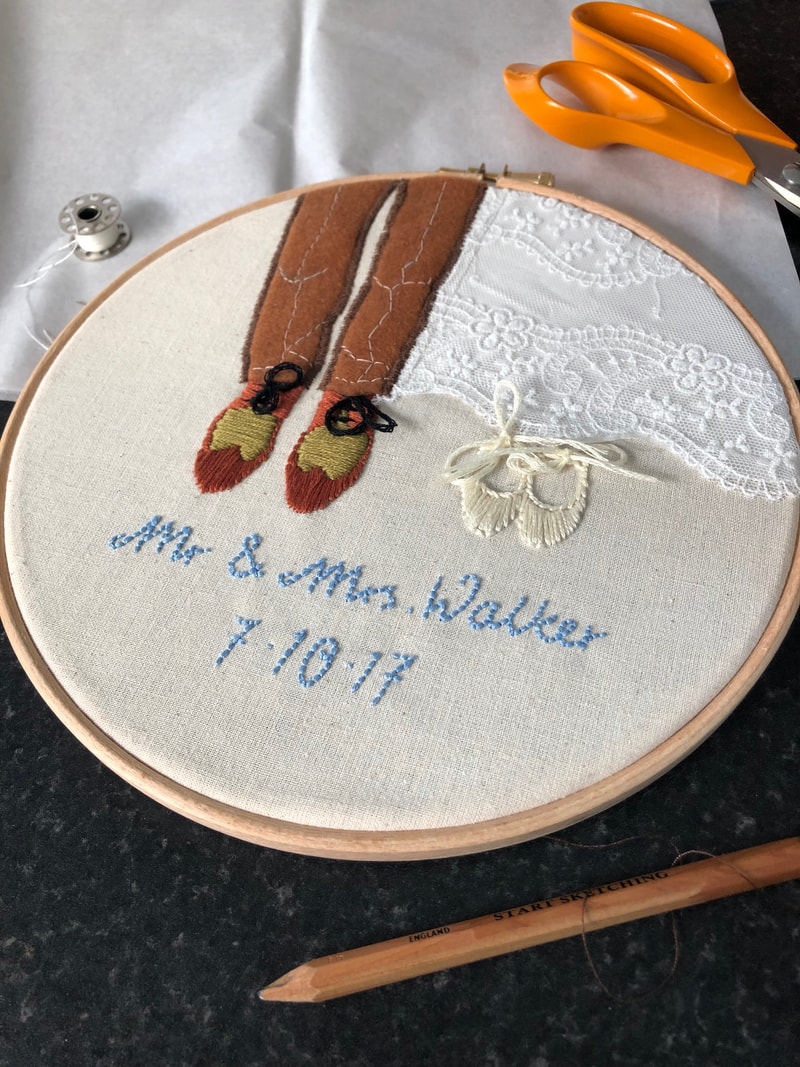
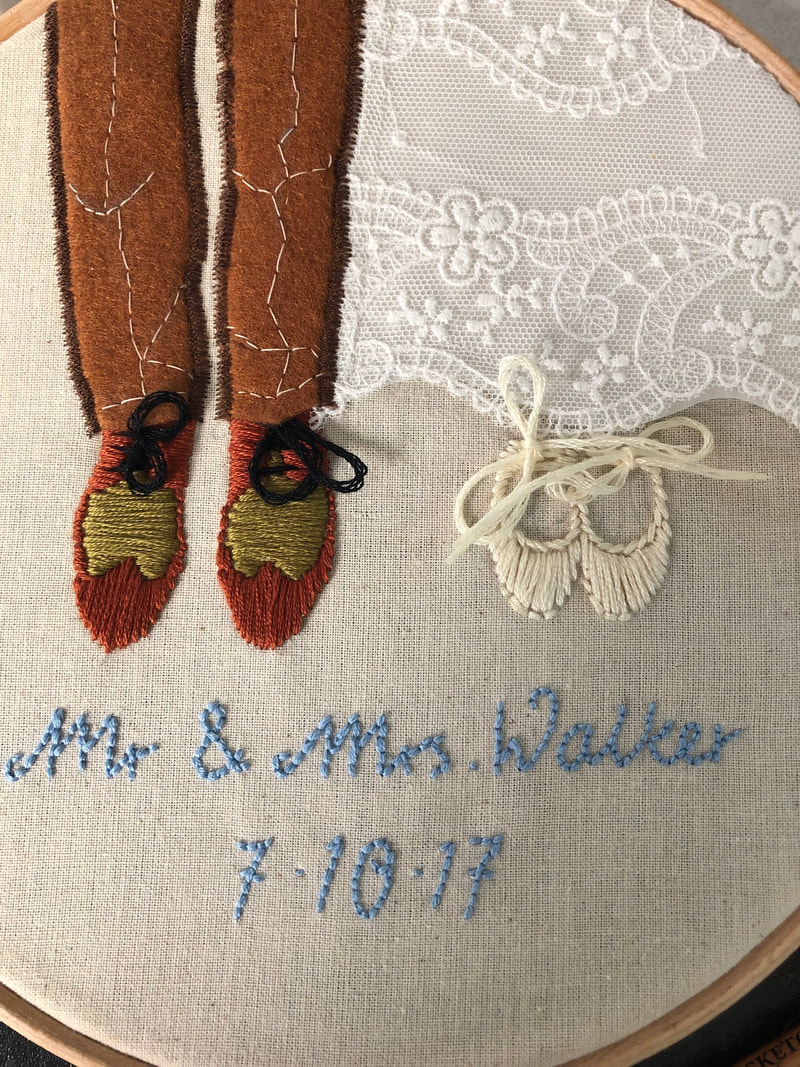
My lovely hubby and I have been married for two years this October. Traditionally it's the 'cotton' anniversary this year, so I made this pretty project for us to cherish.
I found a photo of our wedding shoes and copied the image in pencil on to some natural slubbed linen - a bit of trial and error. After digging through the scraps of fabic I had left over from my wedding projects, I selected some lace, satin and found some brown felt for hubby's trousers. I started with embroidering the shoes, leaving the tail ends of the silk to form the laces. The tips were sealed with clear nail polish. I used my sewing machine to sew the lace and satin layers of my dress on - allowing the hem of the skirt to be free. Next, I hand-sewed 'fold lines' on to the trousers, before using a tight wide machine stich to attach them to the linen. The date and names are appropriately hand-sewn in the perfect wedding day blue. I secured the embroidery hoop in place. All done!
I found a photo of our wedding shoes and copied the image in pencil on to some natural slubbed linen - a bit of trial and error. After digging through the scraps of fabic I had left over from my wedding projects, I selected some lace, satin and found some brown felt for hubby's trousers. I started with embroidering the shoes, leaving the tail ends of the silk to form the laces. The tips were sealed with clear nail polish. I used my sewing machine to sew the lace and satin layers of my dress on - allowing the hem of the skirt to be free. Next, I hand-sewed 'fold lines' on to the trousers, before using a tight wide machine stich to attach them to the linen. The date and names are appropriately hand-sewn in the perfect wedding day blue. I secured the embroidery hoop in place. All done!

Easter Surprise Boxes
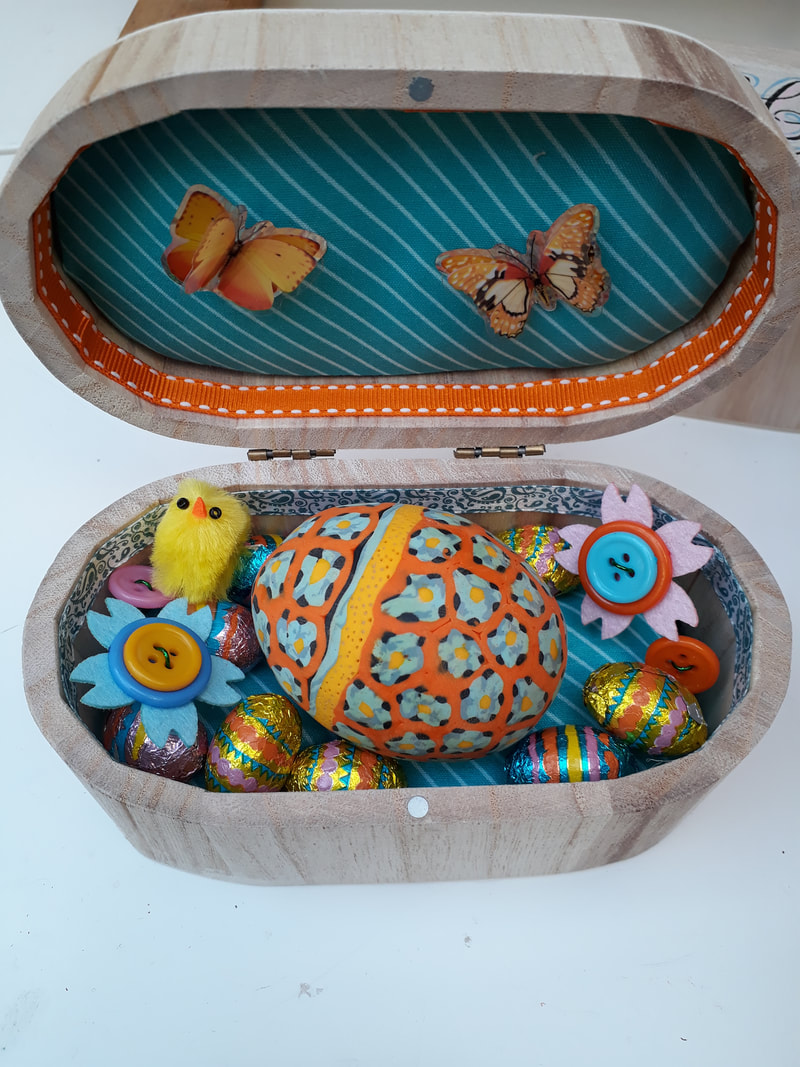
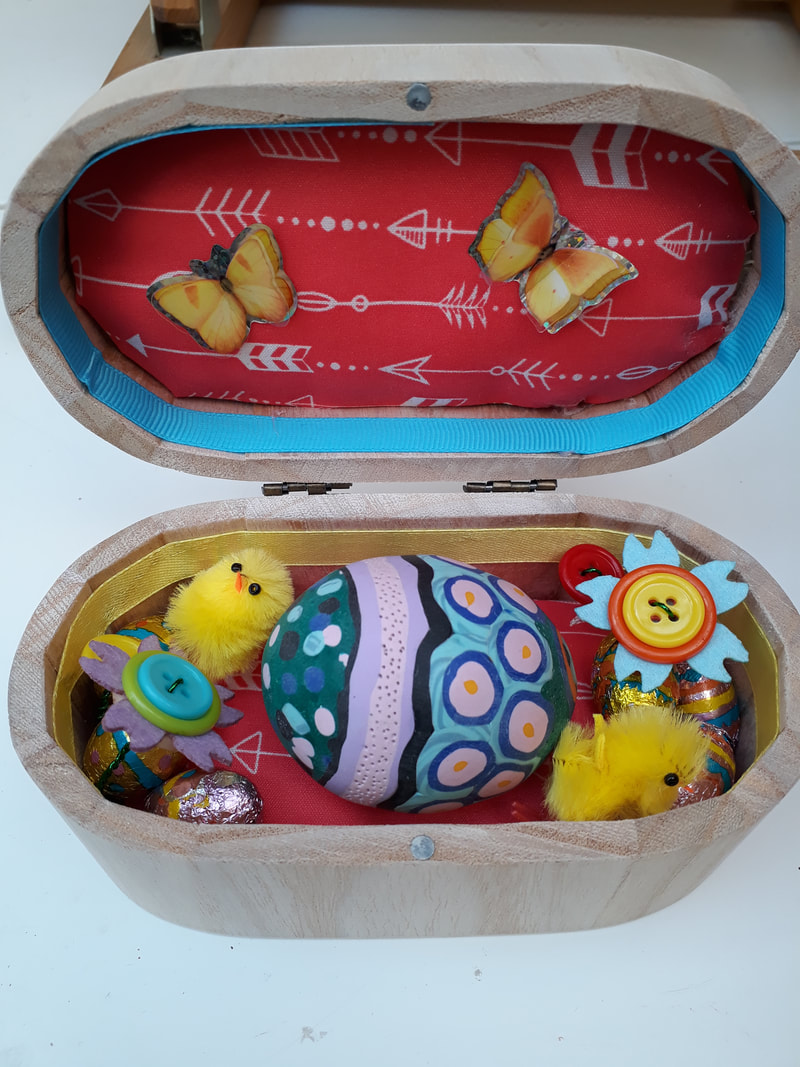
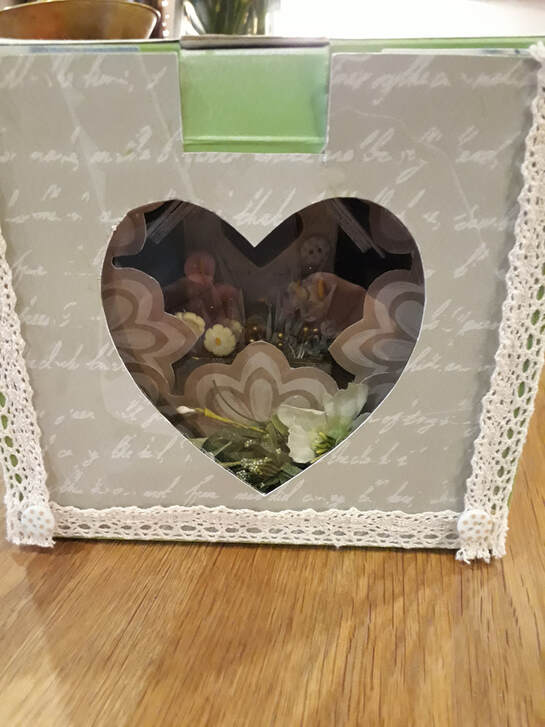
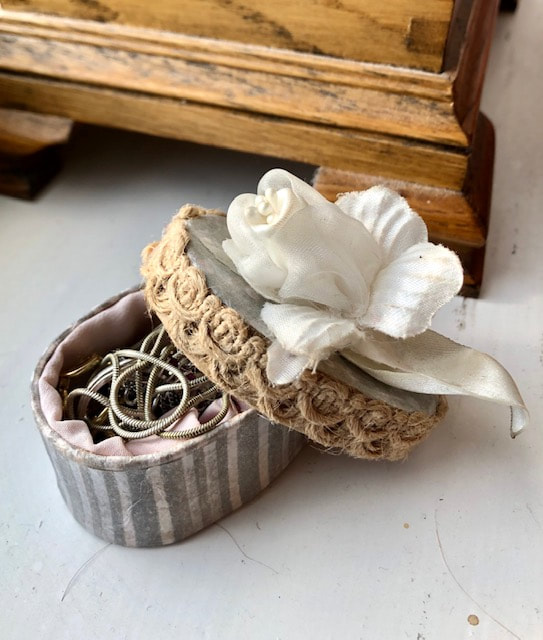
Worried about too much chocolate in your kids bellies this Easter? YES. Granny, Granddad, Aunty and Uncle will overload my little ones with chocolate eggy goodness, so mean Mummy will have to temper this onslaught with some home made gifts. These little boxes of treats can be kept once the Easter madness has subsided, and they have only a smidgen of chocolate inside.
I made the big eggs by blowing eggs and covering them with polymer clay and baking. I lined the craft boxes with pretty fabric and ribbon and made some button flowers attached on wire to the underside.
I like the contrast between the plain box with the bright playful inside. A real surprise when you open it. Surprise!
Patch and Nia's Love Nest.


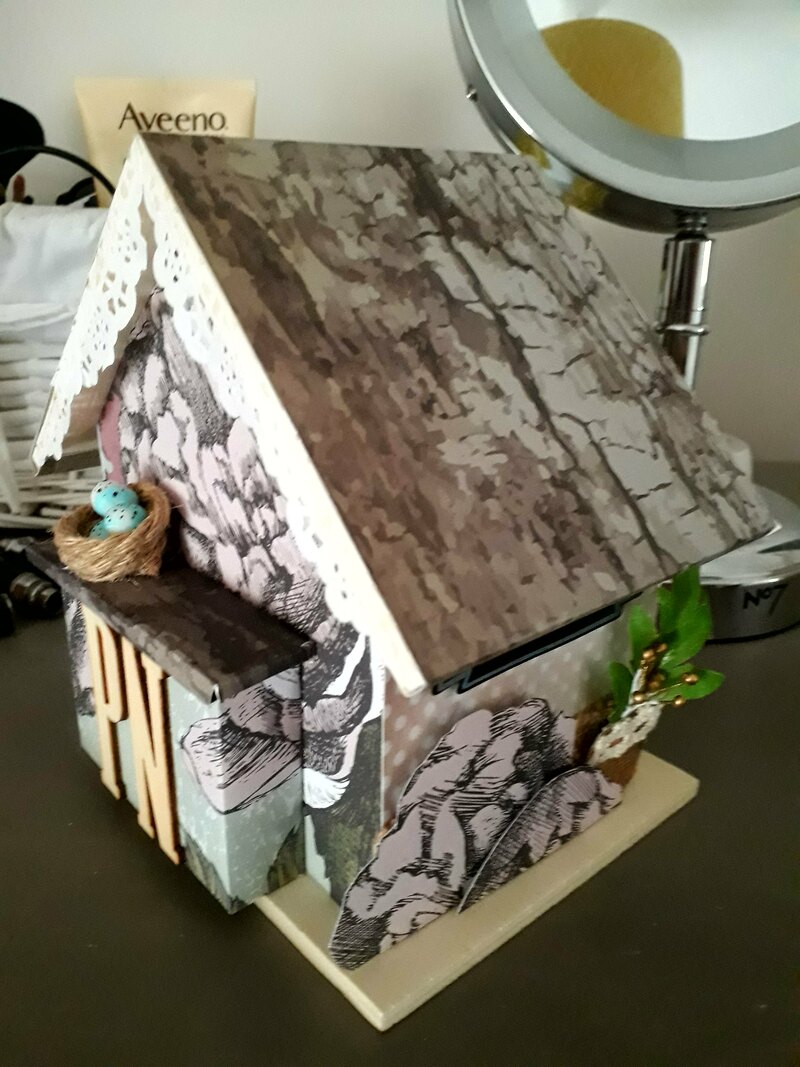
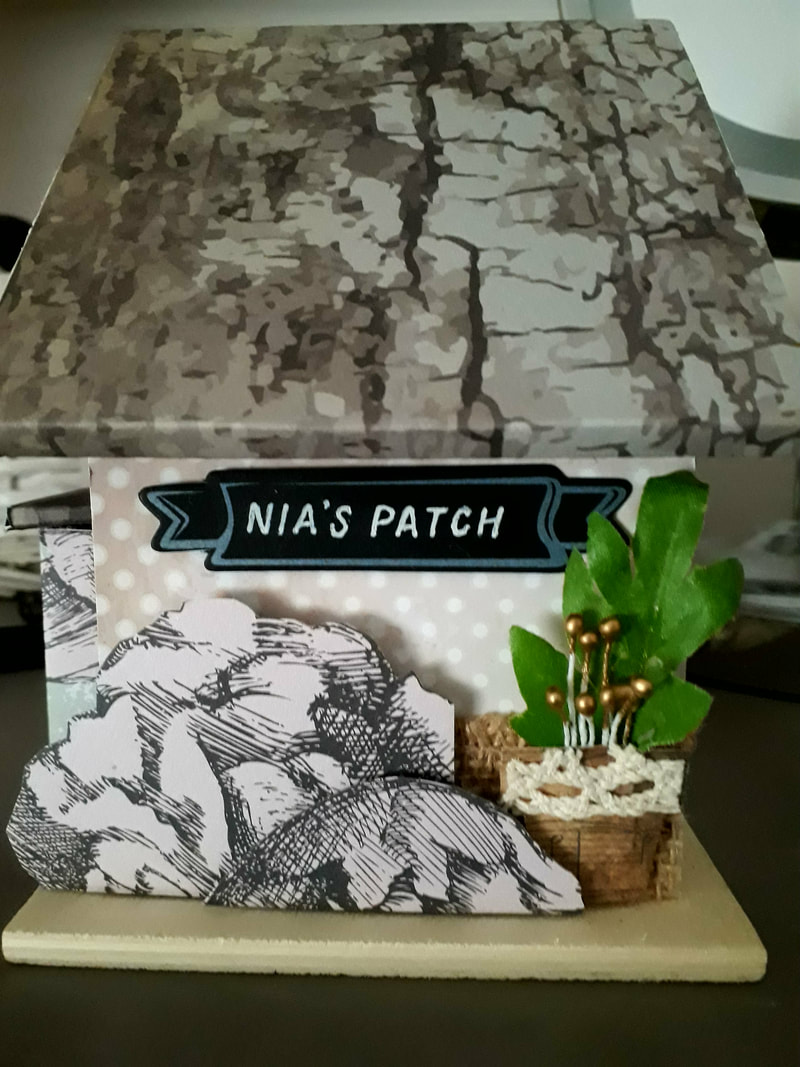
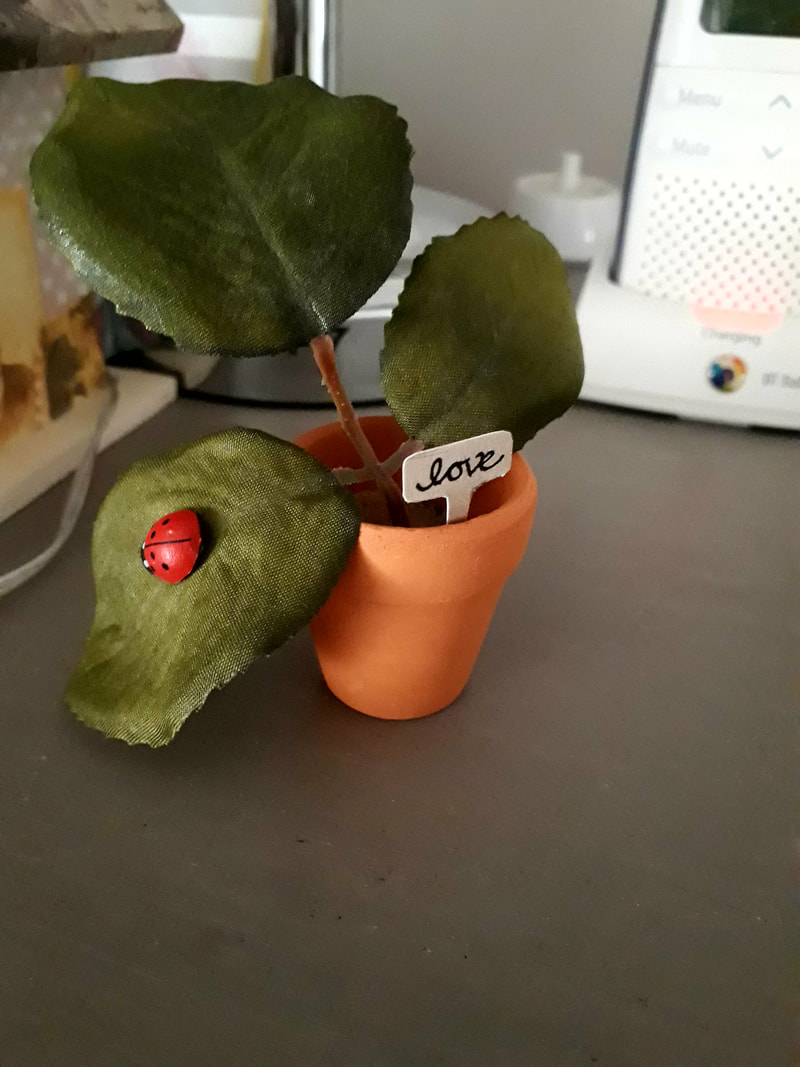
'Nia's Patch' Love Nest wedding gift. This love nest lights up inside and has a cute potted plant to sit beside it.
Made incorporating découpage, craft ribbon and rope and polymer clay. A pretty keepsake and reminder of their special day.
Made incorporating découpage, craft ribbon and rope and polymer clay. A pretty keepsake and reminder of their special day.
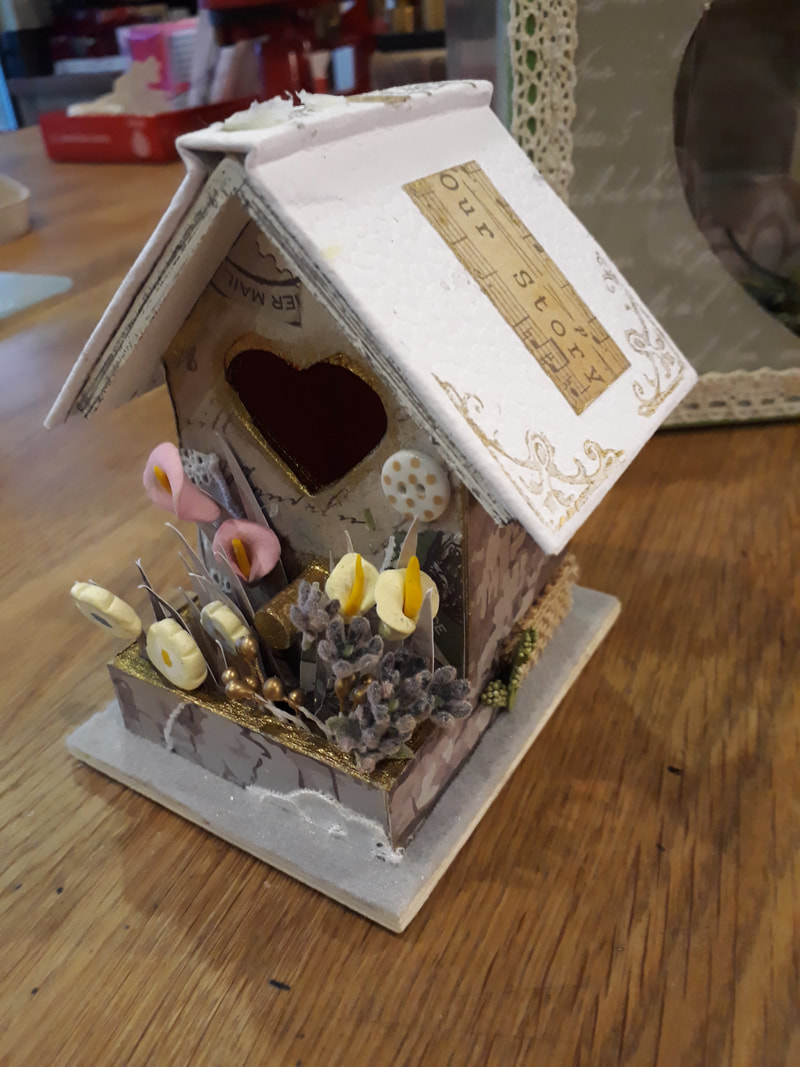
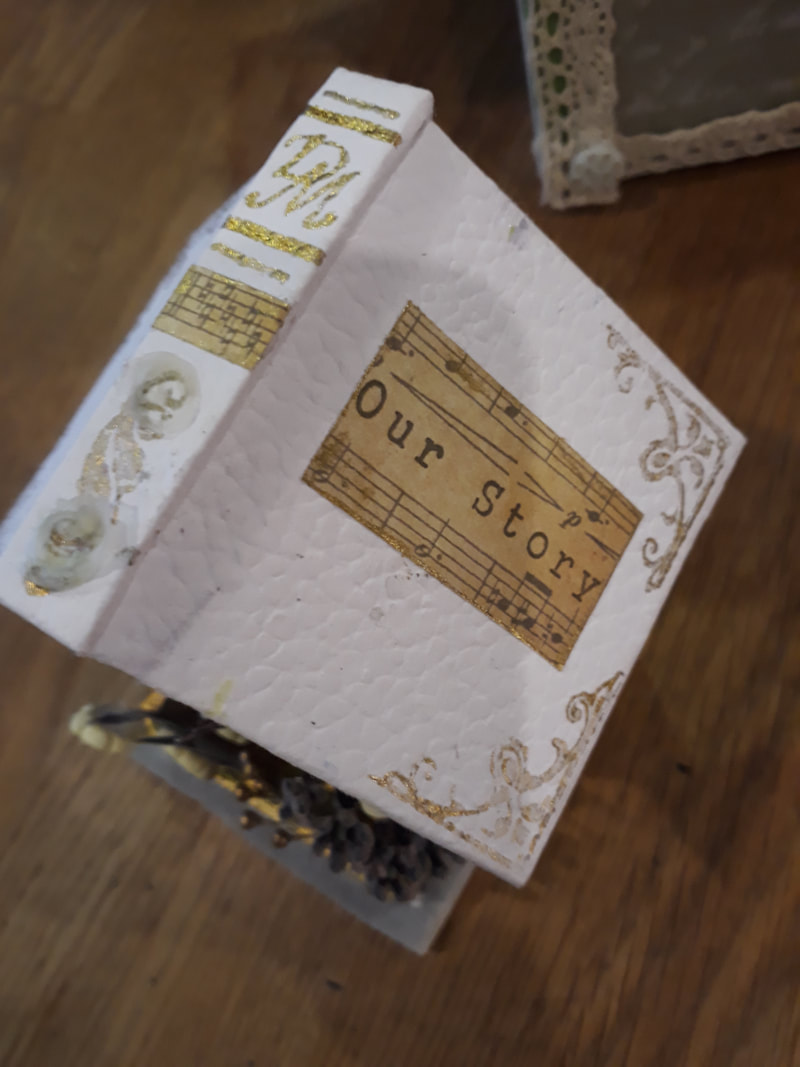
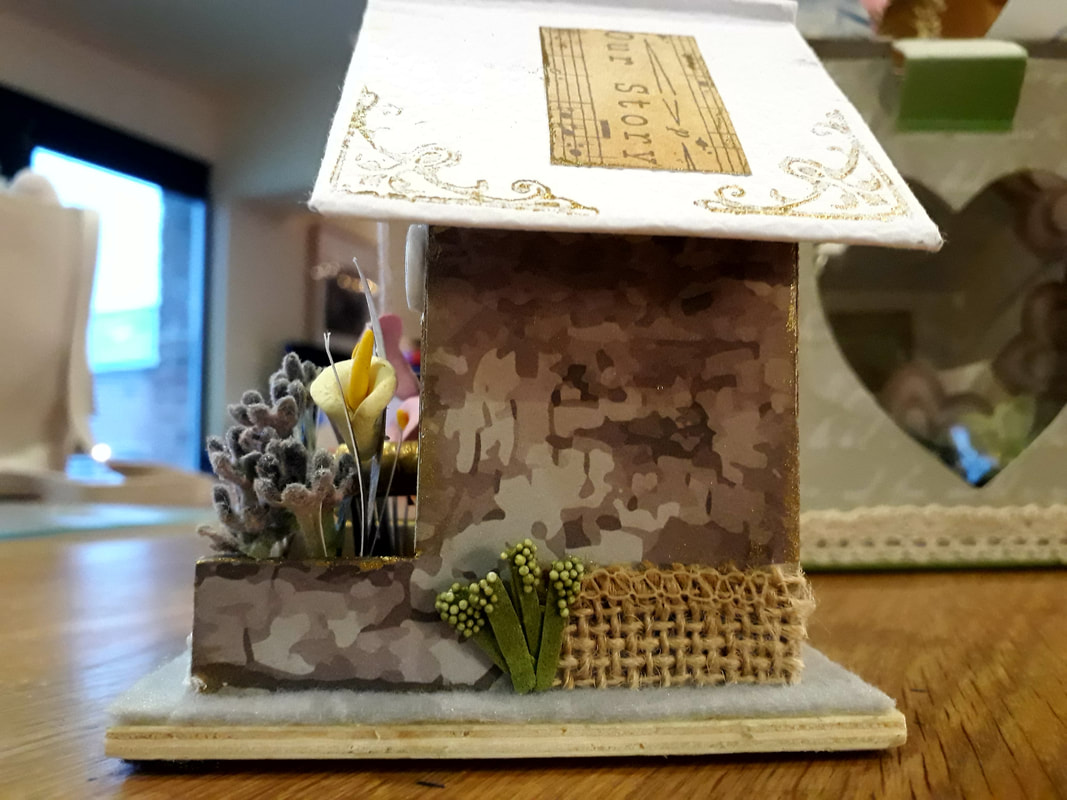
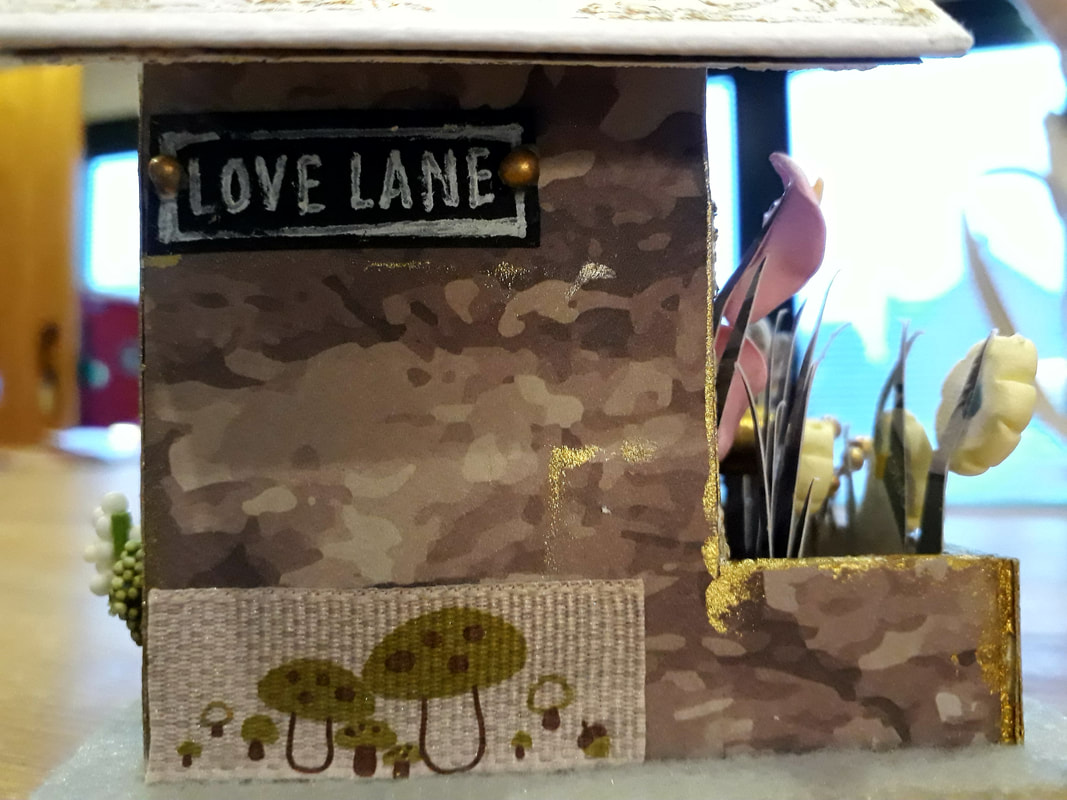
'Our Story' book lovers wedding gift.

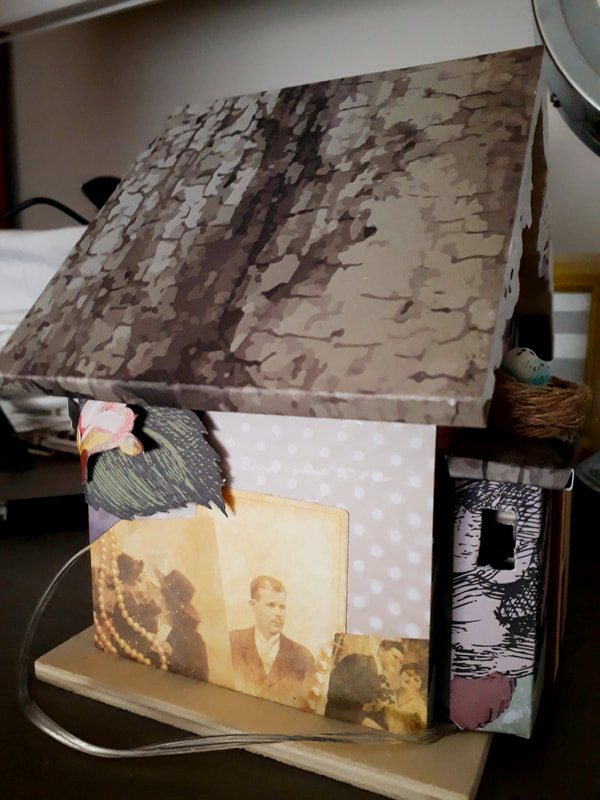
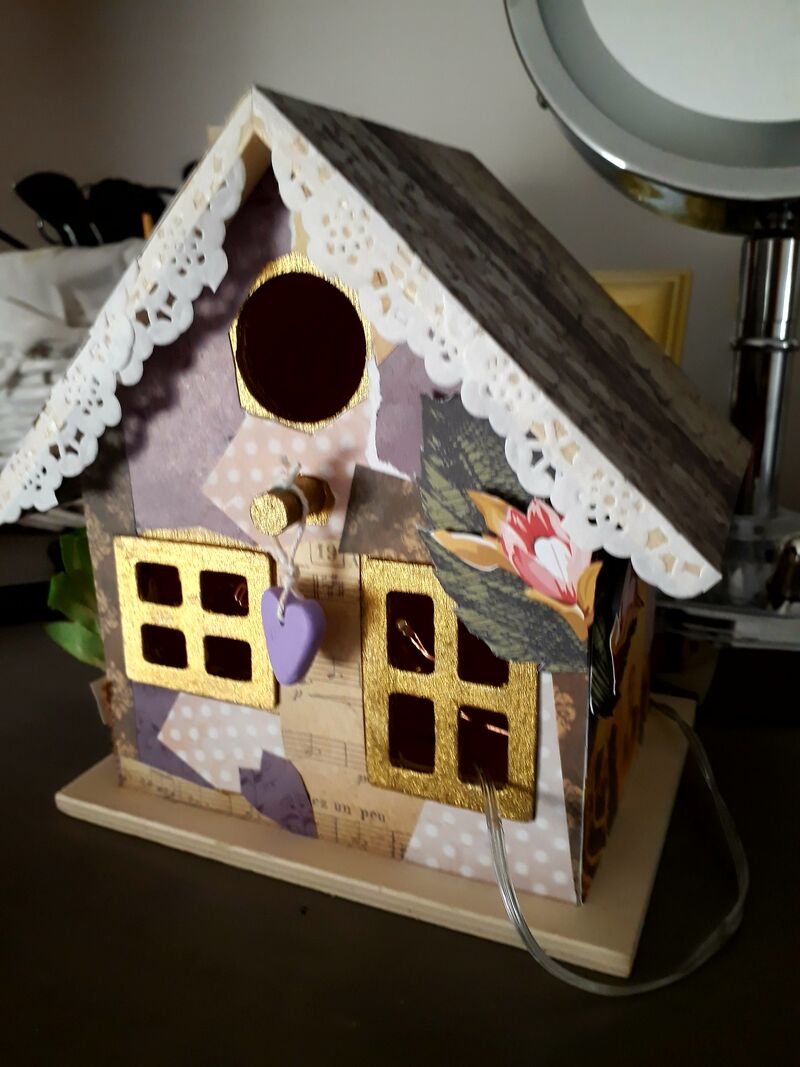
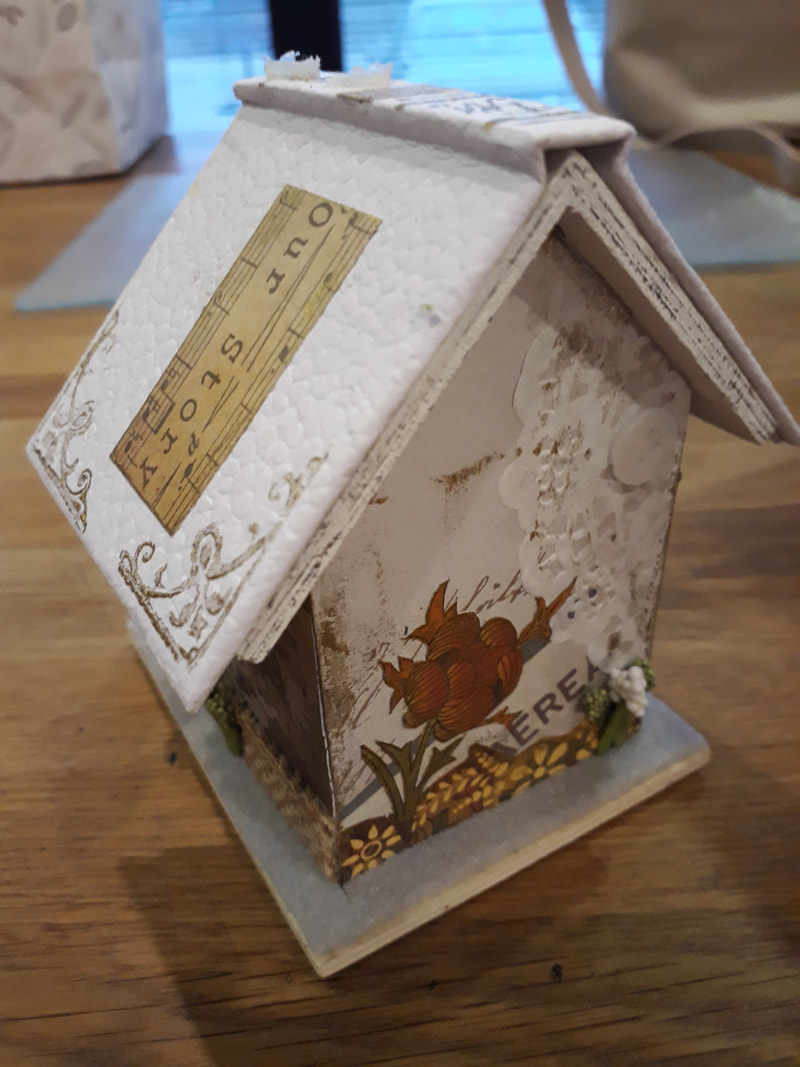
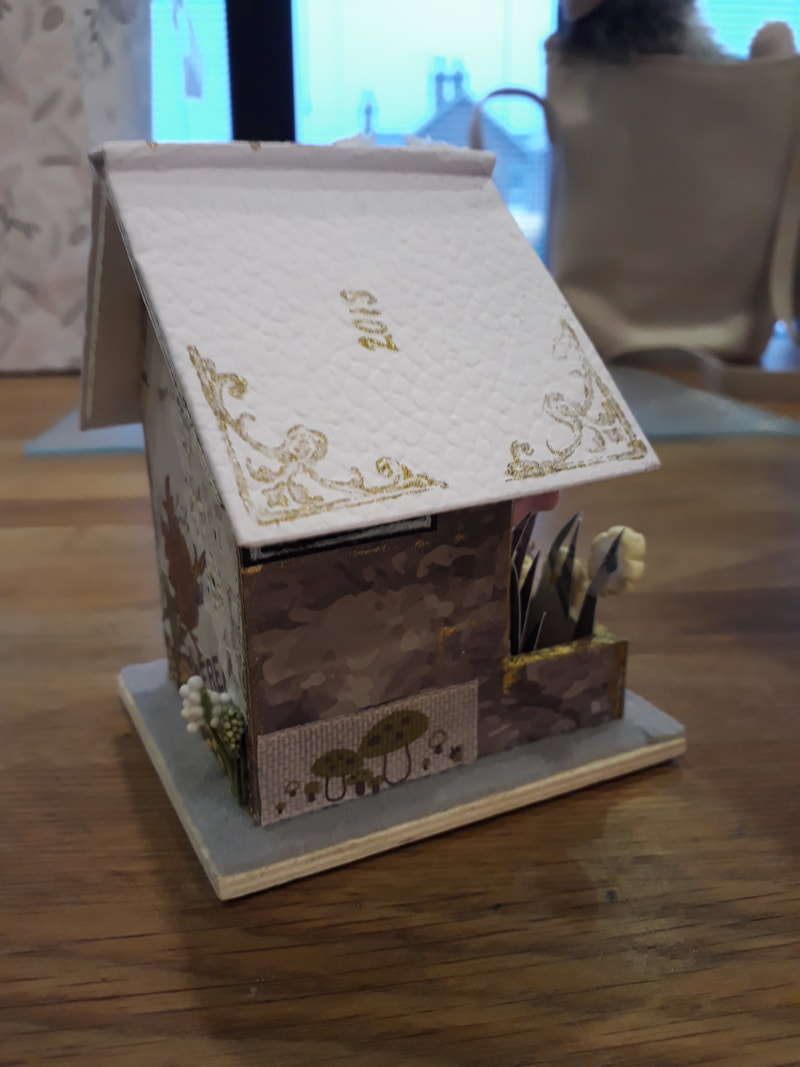
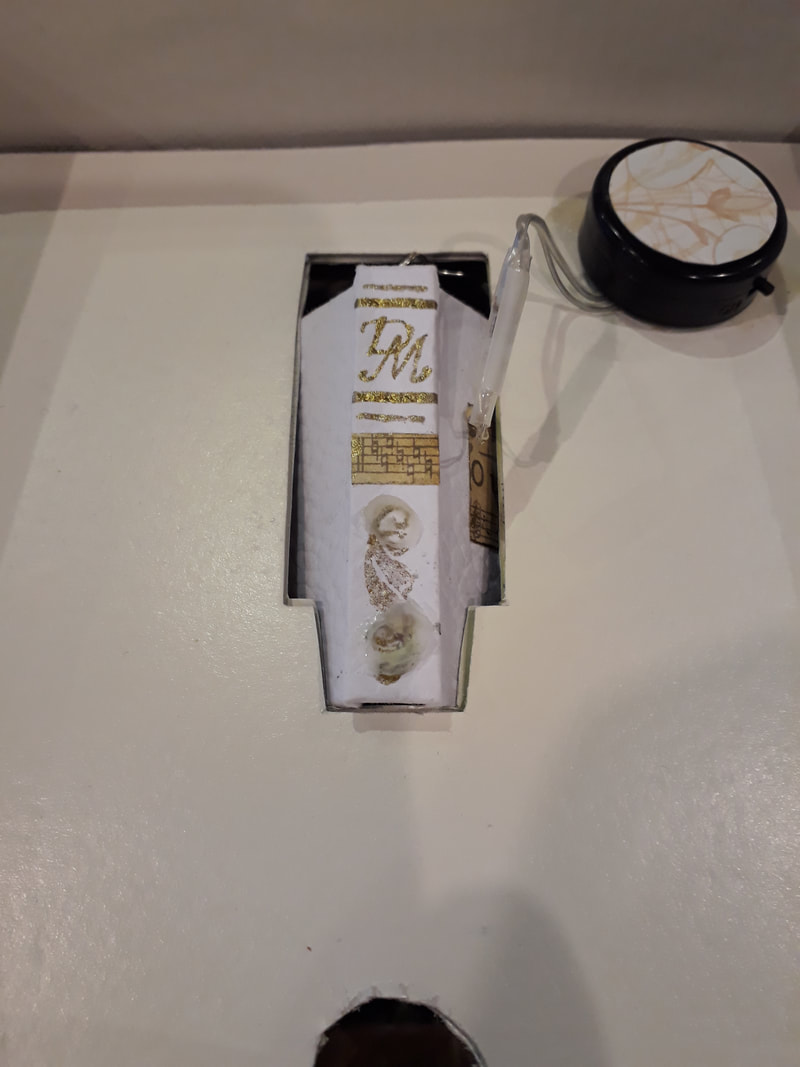
A wedding gift of a little house in a decoupage box which lights up. I used a pre-made wooden house from The Works and just went bananas on it. I had to make a box to fit it, as it was being transported, so I decided to make that an integral part of the gift. The book roof was hand made using a Dior bag and the flowers were made using Fimo. Unfortunately the two doves have since come off the roof. Not coo coo cool! A pretty neat project which was fun to do.

Our Vintage-style Wedding Accessories...oh l'amore!
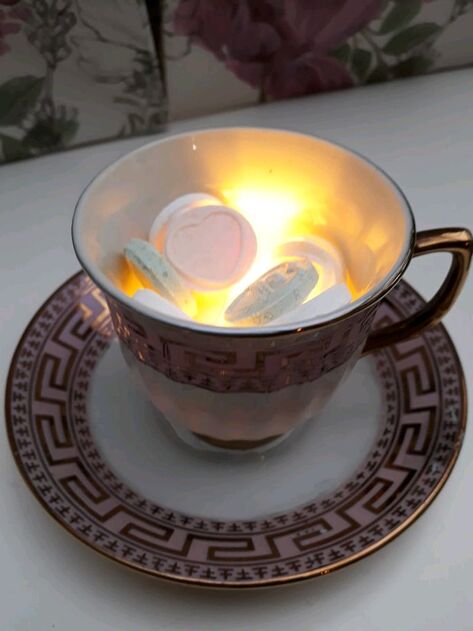
Charity shop tea cup tea lights look pretty with love heart sweets, and dotted around the tables for the guests to nibble on.
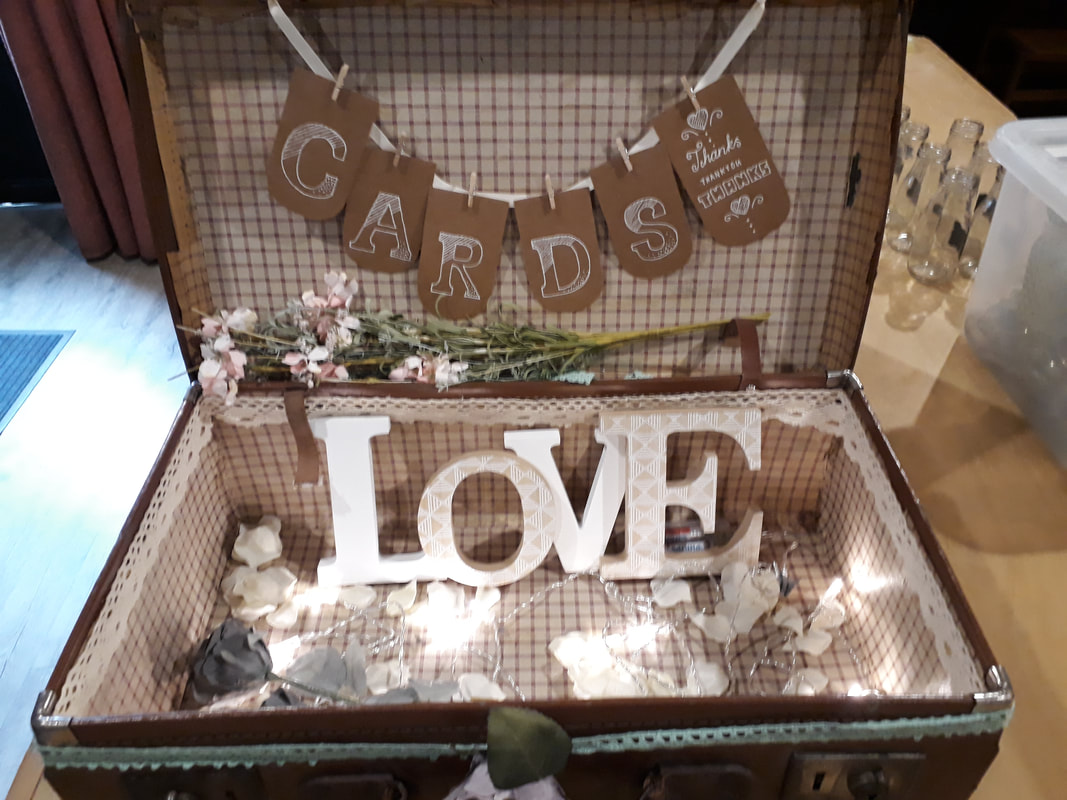
A flea market vintage suitcase in good condition was repurposed as a card box...and it doubles up as a storage case for happy memories.
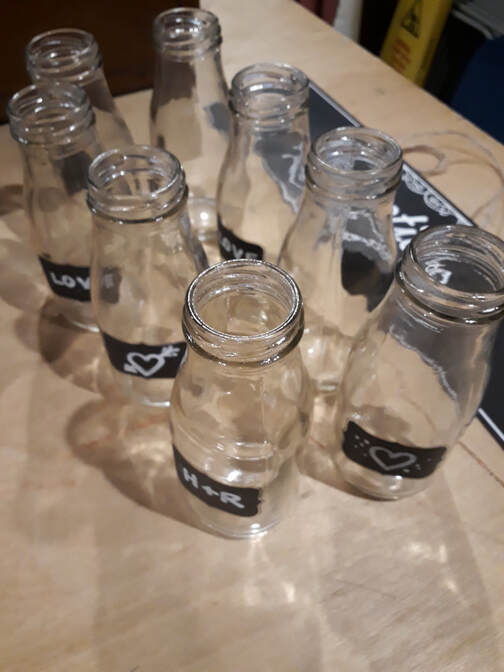
These were from Poundland! Easy to customize and then filled with wild flowers from my Mum's garden. I still have them on my window cill...
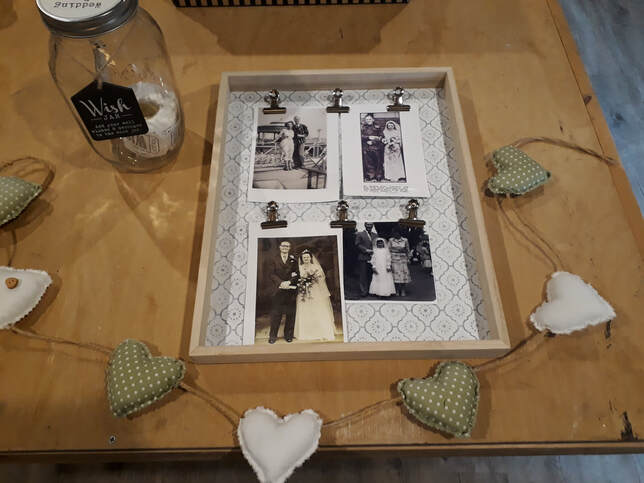
In memory of our Grandparents, pictured on their own wedding days.
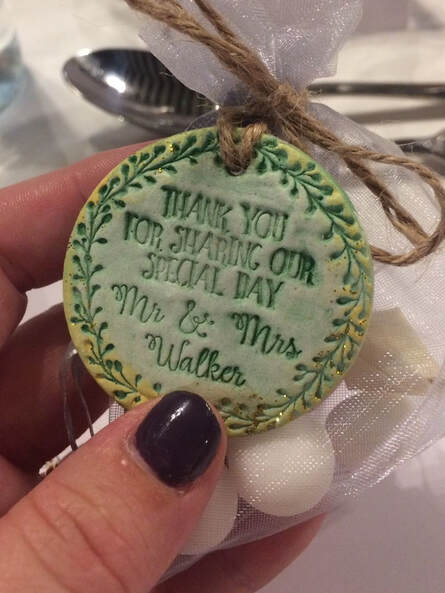
I bought a customised stamp from Ebay and embossed it in self-drying clay. Just a selection of purple and green paints (to match our colour theme), a little gold paint for the edges, some craft string and some mints...and favours to freshen your guests up after the wedding breakfast.
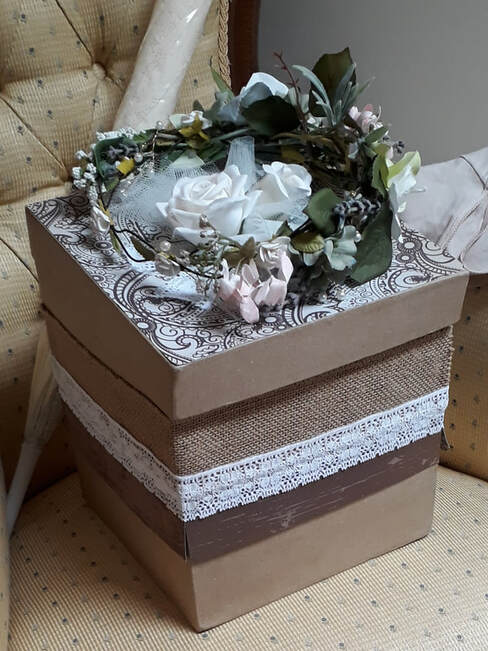
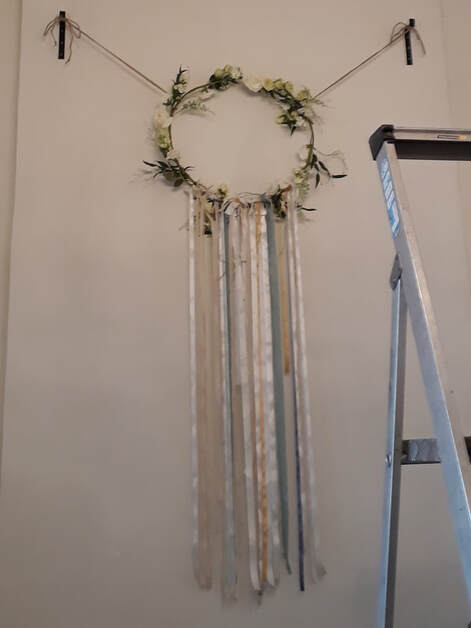
I made my hair wreath with flowers from a garden centre and a beautiful keepsake box to transport it in, along with my button and pearl posy.
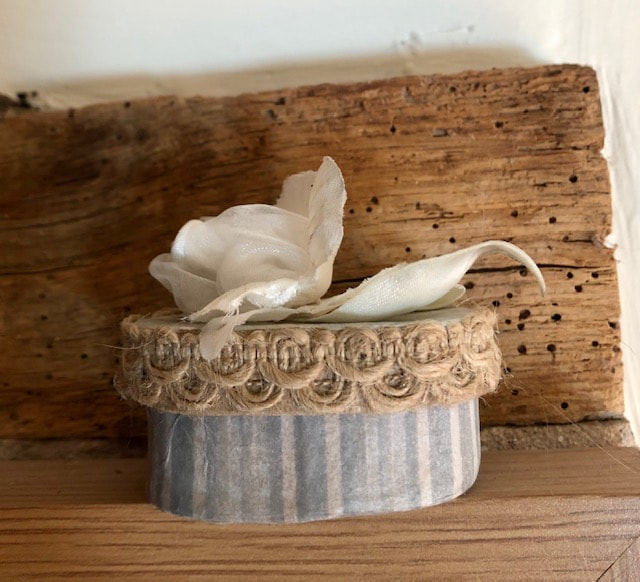
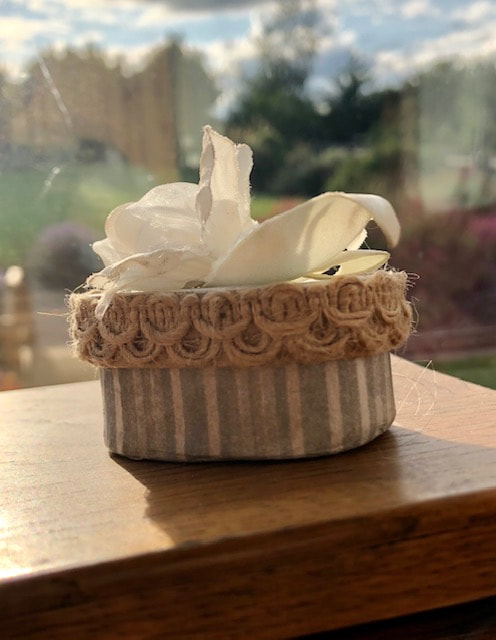
This was a little box I made for my Mum, as part of the thank you gifts we gave her at our wedding breakfast. I lined it with silk that was left over from the wedding dress I attempted to make (bad mistake, made four times, to my shame). The flower was from a garden centre, and the leaves I curled using a lighter and a man made fabric that will melt (don't try this at home! There are kits you can buy to do this safely).
This became the centrepiece at our tumbledown castle ceremony. We left it for the venue to use for future weddings...lovely to think other couples can enjoy it too.
A Christmas gift for my marble-mad son.
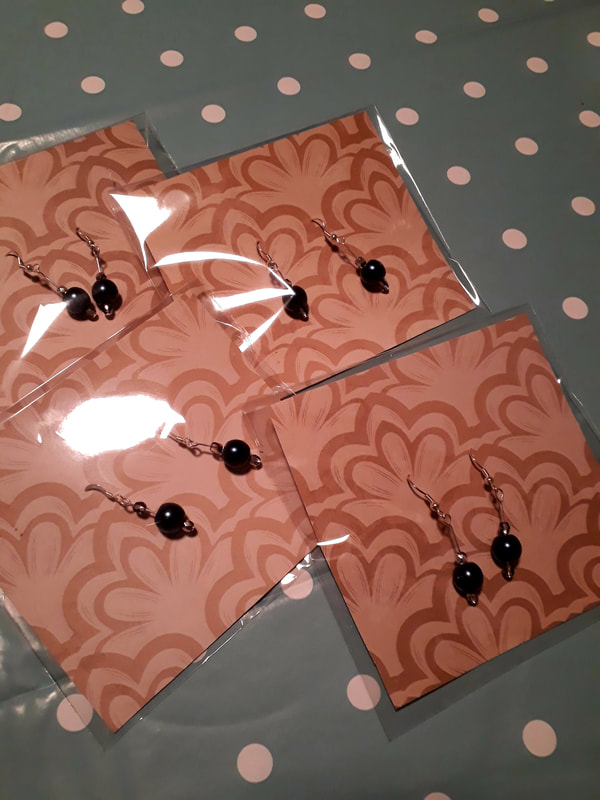
Earrings for Bridesmaids.
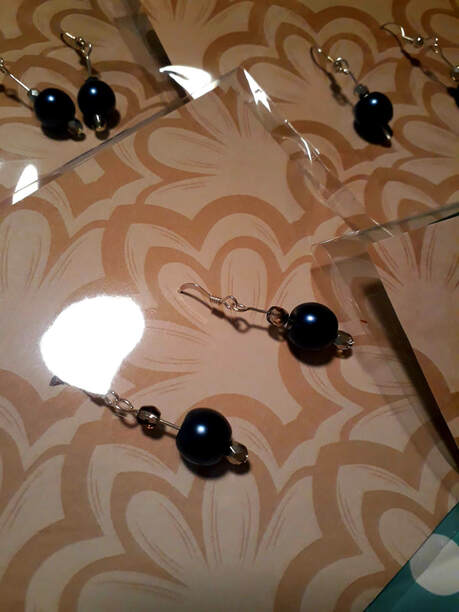
Matching your bridesmaids is no longer de rigeur, however, an odd common thread is not to be sniffed at either. Easy to make. Present them in pretty packaging for an extra treat on the morning of the wedding. It's the little things that count!